

The #1 GPS Hunting App
Join the millions of hunters who trust onX Hunt to help them be more successful in the field. Route, plan, and navigate with private and public land boundaries, 3D satellite and topographic Basemaps, Offline Maps, and hunt-specific layers such as historic wildfires, possible access, GMUs, and much more.
Join the millions of hunters who trust onX Hunt to help them be more successful in the field. Route, plan, and navigate with private and public land boundaries, 3D satellite and topographic Basemaps, Offline Maps, and hunt-specific layers such as historic wildfires, possible access, GMUs, and much more.
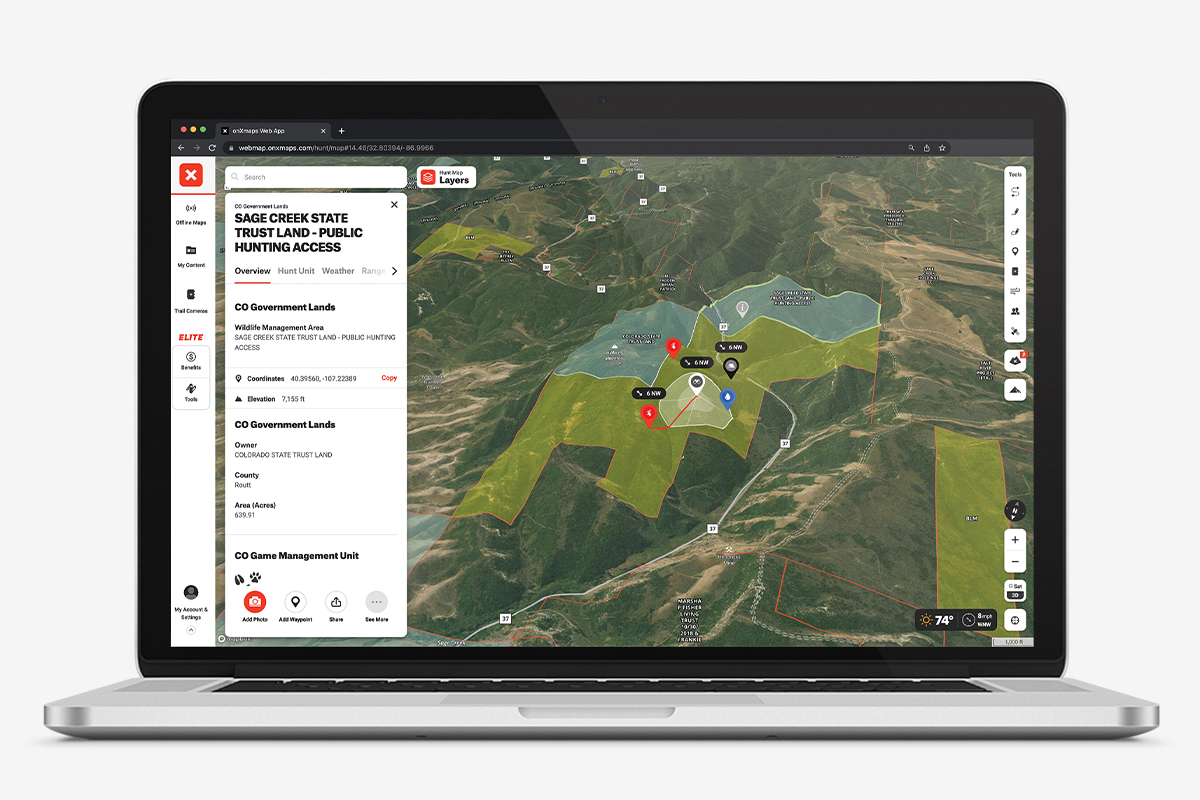
The Most Powerful 3D Mapping Solution
Below is an interactive map sample. Log in or create an account to gain full functionality.
Key Features
Use these features to find more success in the woods.

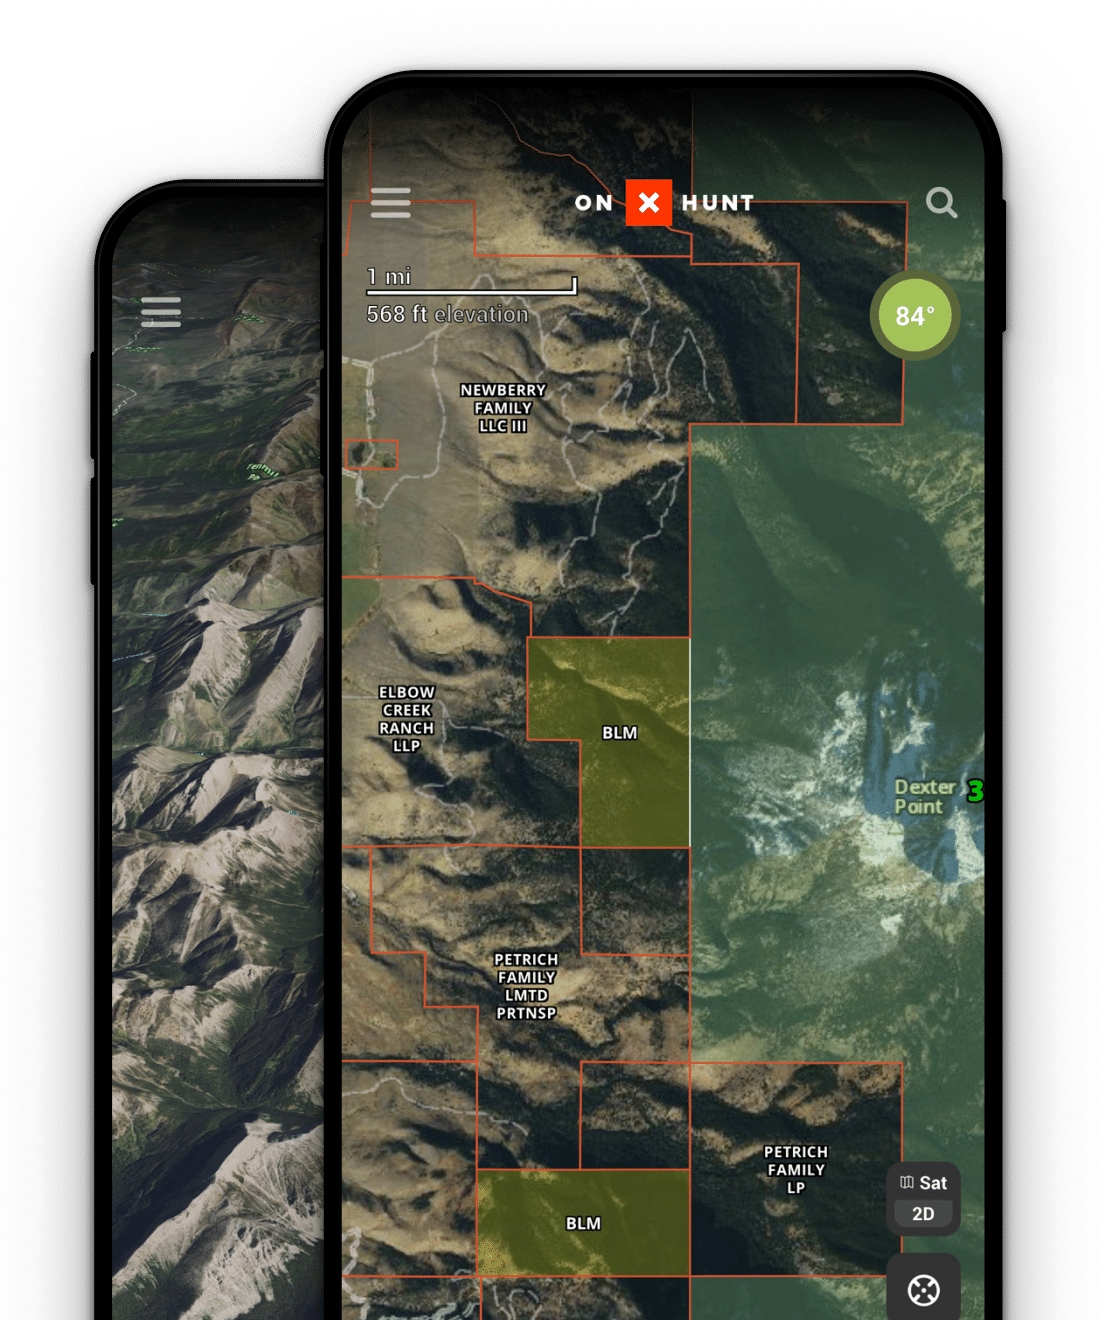
Nationwide Public & Private Land Boundaries
Color-coded public and private land ownership boundaries allow you to quickly and easily find accessible public land, private property, and land ownership information including names and tax addresses. Learn More.
Compass Mode
Use the Compass Mode to easily find your way back to camp in the dark, pinpoint and mark that bedded mule deer before a stalk, or mark your animal’s location after the shot for an easy and worry-free recovery hike. Learn More.

Custom Map Tools
Customizable Waypoints, Lines, and Tracks will help you map out every detail of your hunt. Whether you’re hiking to your favorite glassing point in the dark, exploring all new ground, or chasing a bugle in the dark timber, the onX Hunt App has tools for every aspect of your hunt. Learn More.
3D Maps, Lidar, and Recent Imagery
Understand the lay of the land with 3D maps and Lidar. Use Lidar combined with 3D exaggeration in less terrain-laden areas to easily see nuanced terrain features. On top of that, highly recent, low-resolution imagery gives you an up-to-date look at the ground and vegetation across the country. Learn More.
Satellite, Topo, and Hybrid Basemaps
Understand the lay of the land like never before with high-resolution aerial imagery, the Hybrid Basemap (a combination of satellite imagery and a 1:24k topographic map), or detailed topography. Learn More.

Offline Maps
No service needed. Save detailed maps of the areas you plan to hunt to ensure you always have the tools you need at your fingertips, with or without cell phone service. Learn More.


- Elite-Exclusive Map Tools: Plan, scout, and hunt better with TerrainX, an array of aerial imagery options (including Lidar), revolutionary Trail Cam Integration, Route Builder, In-Dash, and more.
- Pro Deals and Expert Resources: We’ve partnered with top brands to bring you discounts on the gear we use and trust and educational resources to help you improve the way you hunt.
- Maps for 50 States and Canada: The maps trusted by millions of hunters for all 50 states and Canada. Wherever you roam, onX Hunt Elite has you covered.
- Western Application Strategy: As part of your onX Hunt Elite Membership, you receive access to onX Hunt Research Tools, and two industry-leading resources—Huntin’ Fool, and HuntReminder—for free.
App Reviews
Priceless
Hands down the best hunting app available! Customer service is second to none and highly recommend anybody who has questions about property lines, topography as well as a ton of other features. I originally purchased the…
Read more
Hands down the best hunting app available! Customer service is second to none and highly recommend anybody who has questions about property lines, topography as well as a ton of other features. I originally purchased the app for my first solo antelope hunt in Wyoming. Knowing absolutely nothing about hunting out west the app allowed me to strategize hunt areas. I tagged out in 3 hours with a very nice animal. Thank you onX for providing a priceless resource!!!!
Great App Not Just for Hunting
I have used this app for a few years now. They keep adding needed features like directions to a point along with multiple layers that can be overlaid. Tried a competitor’s app a couple years ago, nowhere near as user-f…
Read more
I have used this app for a few years now. They keep adding needed features like directions to a point along with multiple layers that can be overlaid. Tried a competitor’s app a couple years ago, nowhere near as user-friendly. Would highly recommend for hunters and non-hunters.
Most Excellent
OnX has created an awesome app. It’s fairly easy to use with very intuitive features. I’ve found that any question I have can be quickly fielded by their remarkable customer support! I’ll def be staying with your a…
Read more
OnX has created an awesome app. It’s fairly easy to use with very intuitive features. I’ve found that any question I have can be quickly fielded by their remarkable customer support! I’ll def be staying with your app
Plan and Scout From the Comfort of Home
Use onX Hunt on desktop for a bigger view of the maps you’ve created. Scout new land and plan your next hunt.
- All your saved Markups sync automatically to all devices for use on the futon or in the field.
- onX Hunt is compatible with Android, iOS, Mac, and PC.


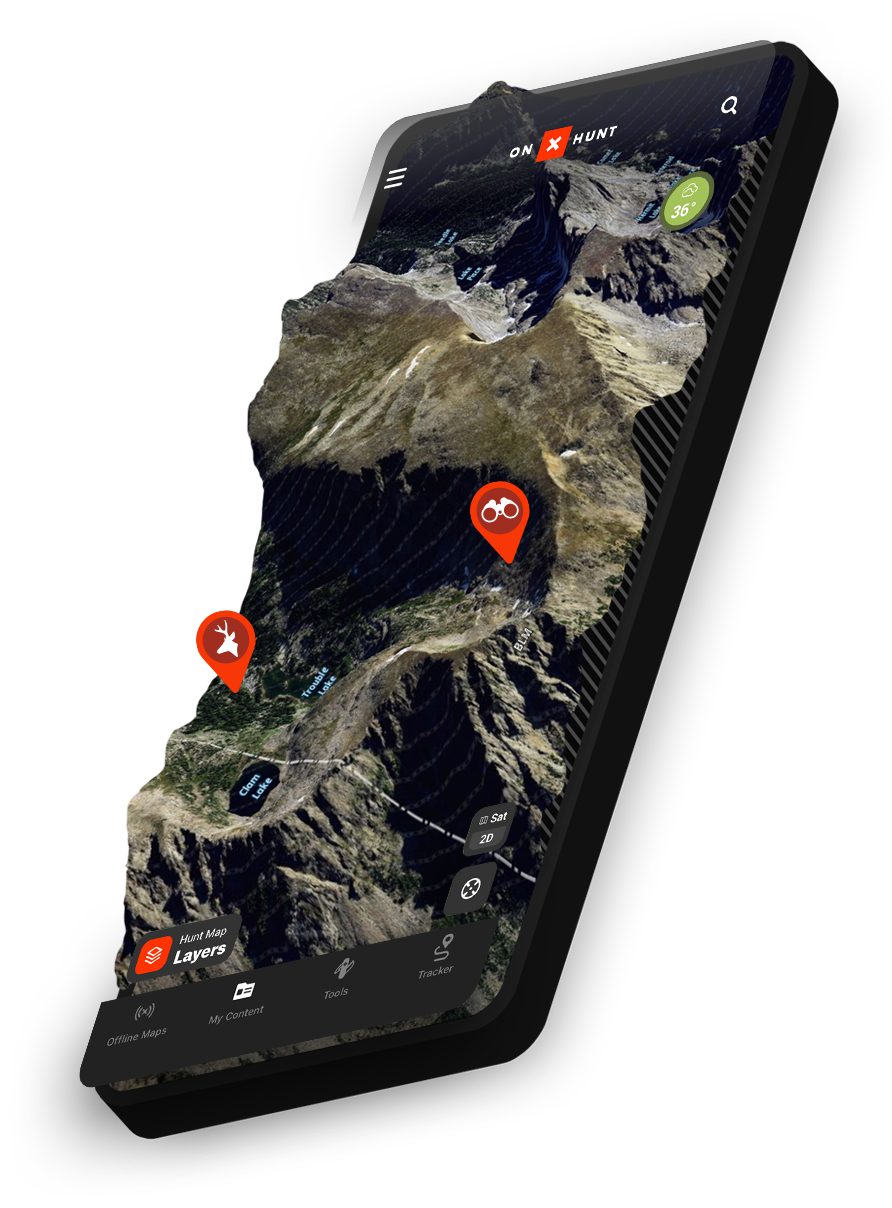
3D Hunting Maps
Understand the land—scout in 3D before you lace up a boot.
A Powerful E-Scouting Tool
Combined with features like Hybrid Basemap or Lidar Maps, viewing 3D Maps gives you the tools to understand how animals move across the landscape—and where you need to be to cross their paths.
Big Screen or Small
Available in Web Map and Mobile, 3D provides a unique way to experience the landscape on screen. Whether reliving a past hunt by viewing previous markups or planning the next one, 3D on multiple devices can change the way you hunt.
More Features
“I shudder to think about life as a public-land bowhunter before the creation of onX.”
“onX Hunt … is about the most influential scouting tool ever made, next to the trail camera.”
“This app is a godsend for any hunter, no matter if you’re exploring the backcountry or sticking close to home.”
onX Hunt Membership Levels
Hunt close to home or roam across all 50 states + Canada, there’s an onX Hunt membership perfect for you.
Sign up for a 7-day free trial of onX Hunt and unlock, explore, and master all the map tools and features we offer.
By The Numbers
Hunting isn’t a math problem, but onX Hunt adds an ecosystem of tools on top of your talents to make every hunt count.