Turkey hunters are no different than other hunters when it comes to wanting to have a physical memento from a successful hunt. For big game hunters it might be an antler mount, elk ivories, or even a deer hoof gun rack (don’t judge). Turkey hunters are fond of big toms’ beards, spurs, and tail feathers. That’s why we put together this comprehensive guide for how to preserve a turkey fan. onX’s own Lake Pickle snapped detailed photos showing just how to take these treasured feathers from field to fully preserved.
TL;DR: Preserving a turkey fan is a simple way for hunters to create a lasting memento from a successful hunt. After harvesting a bird, carefully remove the tail fan, clean away fat and tissue, and use Borax (the most popular method) to dry and preserve the feathers. Salt can also work, but it risks attracting insects, while professional taxidermy offers a polished result for a fee. Once preserved, the fan can be mounted on a plaque, hardened for use in a decoy, or displayed as a trophy. Proper cleaning with alcohol or lacquer thinner, along with protection from sunlight, will keep your turkey fan looking sharp for years.
Equipment Needed for Preserving a Turkey Fan
Preserving a turkey tail fan is quite simple overall. However, there are several additional steps one can take to make their fans more ornate or to have special uses. Some of these we will discuss. The basic tools and equipment needed for preserving a turkey fan are as follows:
- Sharp knife
- Borax
- T-pins
- Drying board
Additional, optional equipment:
- Coleman lantern or camp fuel
- Large metal coffee can
- Hair dryer
- Dawn dish soap
- Rubber gloves and eye protection
- Auto body filler with hardener
- Mounting plaque
Preparing the Turkey Fan
After your turkey has been harvested you can get to work on removing its breast and legs or immediately get its tail removed. The best way to remove a turkey tail for displaying as a fan is shown by Lake Pickle in the following video:
In essence, with the bird laying breast side down, you’ll want to use a sharp knife to cut into the meat between the bird’s vent and the base of the tail feathers where you’ll find a small knob. Take care not to cut into any part of the feathers, including the tissue that is holding the feathers together at their base.
As shown below, you can make a small exploratory cut with your knife to expose the knob before cutting toward the body of the bird.
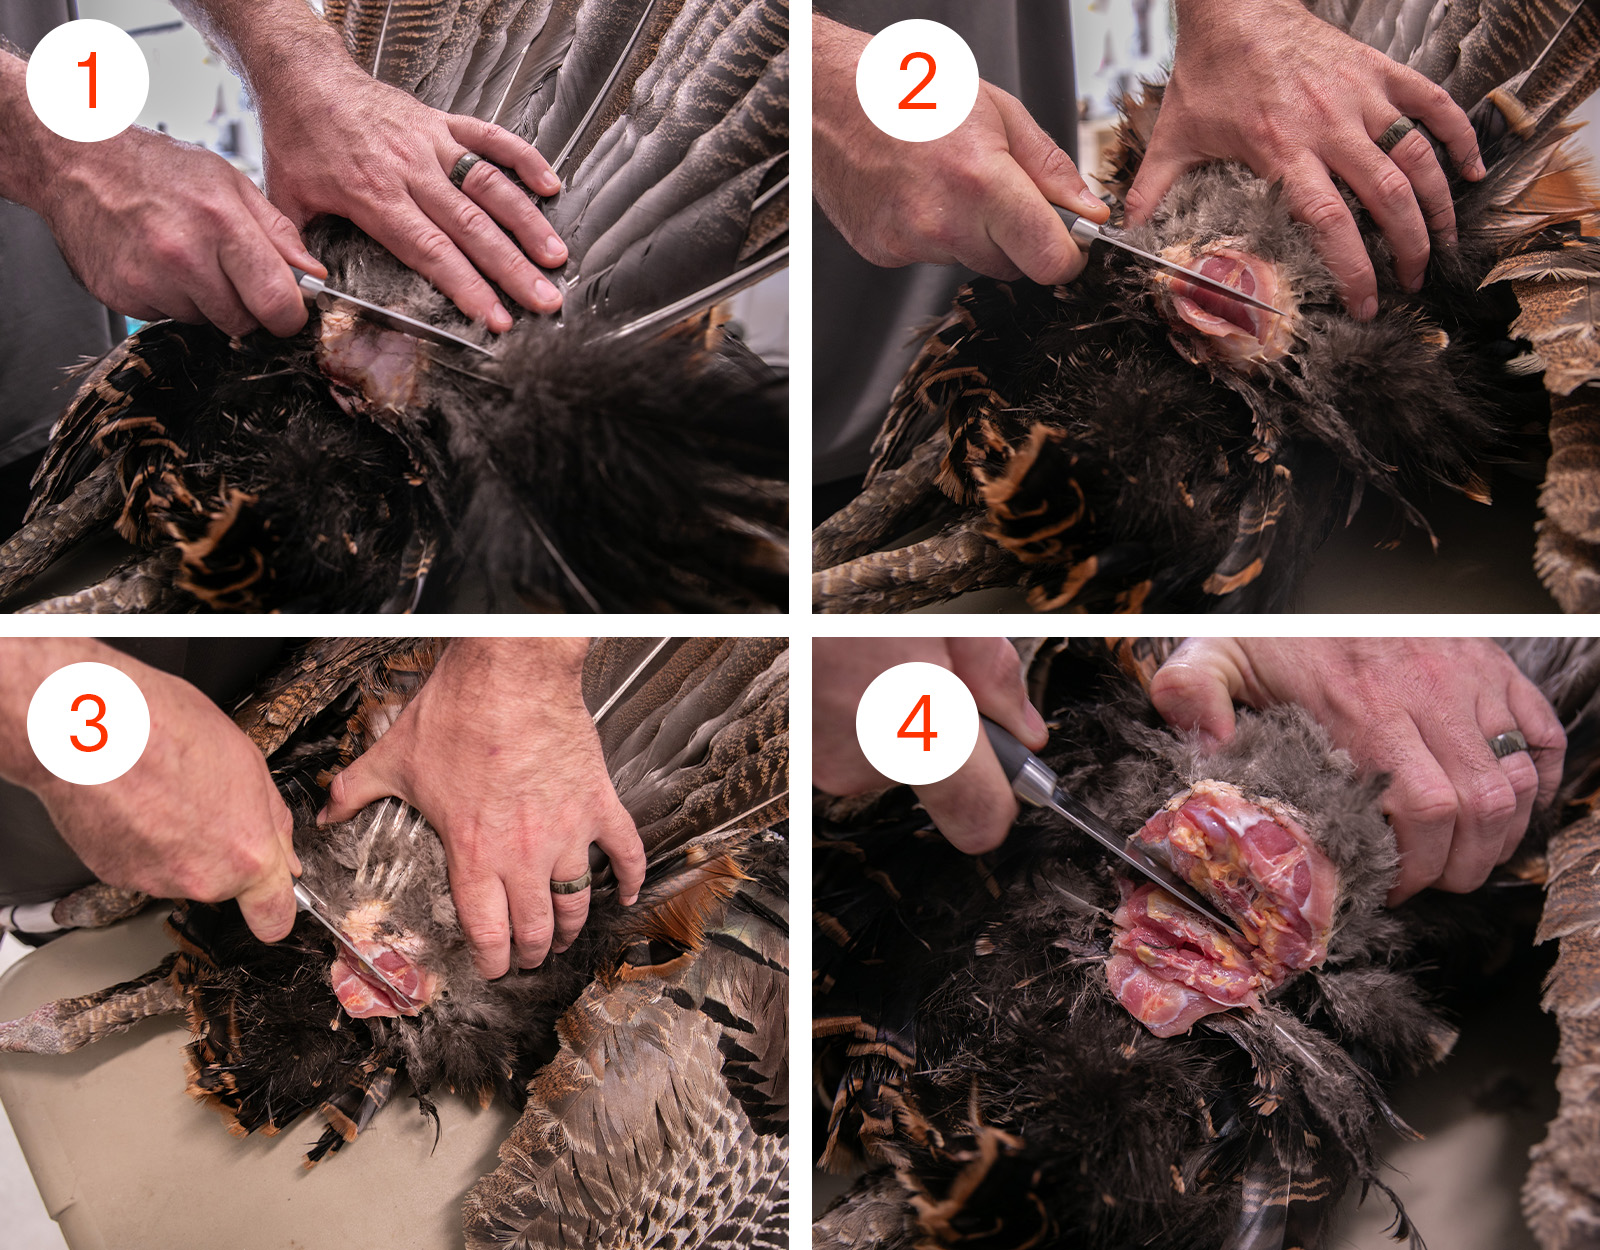
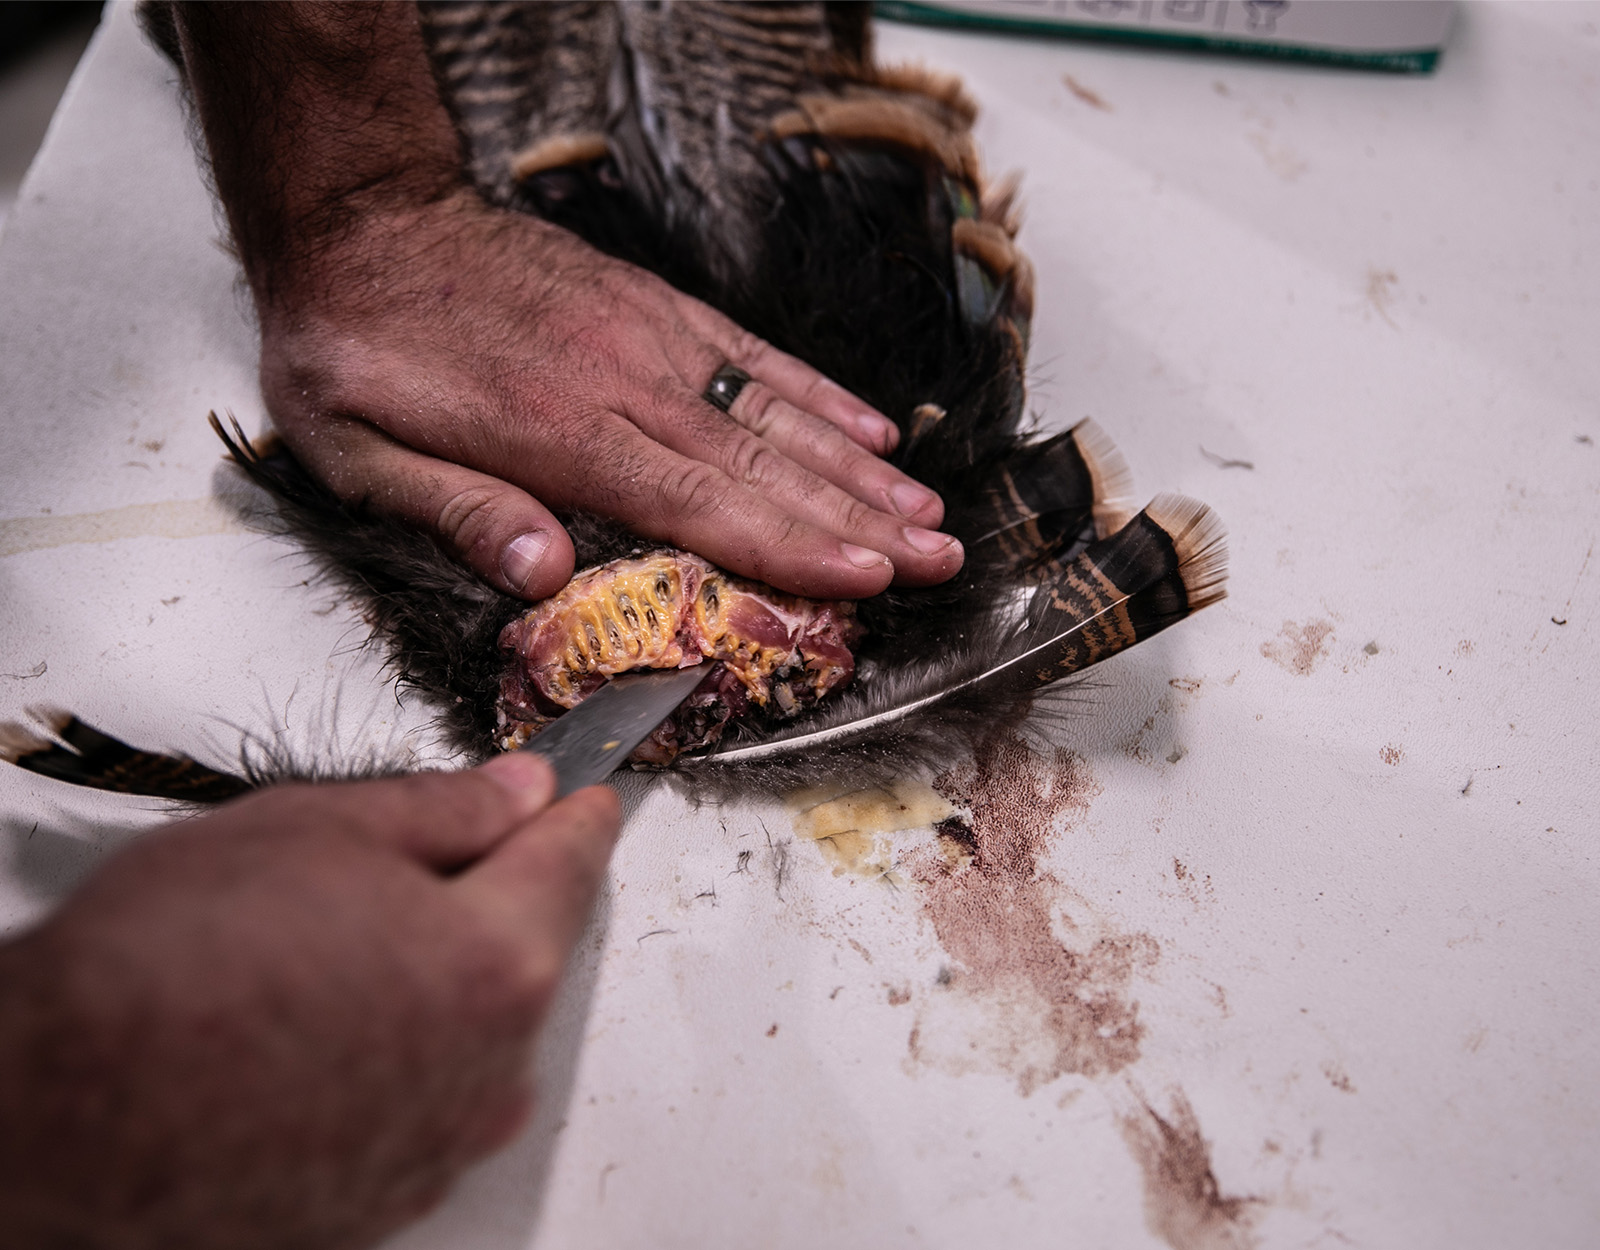
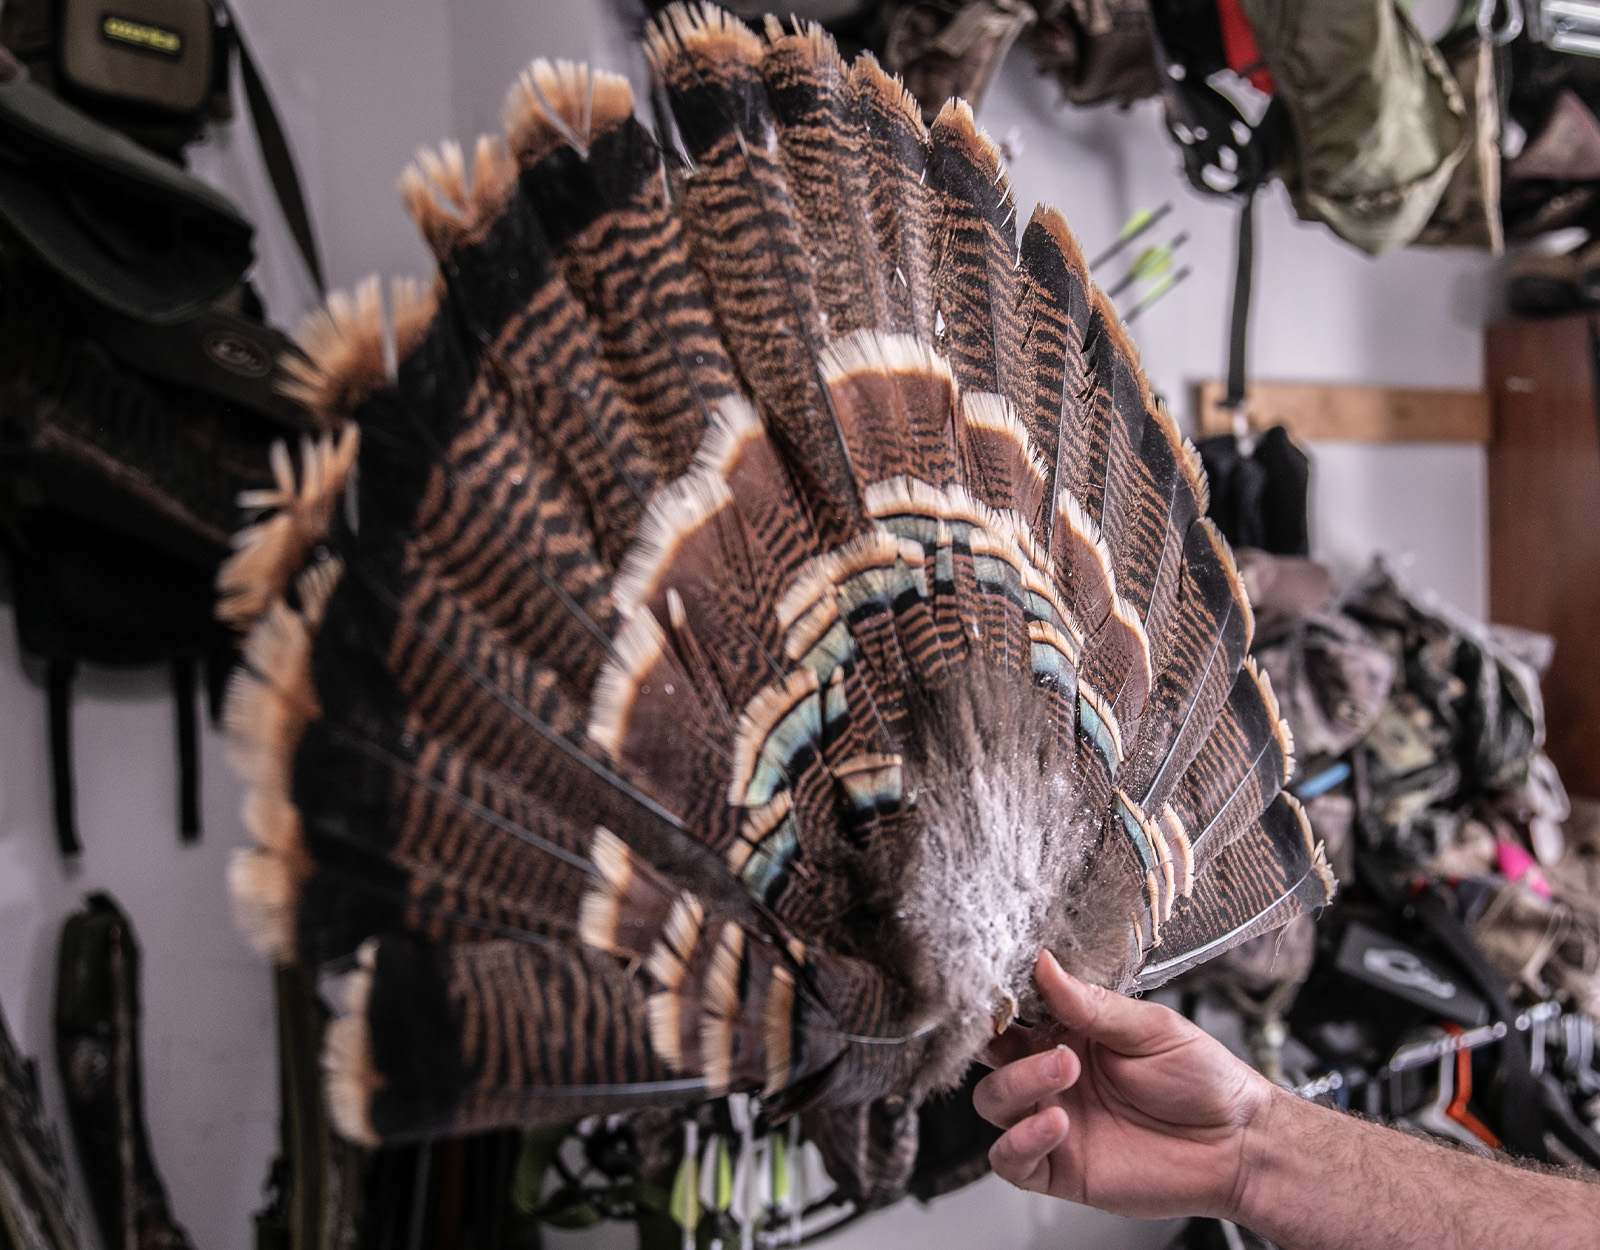
Once the tail fan has been removed, scrape away as much fat and meat as possible to make the drying process more efficient, again taking care not to cut through any connective tissue. You’ll see that some downy feathers might still be on the tail. You can remove those if you wish, but keep all the flat, color-tipped feathers you see. A turkey tail is typically made up of three different lengths of feathers.
As an optional step for preparation, some hunters like to soak the fleshy part of the fan in a coffee can containing Coleman white gas for about an hour to help degrease the tail. After soaking for an hour, remove the fan and wash the part that was soaked with Dawn dish soap, and then use a hair dryer on Low/Medium heat to dry the feathers. This will help the feathers fluff after being washed.
Of course, gas is very flammable and the fumes can be harmful so do this step in a well-ventilated area. Many skip the gas and just wash the feathers and base with Dawn dish soap as much as needed.
Once cut, cleaned out, and washed, you’re ready to start the simple preservation process.

Turkey Fan Preservation Techniques
There are three main ways you can choose to preserve your turkey fan. One is to use Borax. Another uses salt in place of Borax. Or you can choose to pay for a professional taxidermist. The latter costs between $150-$300 depending on whether you also have the beard and spurs preserved and what kind of display mount it used.
One of the major drawbacks of using salt to dry out the tail feathers is the risk of attracting ants and insects while it dries; plus many say the smell of rotting meat is pretty bad.
The popular method is to use Borax, which is what we show below. Borax is sodium tetraborate, a type of salt. It has a pH of 9.5 compared to table salt’s pH of 7. It’s also especially good for degreasing, which is why it’s so often used for cast iron pan restorations.
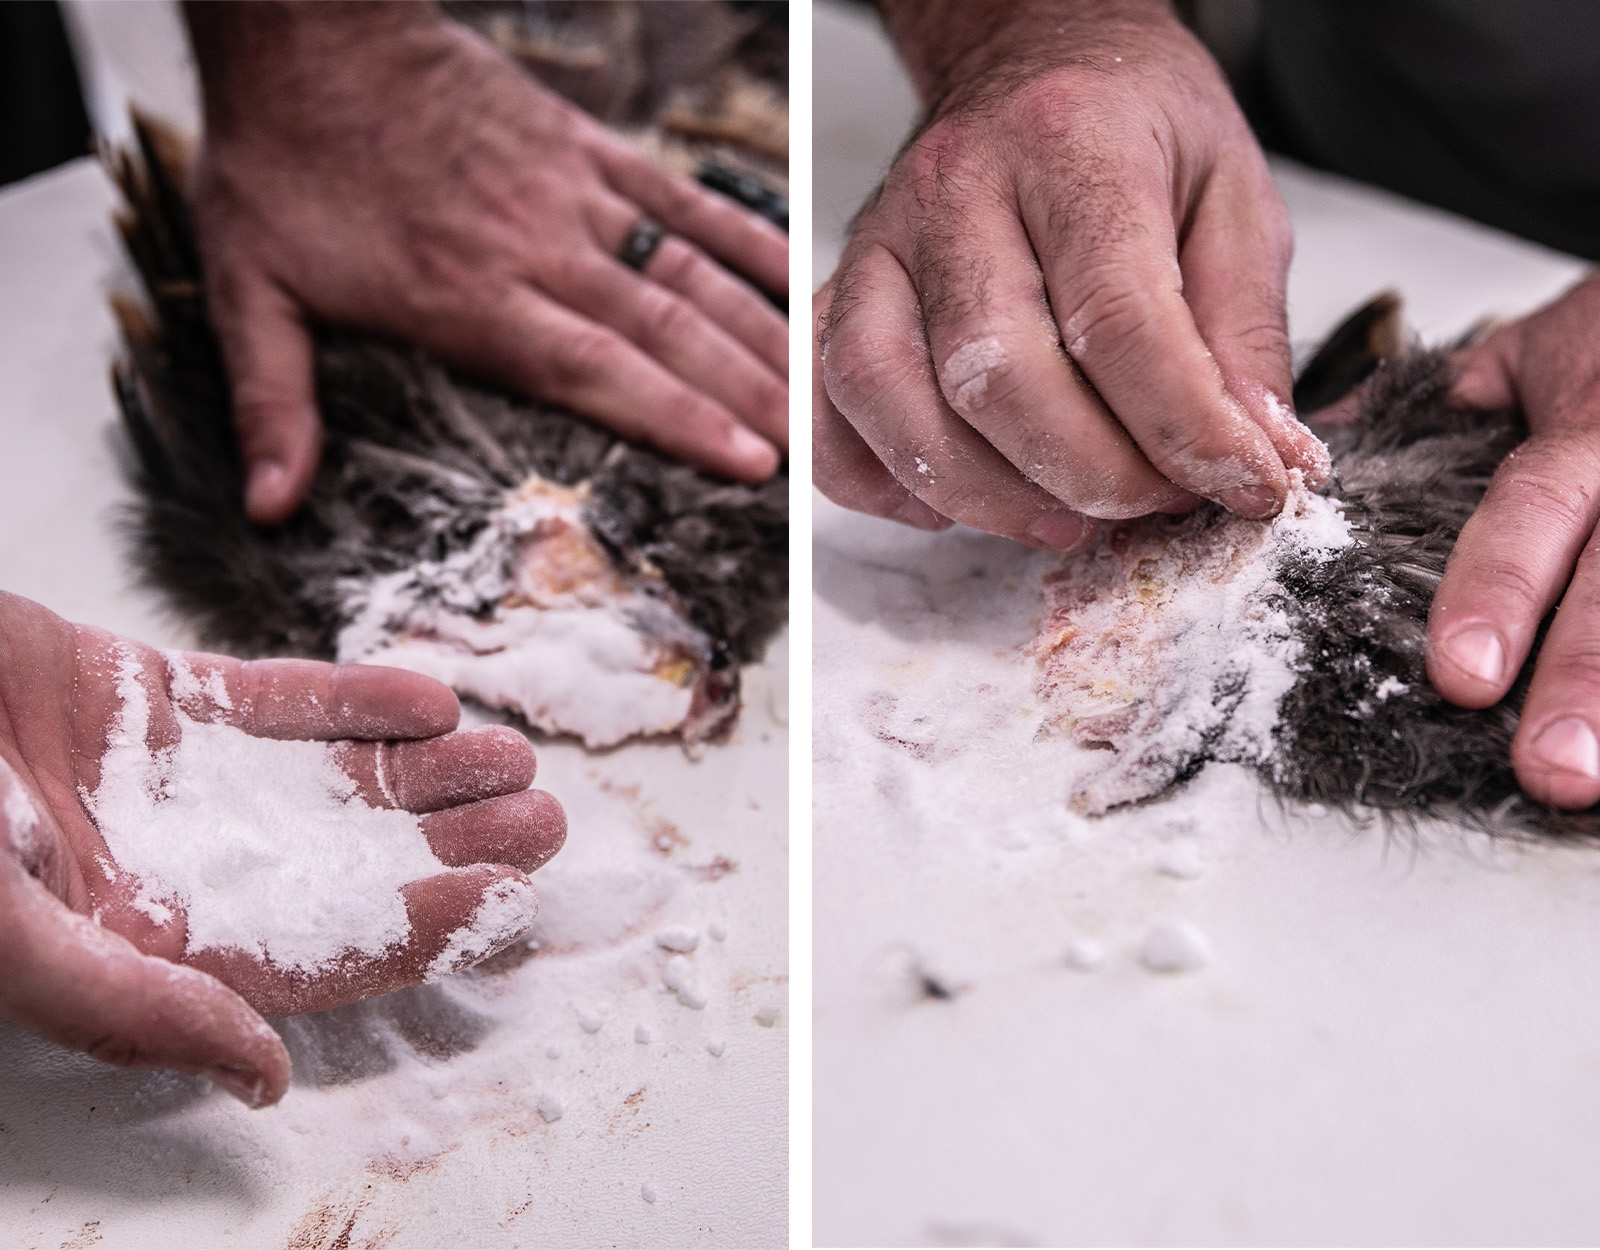
Once you’ve fleshed out the tail as much as possible, apply a generous amount of Borax to any exposed tissue. Make sure you rub it in well, lifting any loose bits of skin and getting both the front and the back side of the tail.
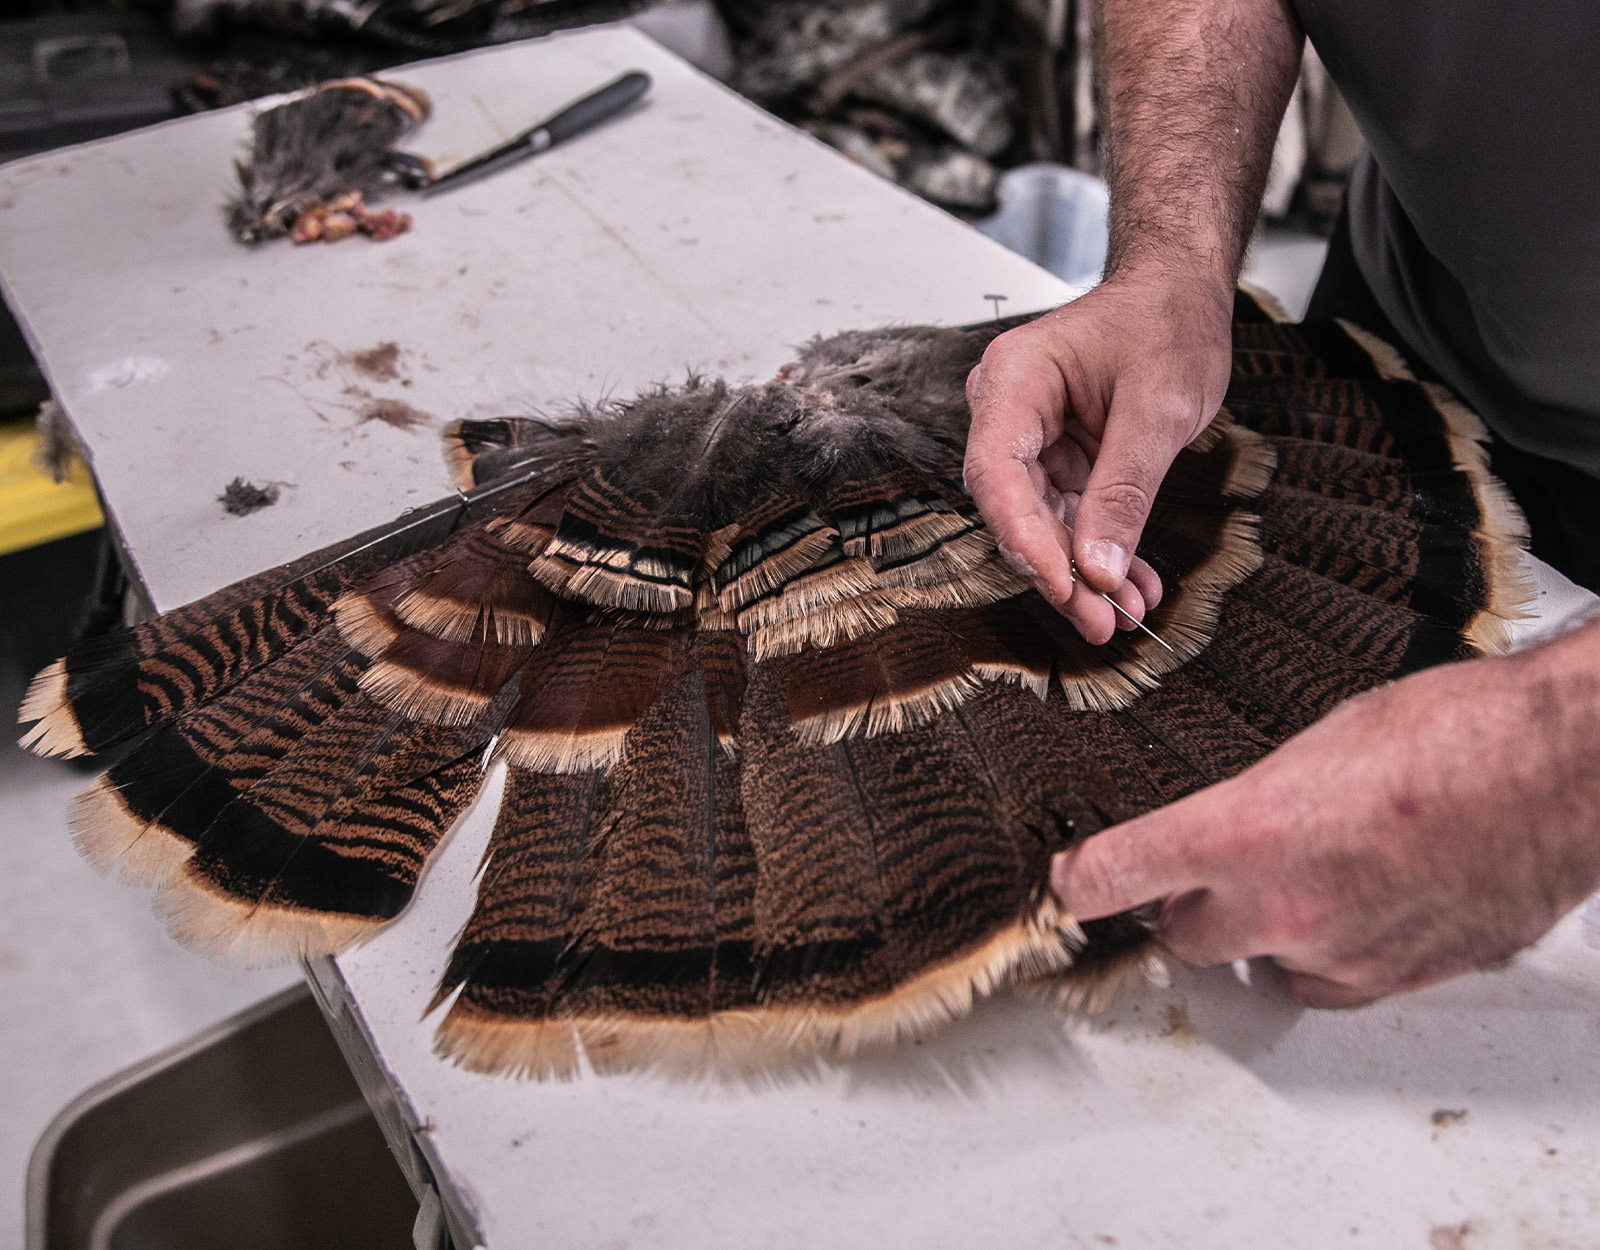
Now you’ll want to spread the tail into its fan shape for drying. Using T-pins and placing the turkey tail on a board or foam board, push one pin into the base of the tail and then working from the outer feathers toward the middle place a T-pin alongside (but not through!) each feather’s shaft (or rachis). Sprinkle a little more Borax on the base of the tail after it’s set in place.
You’ll want to leave your turkey fan to dry for at least a week. Then turn it over, pin if needed, and dry for another week. It may take up to three weeks to fully dry.
Mounting and Displaying a Turkey Fan
After your turkey fan has fully dried, it’s time to decide how you want to mount it. Several outdoor stores will carry turkey plaque kits, or you can make your own out of wood or leather.
If you don’t want to mount your turkey fan for display and instead use it as part of your turkey decoy for hunting, some folks like to add a hardener to the tail base to make it more durable. This is where the auto body filler comes in handy. Using the provided plastic spreader, work quickly to spread the hardening filler around the base of the tail. It will dry quickly. You’ll also want to work in a well-ventilated area and use any recommended safety gear on the package instructions.
Once it’s dry, you can sand down the filler and attach the tail fan to your decoy or to a wall mount.
And that’s all there is to it.
Maintenance Tips
Once you’ve mounted the turkey fan and have been enjoying it for a year or two, you might need to do a little maintenance on it. As true for turkey tails as it is for other feathered taxidermy, you might start noticing some of these common issues: dust accumulation, broken and disengaged barbs and barbules, whole or partial feather losses, or pest damage.
The best way to combat these issues is by periodically cleaning the feathers. Cleaning is very simple as long as you do it the right way. And the right way is to always clean in the direction of the feather, never against the direction the barbs lay or sideways.
The second-most important tip for cleaning is to use the right materials. All you need is a clean, soft cloth and either rubbing alcohol or lacquer thinner. Never use water to clean your feathered mounts, as it will matte the feathers and mess them up. Dampen the rag in rubbing alcohol or lacquer thinner and gently wipe the feathers down (in the direction they lay). Alcohol and the thinner will evaporate away, leaving the feathers clean and dry.
One other tip that will extend the life of your turkey fan is to keep it out of direct sunlight. Direct sunlight will bleach and fade the feathers faster than you can call in another ol’ tom.
Basic tools include a sharp knife, Borax, T-pins, and a drying board. Optional tools include dish soap, a hair dryer, auto body filler, or a mounting plaque.
The most popular method is using Borax, which degreases and dries the tissue while preventing rot. Salt is an alternative but can attract insects. Professional taxidermy is another option if you want a polished, long-lasting mount.
Drying typically takes 2–3 weeks. The fan should be pinned and dusted with Borax, flipped after a week, and allowed to dry fully before mounting.