After the thrill of bagging your first wild turkey, new hunters are met with what can be one of the more intimidating aspects of a hunt—cleaning a bird for the first time. While the process might seem overwhelming, it’s actually a fairly straightforward exercise.
To help you on your hunting journey, we’ve put together an illustrated guide to the easiest way to break down your turkey and prepare it for eating immediately or wrapping and freezing. While opinions and methods may differ, start with this process on your first bird to learn the anatomy and produce ready-for-the-skillet cuts of healthy and delicious meat.
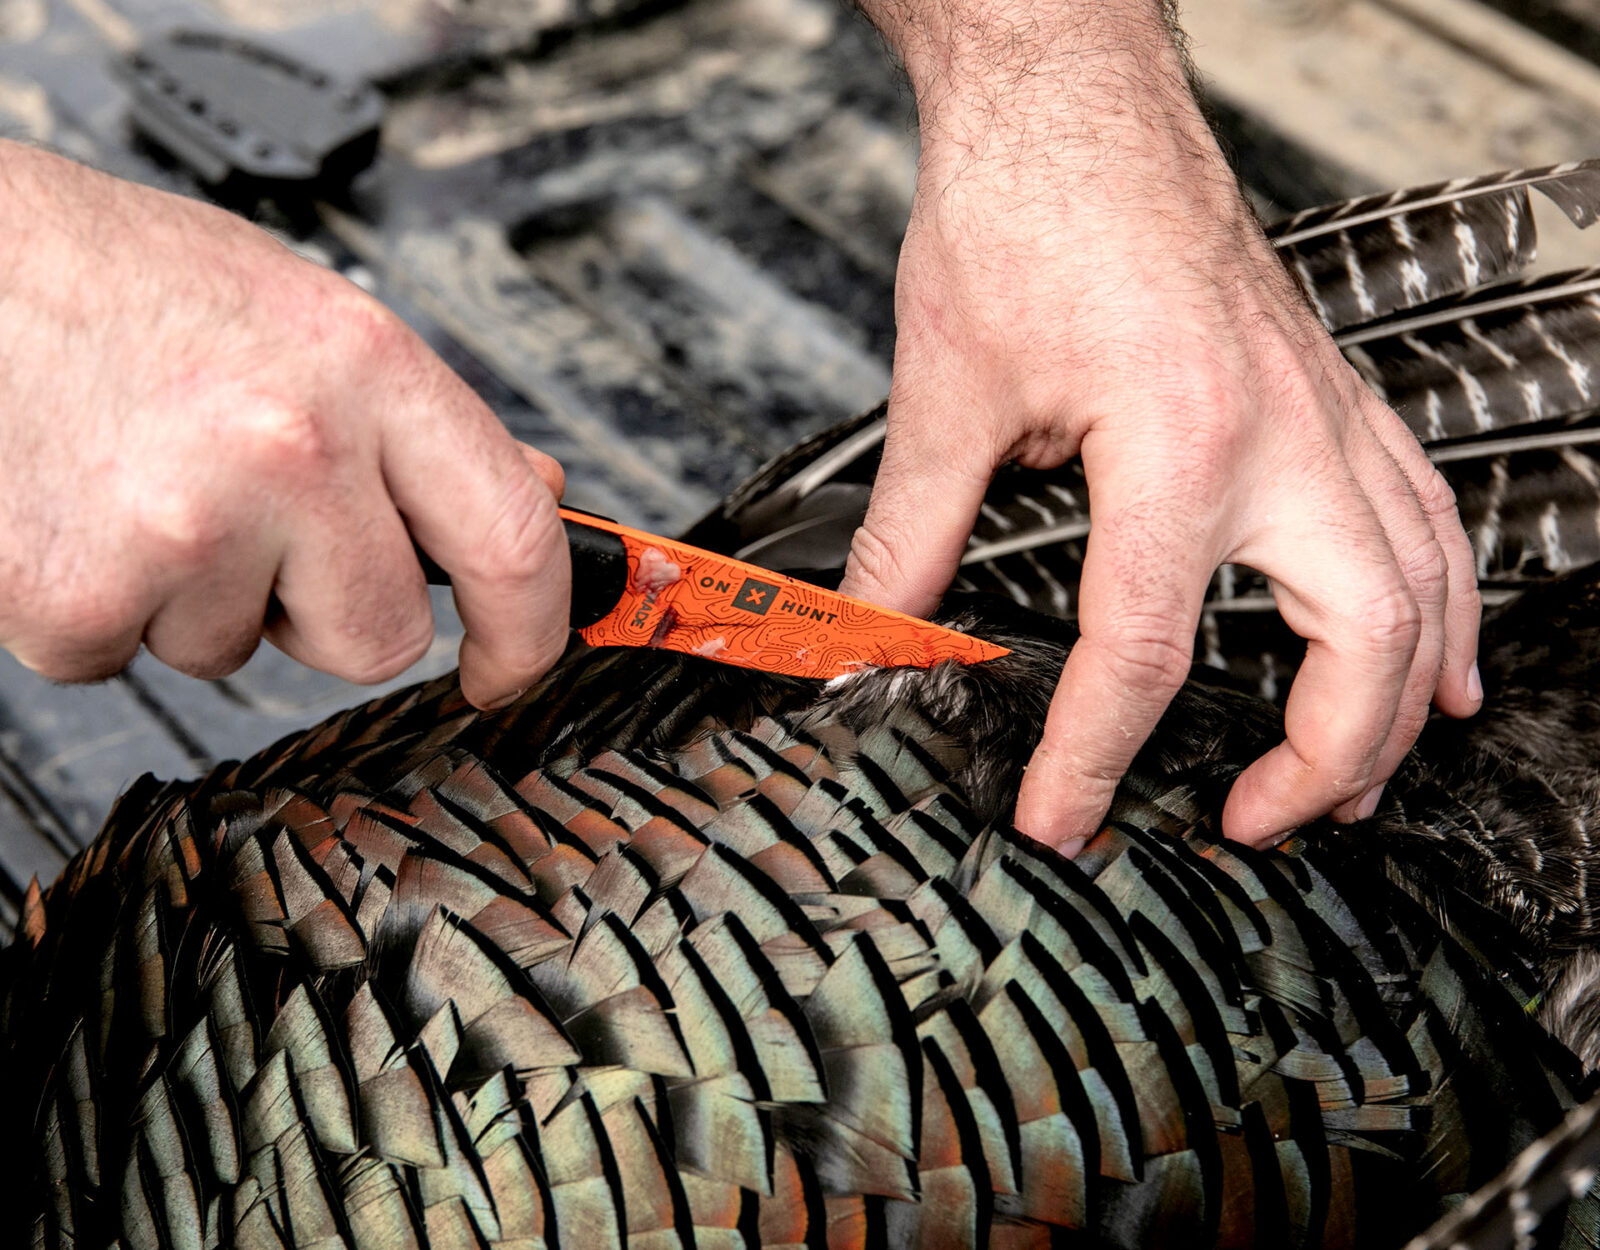
Step 1: Make Your First Cut
Find the point of the breast bone, then make a cut through the skin directly on that point.
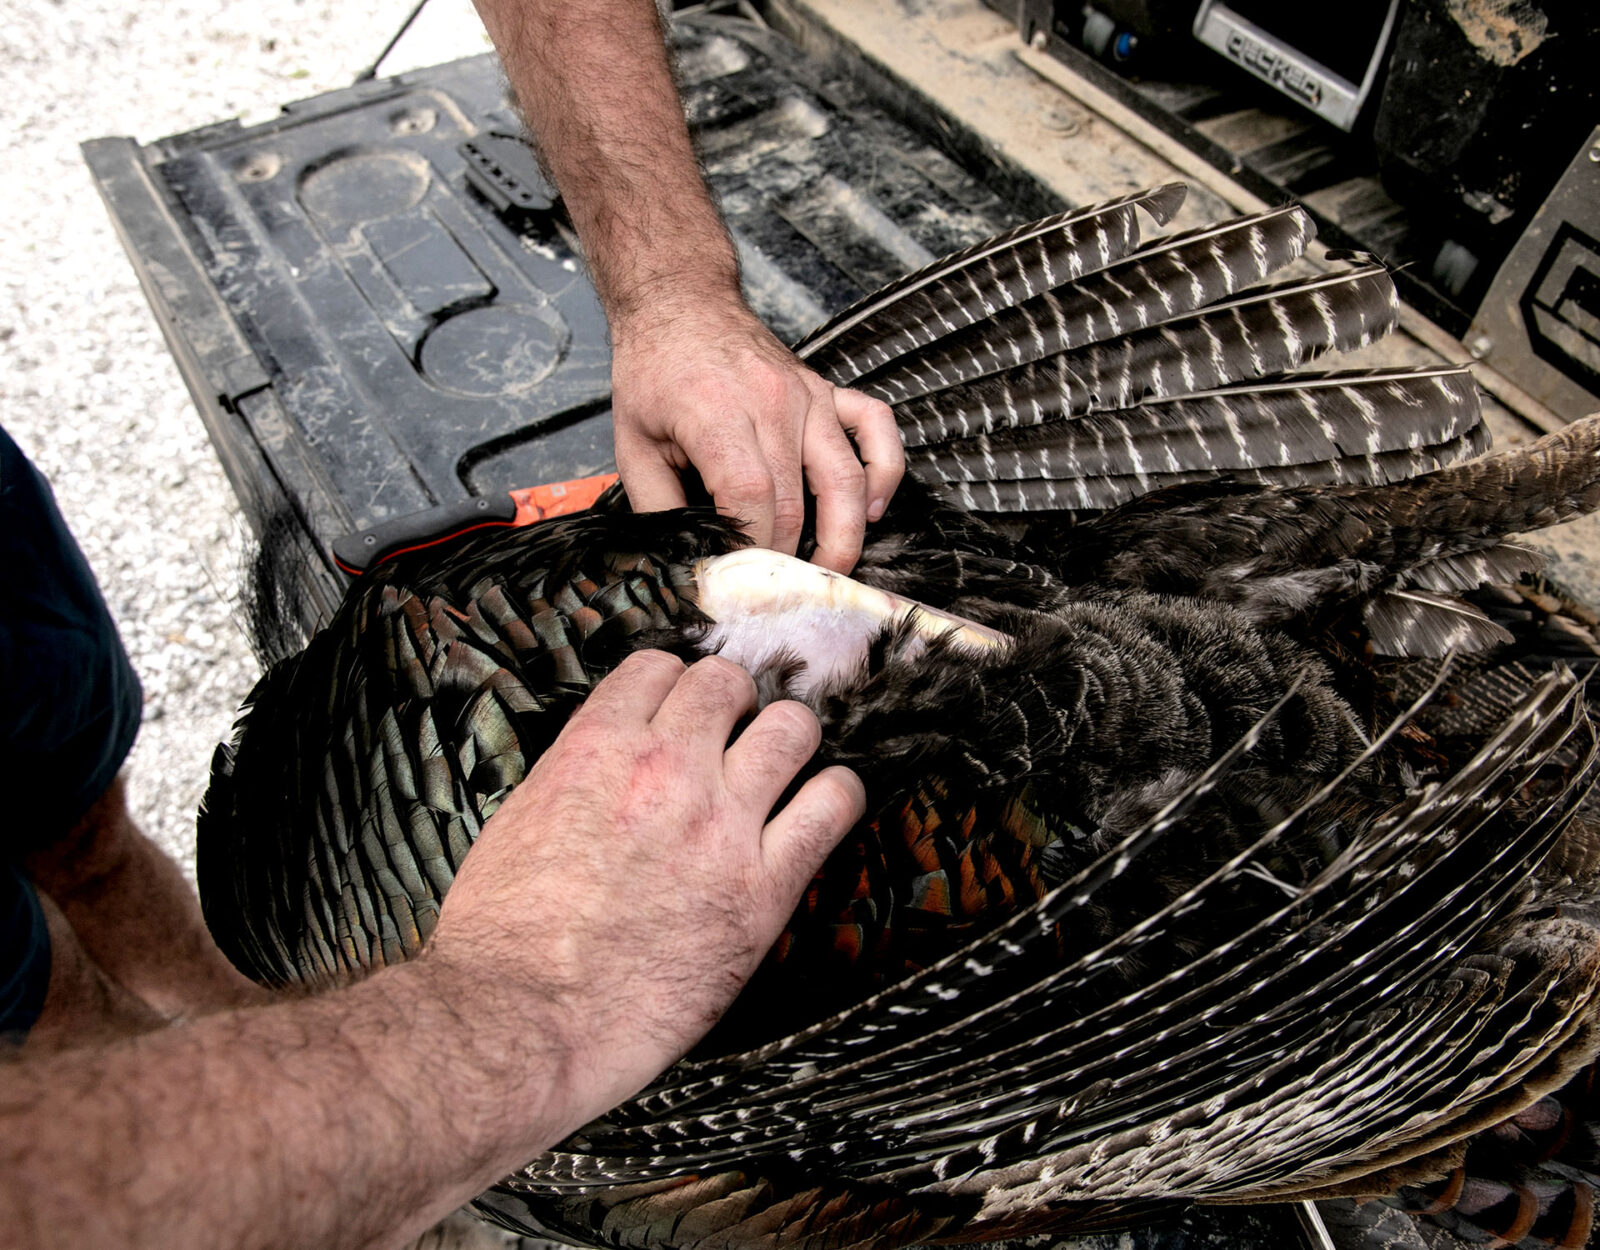
Step 2: Expose the Breast Meat
Using your hands, grab both sides of the cut you just made and pull the skin back to expose the breast meat.
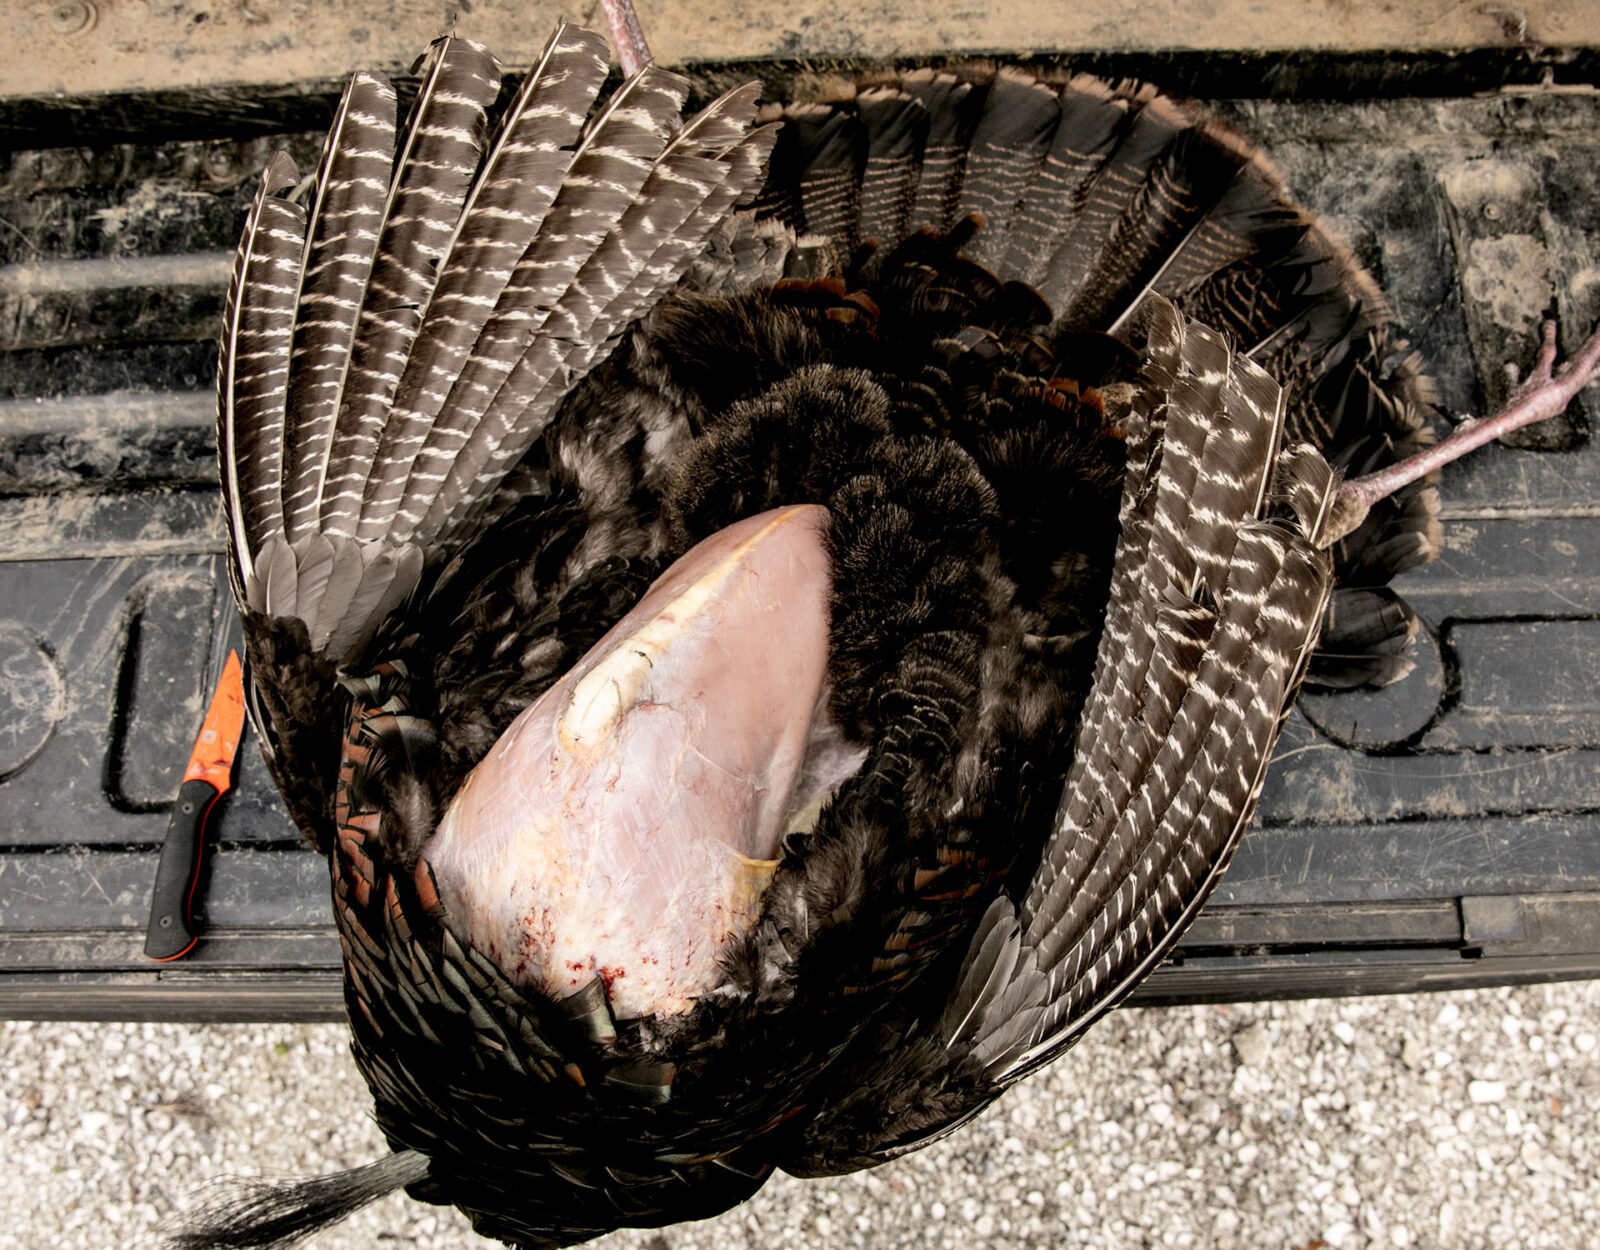
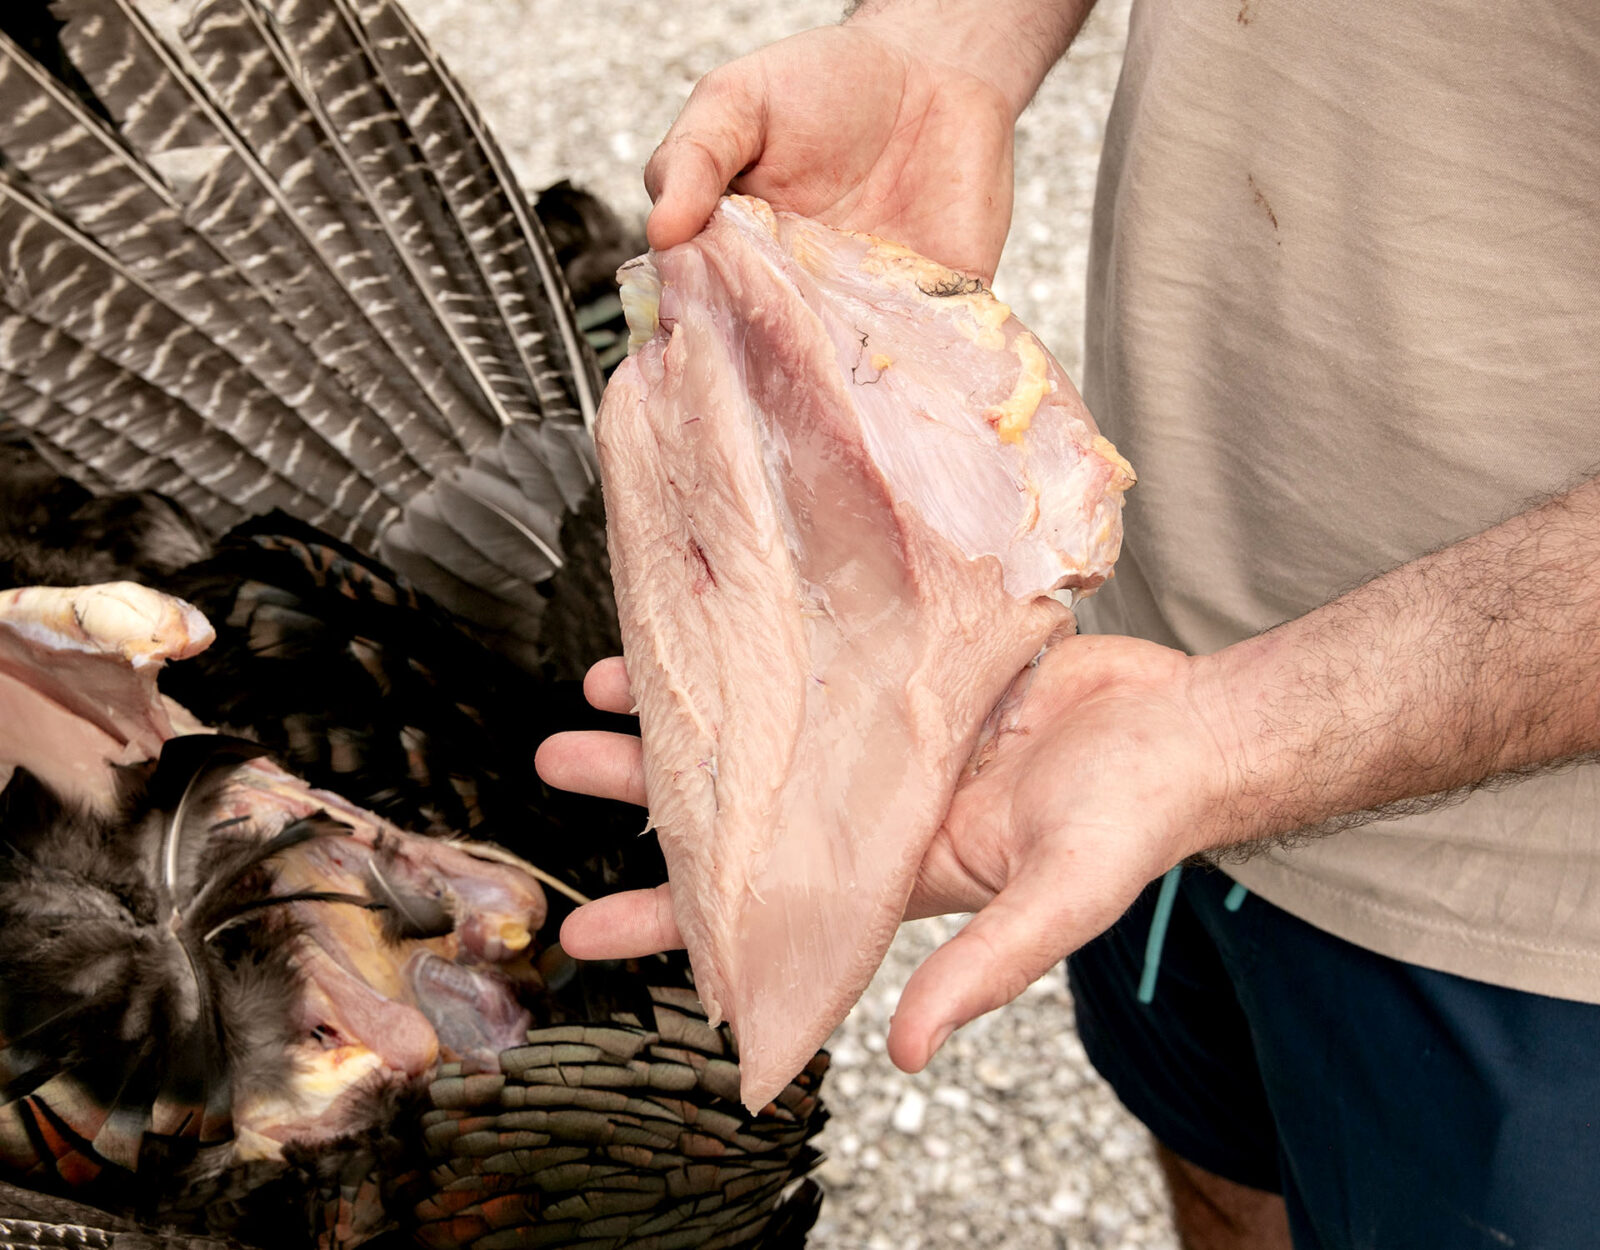
Step 3: Begin to Cut the Breast Meat
Choose which side of the breast to remove first. Using your knife, make a quarter-of-an-inch-deep cut right along the bone until you can see a tender along with the breast lobe.
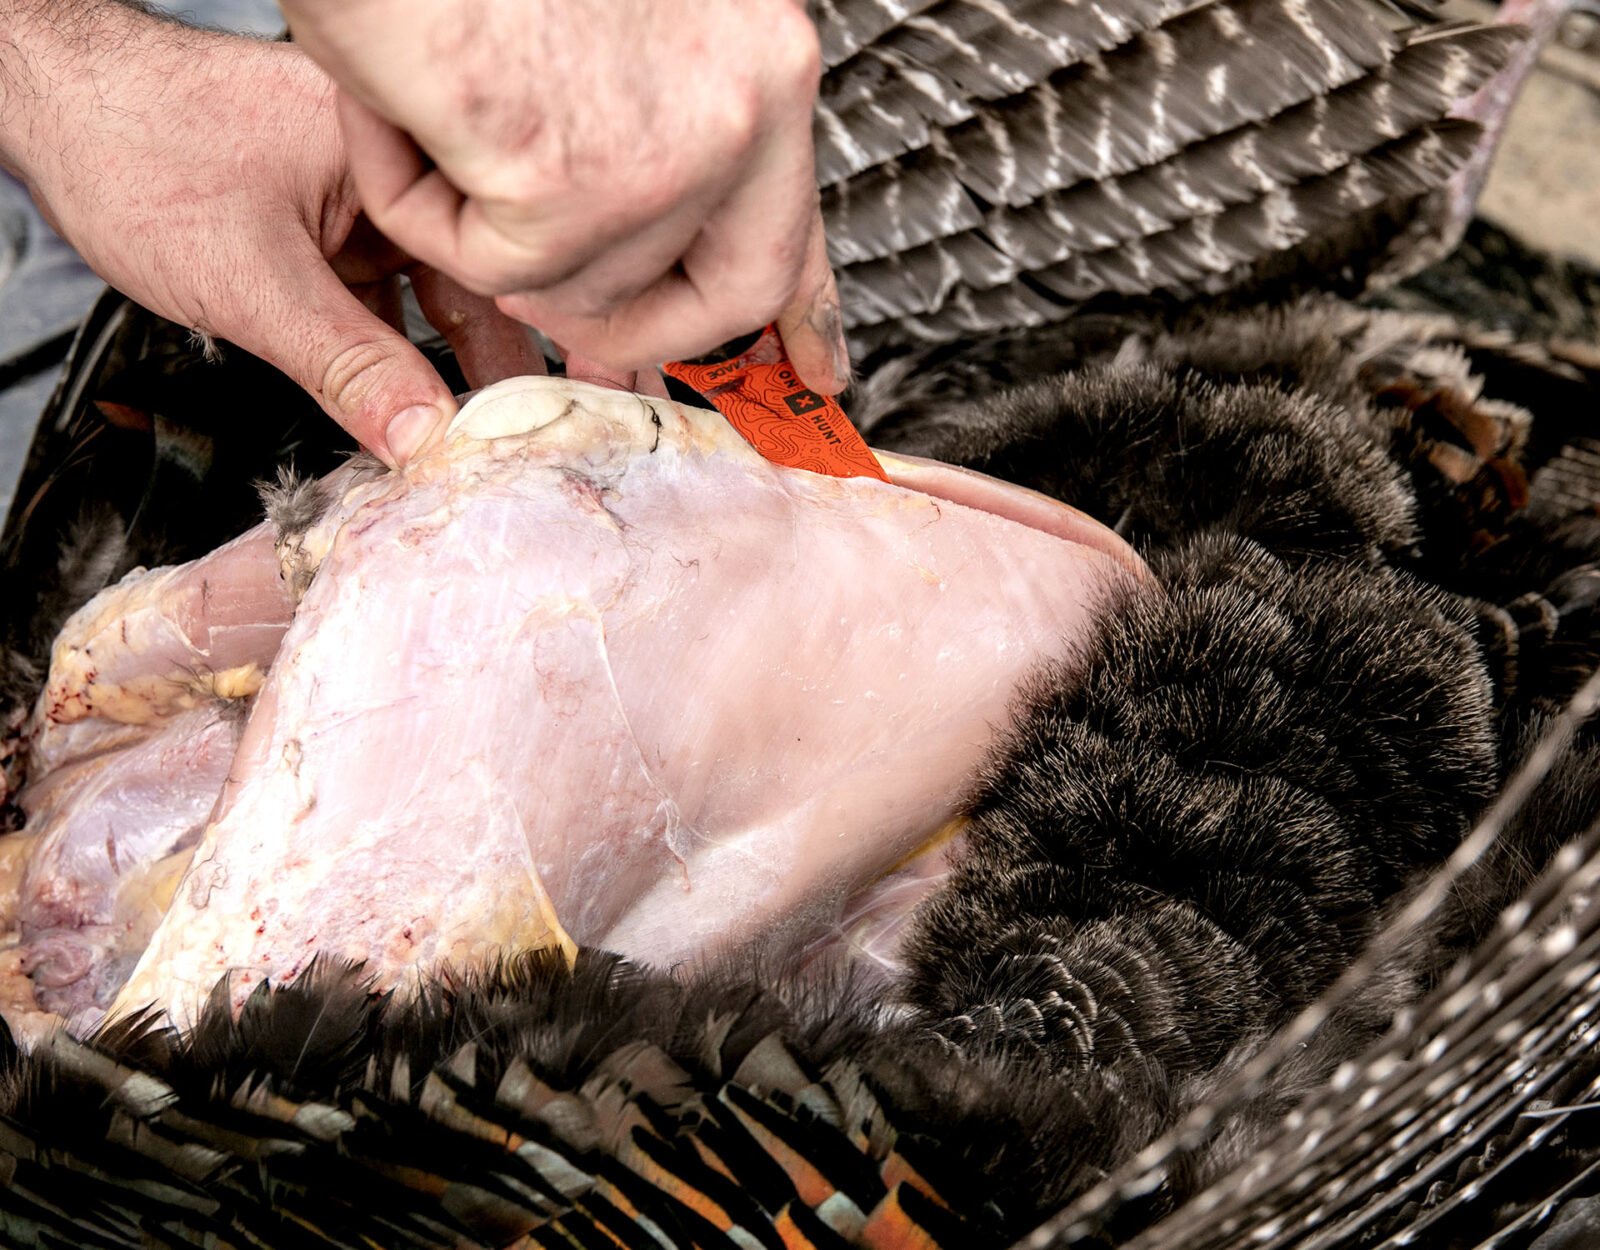
Step 4: Remove the Lobe
Continue cutting along the breast bone until the lobe is free and can be removed.
Step 5: Remove the Tender
Head back in and cut along the breast bone again until the tender is free and can be removed. Repeat the previous three steps to remove the breast meat on the other side of the bird.
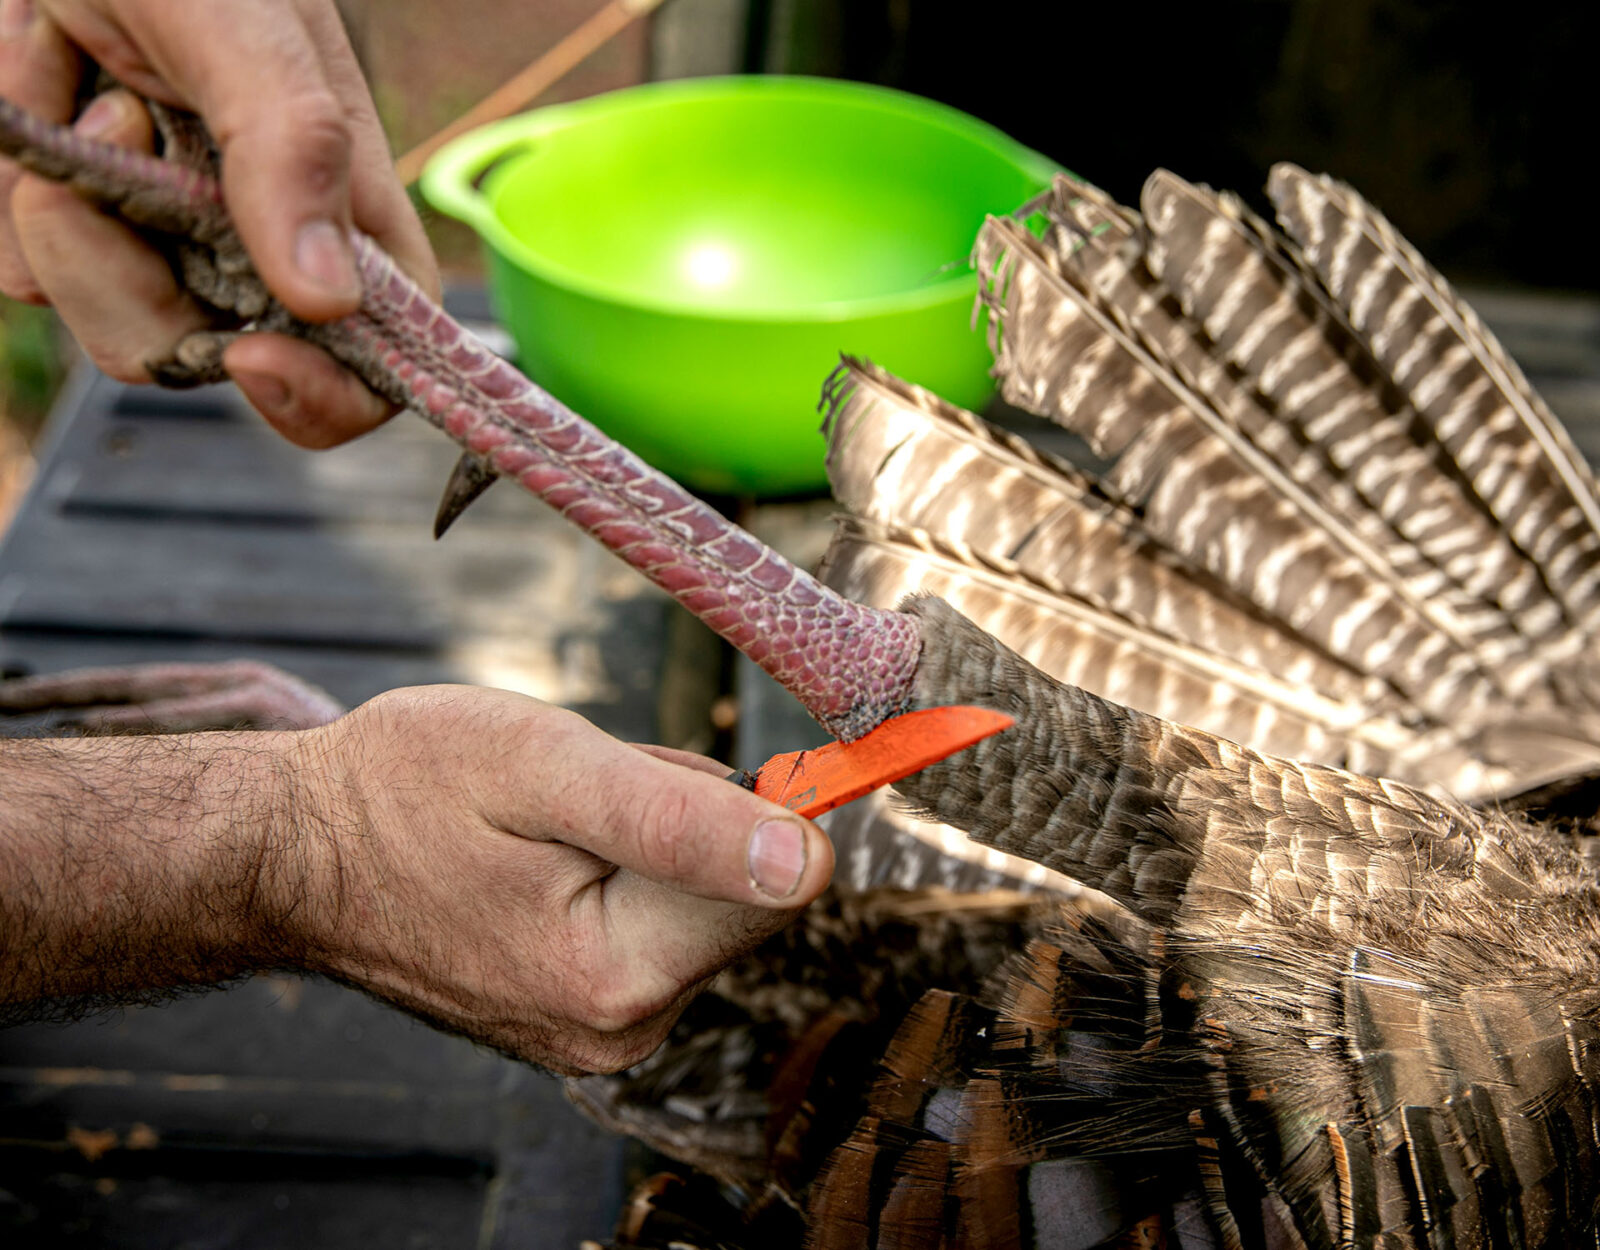
Step 6: Move On to the Legs
Cut the legs at the knee joint, where scale meets feather. Remove the lower leg.
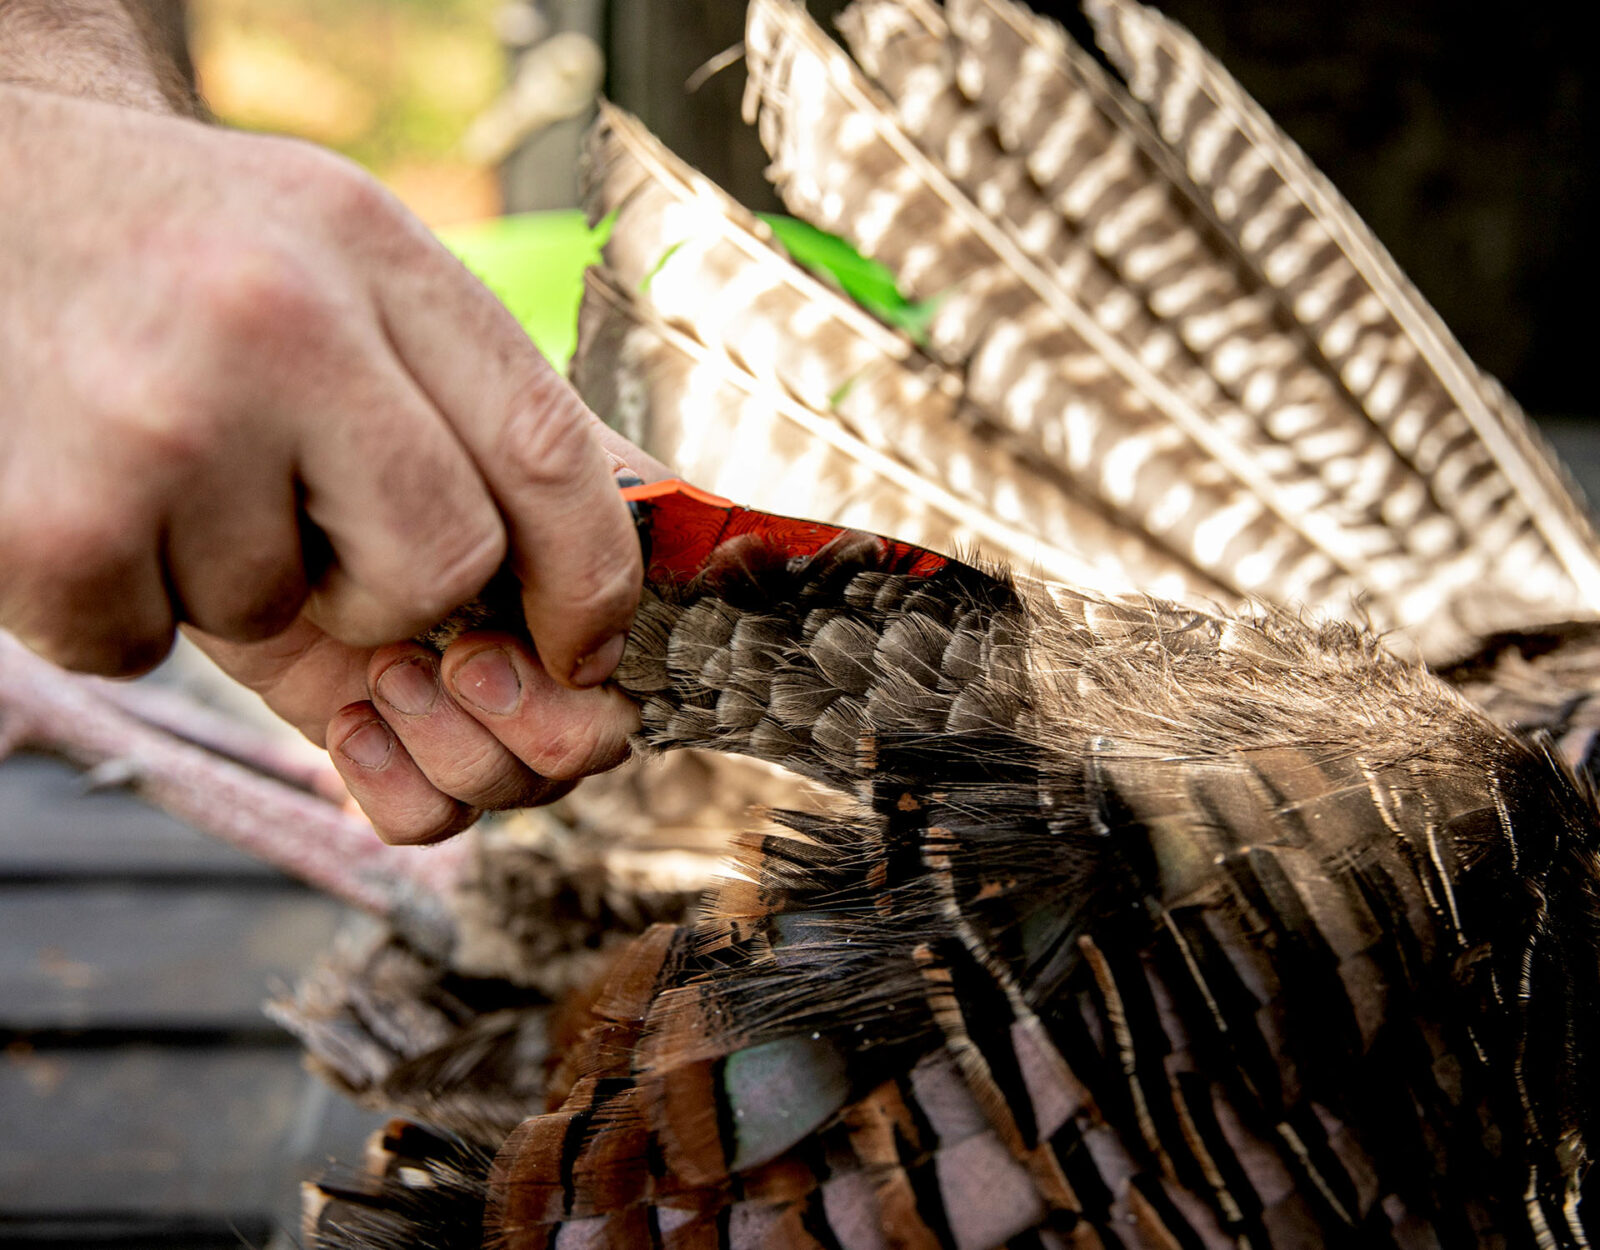
Step 7: Expose the Thigh
Choose a leg on which to begin, then insert your knife under the skin and feathers. Cut upward toward the top of the thigh.
Step 8: Pull the Skin
Using your hands, pull the skin away from the meat.

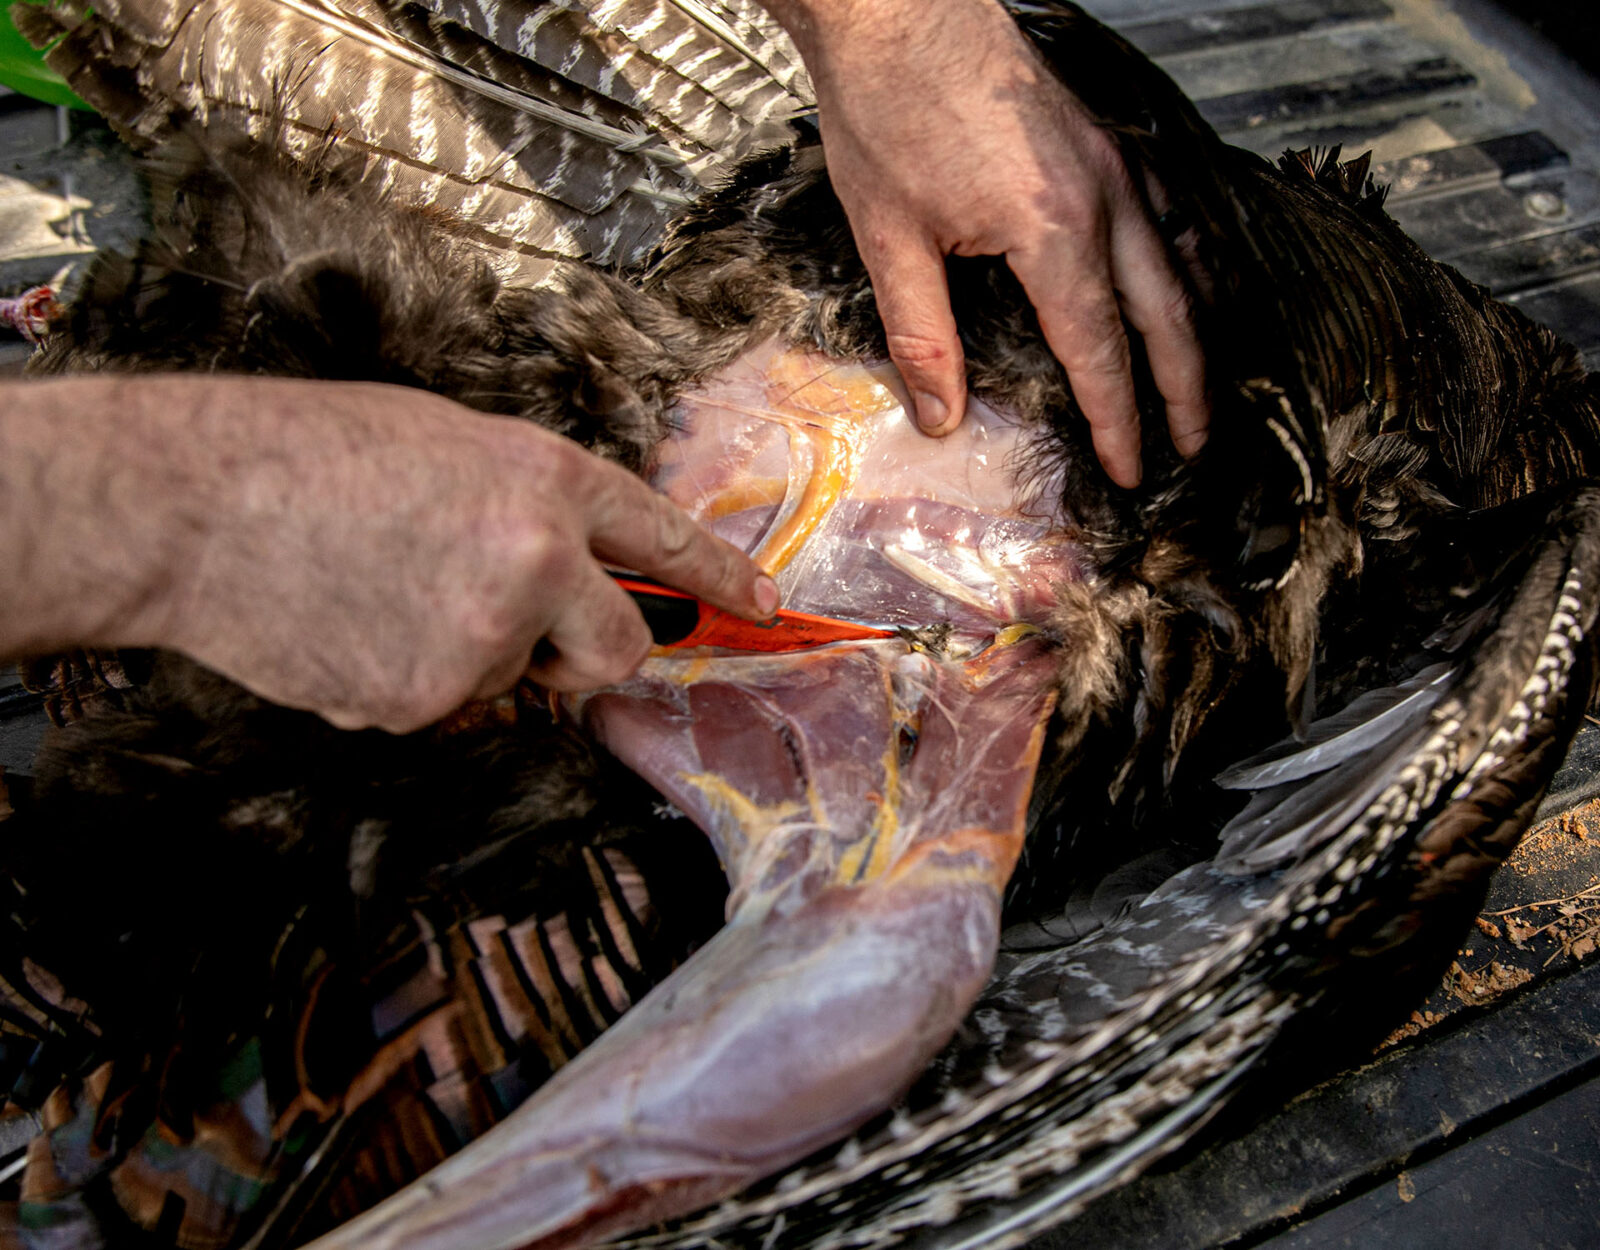
Step 9: Separate the Hip Joint and Cut to Remove
Using your hands, press downward on the leg until you feel the hip joint dislocate. Use your knife to cut through the separated hip joint and remove your thigh. Repeat the previous three steps on the other leg.
It’s that simple. In nine short steps, we’ve gone from a bird on the ground to several pounds of meat. And remember, this process only gets easier and faster every time you clean a bird. Now that you’re prepared to process your first bird, it’s time to take to the field and harvest it.