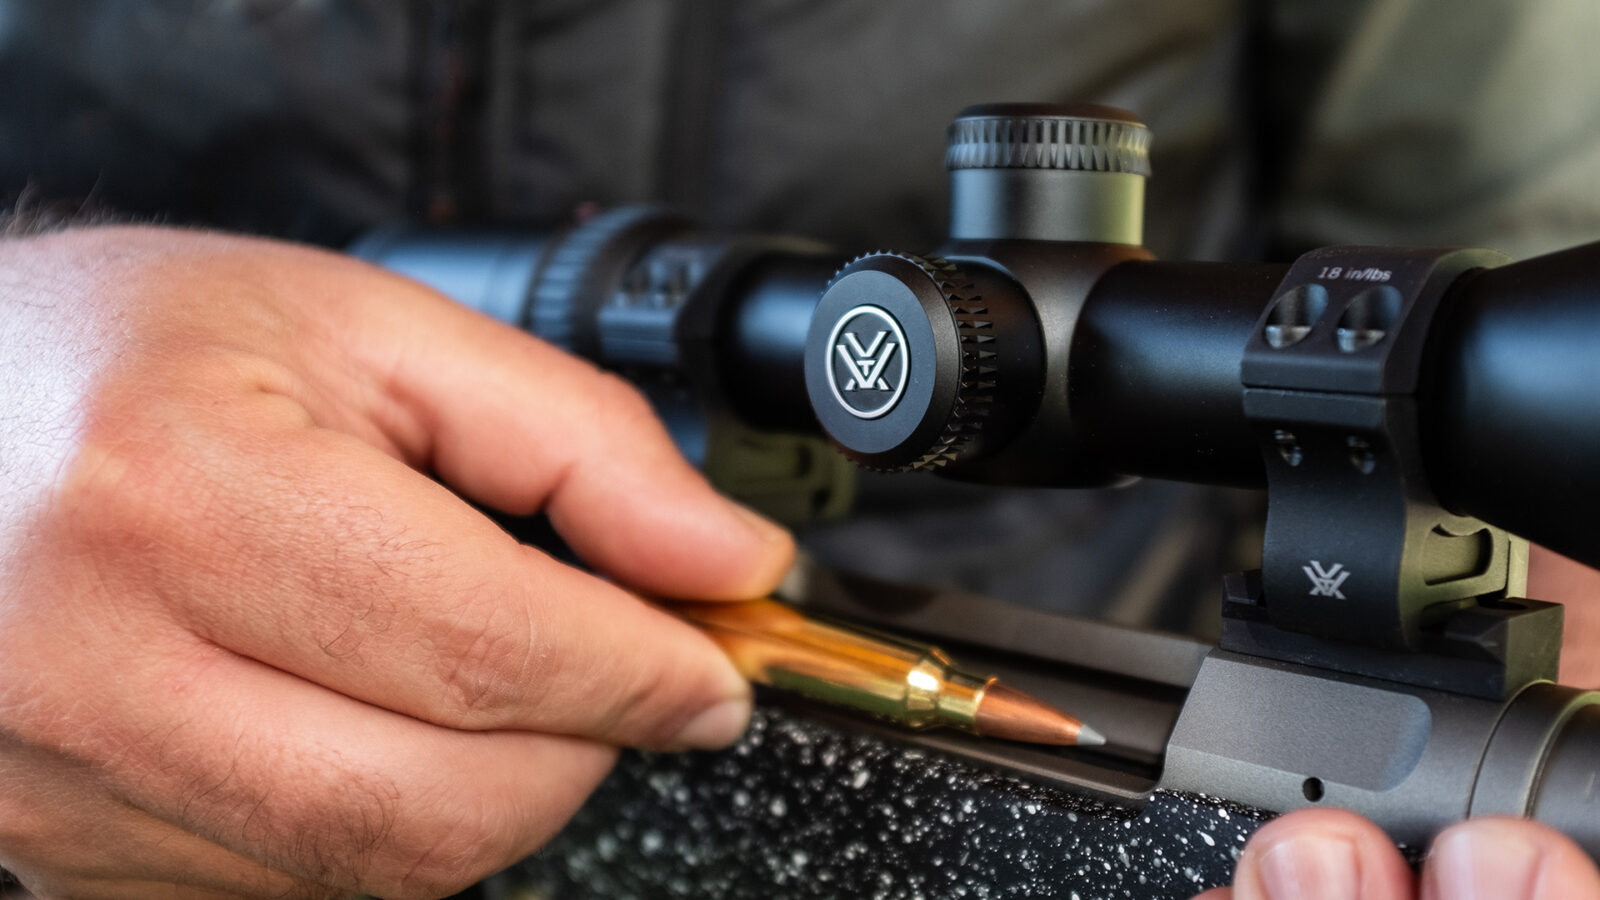
Whether you’ve recently upgraded your rifle’s optics or purchased a firearm that came with a scope, there’s a simple yet necessary process for how to sight in a rifle. Follow this step-by-step guide and you’ll have the confidence to pull the trigger by your next hunting trip.
Elevate Your Rifle Game
We’ve partnered with Vortex Optics and Seekins Precision to offer a comprehensive curriculum for Western Big Game and Whitetail rifle shooters. Free for Elite members.
Parts of a Riflescope
Before you begin adjusting your new riflescope it’s important to understand what each part is and how it can affect your shot placement. In general, most riflescopes for hunting have the same basic features, which include the ability to adjust magnification and account for elevation and windage. Premium or special-use scopes may have other features, such as parallax adjustments, illuminated reticles, or red dots, but below is the basic anatomy of a riflescope:
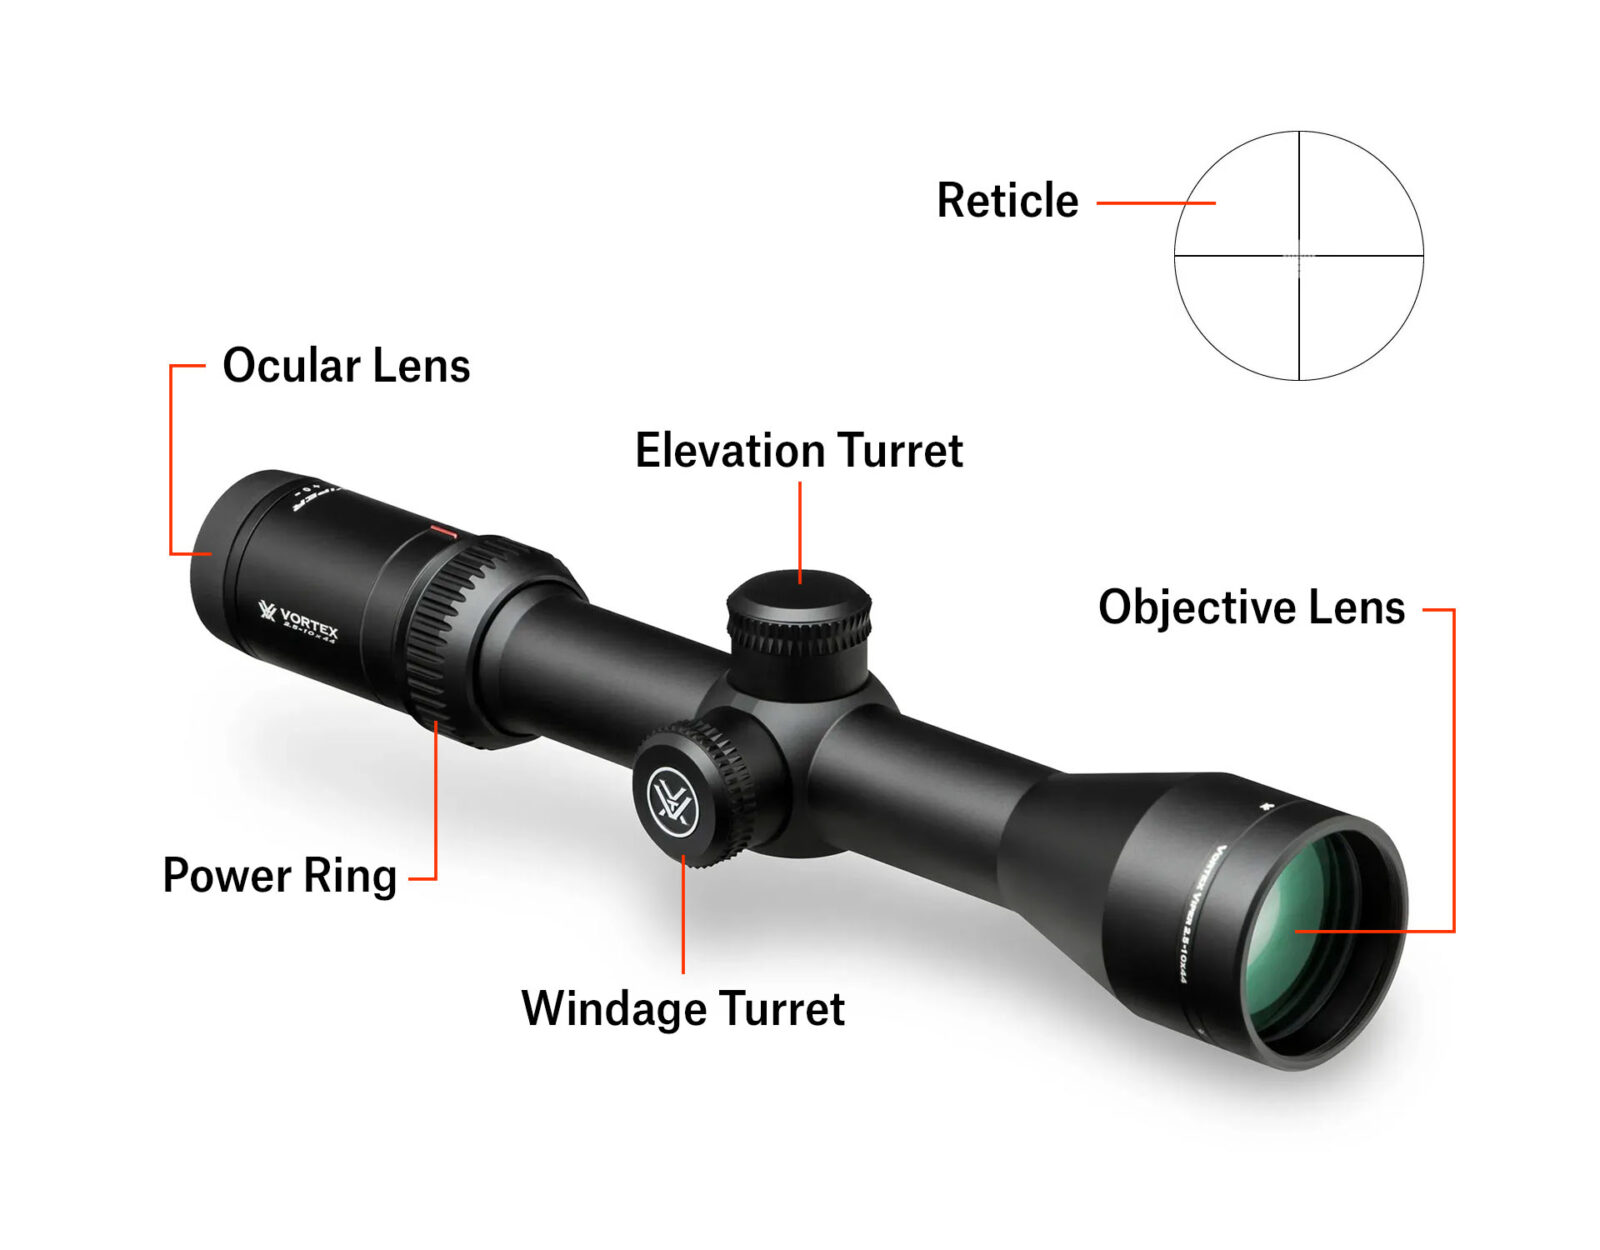
Objective Lens
The larger end of your riflescope, the one that is closest to the end of your barrel and subsequently the object at which you aim, is the objective lens. It is the part that collects ambient light and brings it and the target into the scope. Logically, the larger the objective lens the more light it can collect and the brighter and clearer your target will be. The size of the objective lens can be found following the scope’s name. Take the Vortex Viper HS 4-16×50. The “50” here means the objective lens’ diameter is 50 millimeters. The “4-16” refers to the scope’s magnification, but more on that shortly.
Generally speaking, larger objective lenses also make for more expensive riflescopes. Secondly, lenses are made of glass and higher quality glass makes for more crisp images, but it also adds to the price of the scope.
Ocular Lens
At the other end of the riflescope, the lens nearest your eye is the ocular lens. This lens is what takes the light gathered by the objective lens, focuses it, and then presents the target image to the eye of the shooter.
Power Ring
Typically set near the ocular lens end of the scope is an adjustable power ring (also called a magnification ring or focus ring). This ring is what adjusts the magnification of your riflescope. If you have a variable power scope, like the Vortex Diamondback 3.5-10×50 for instance, that scope’s magnification can be adjusted from 3.5 to 10x magnification, meaning the target can appear between 3.5 and 10 times closer to the eye than it actually is. The power ring is adjusted by rotating it in a clockwise or counter-clockwise direction according to the magnification level you desire.
Reticle
The reticle is often referred to as the scope’s crosshairs, though crosshairs is technically a type of reticle. The reticle the defined lines or dots inside the eyepiece of the riflescope, visible by looking through the ocular lens. It’s what the shooter uses to aim at the target. Some of the most popular reticle designs or shapes used for hunting or target shooting include the Duplex, Dot, SPR, BDC, Mil-Dot, or TMR, though there are many others.
Turrets
There are commonly two turrets on a riflescope. The one on the top of the scope adjusts for elevation (up/down), and the one on the side adjusts for windage (left/right). If your scope has a third turret on the side opposite of the windage turret, that is used for parallax adjustments. It’s beyond the scope of this article to explain parallax adjustments, as most common hunting scopes have a preset parallax and if you bought a scope with this turret you will likely already have the knowledge you need for sighting in your rifle.
Turrets are covered by caps that will need to be removed, commonly by unscrewing them. Then you will find the dial that can be turned clockwise or counterclockwise to make elevation and/or windage adjustments. We’ll cover how to make those adjustments shortly.
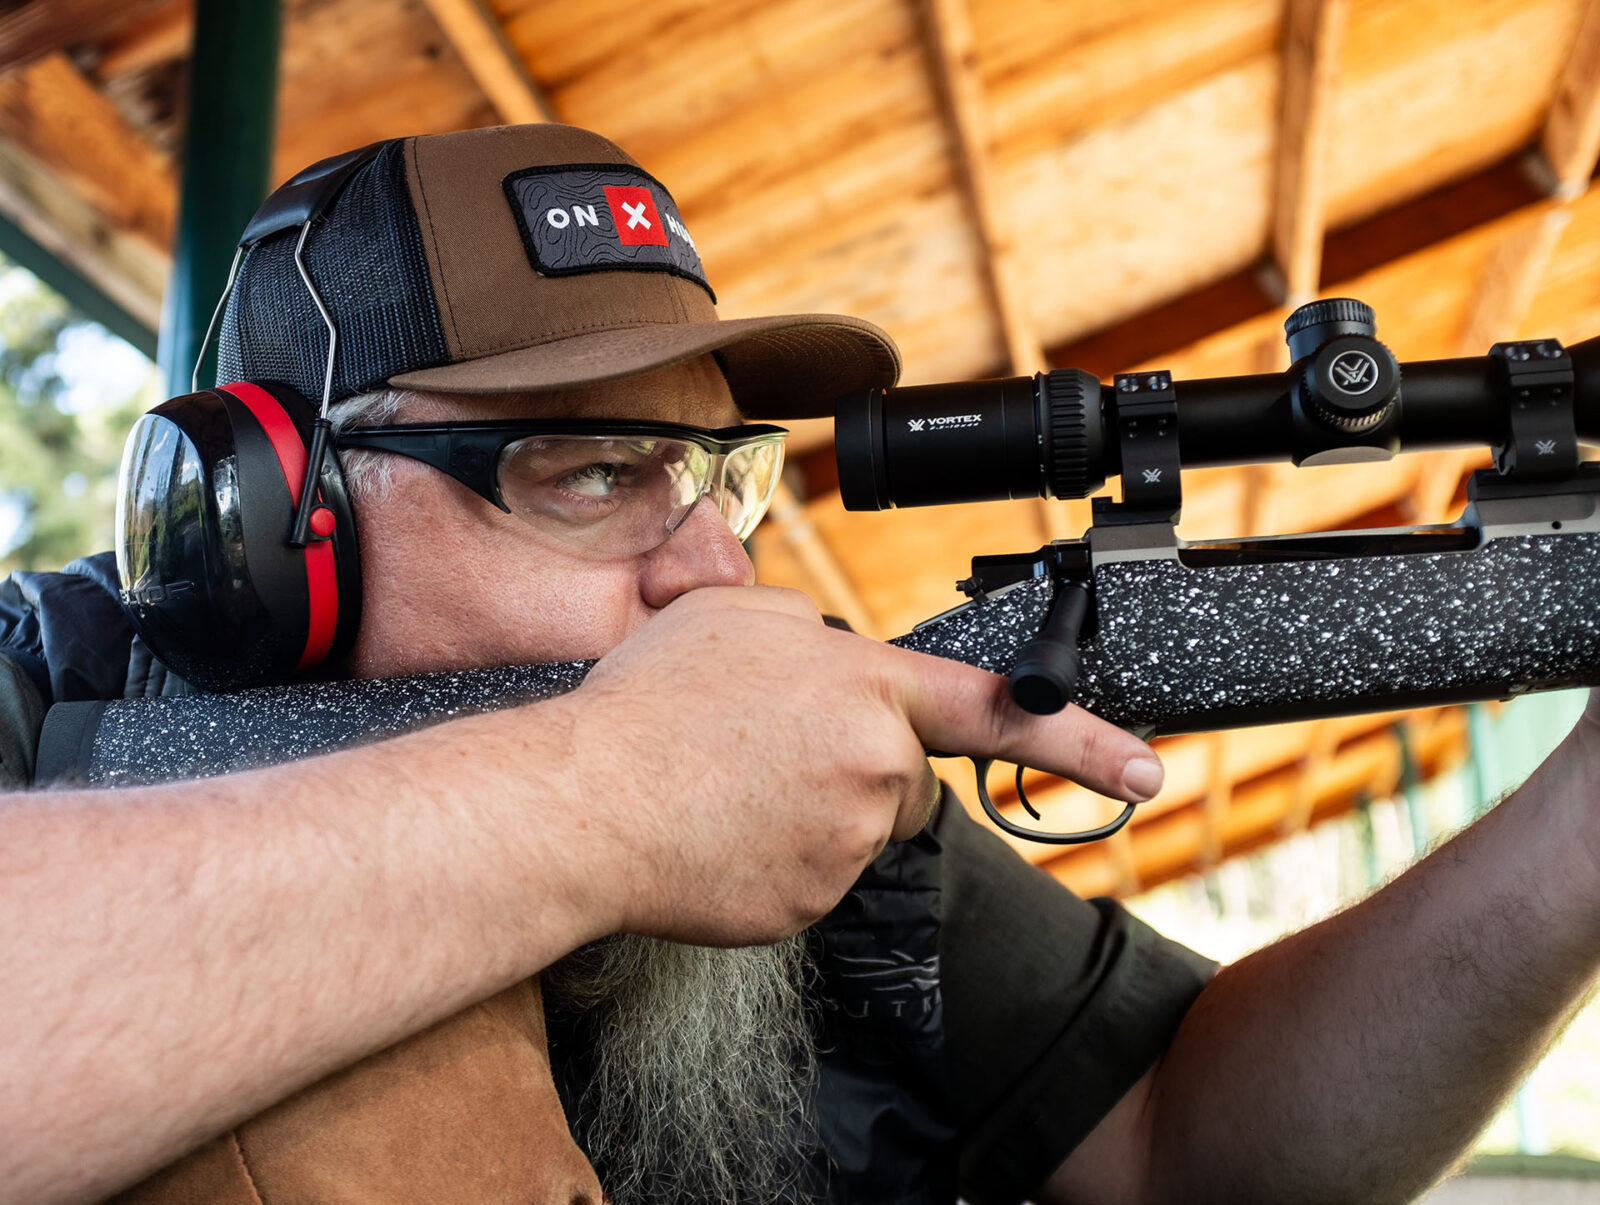
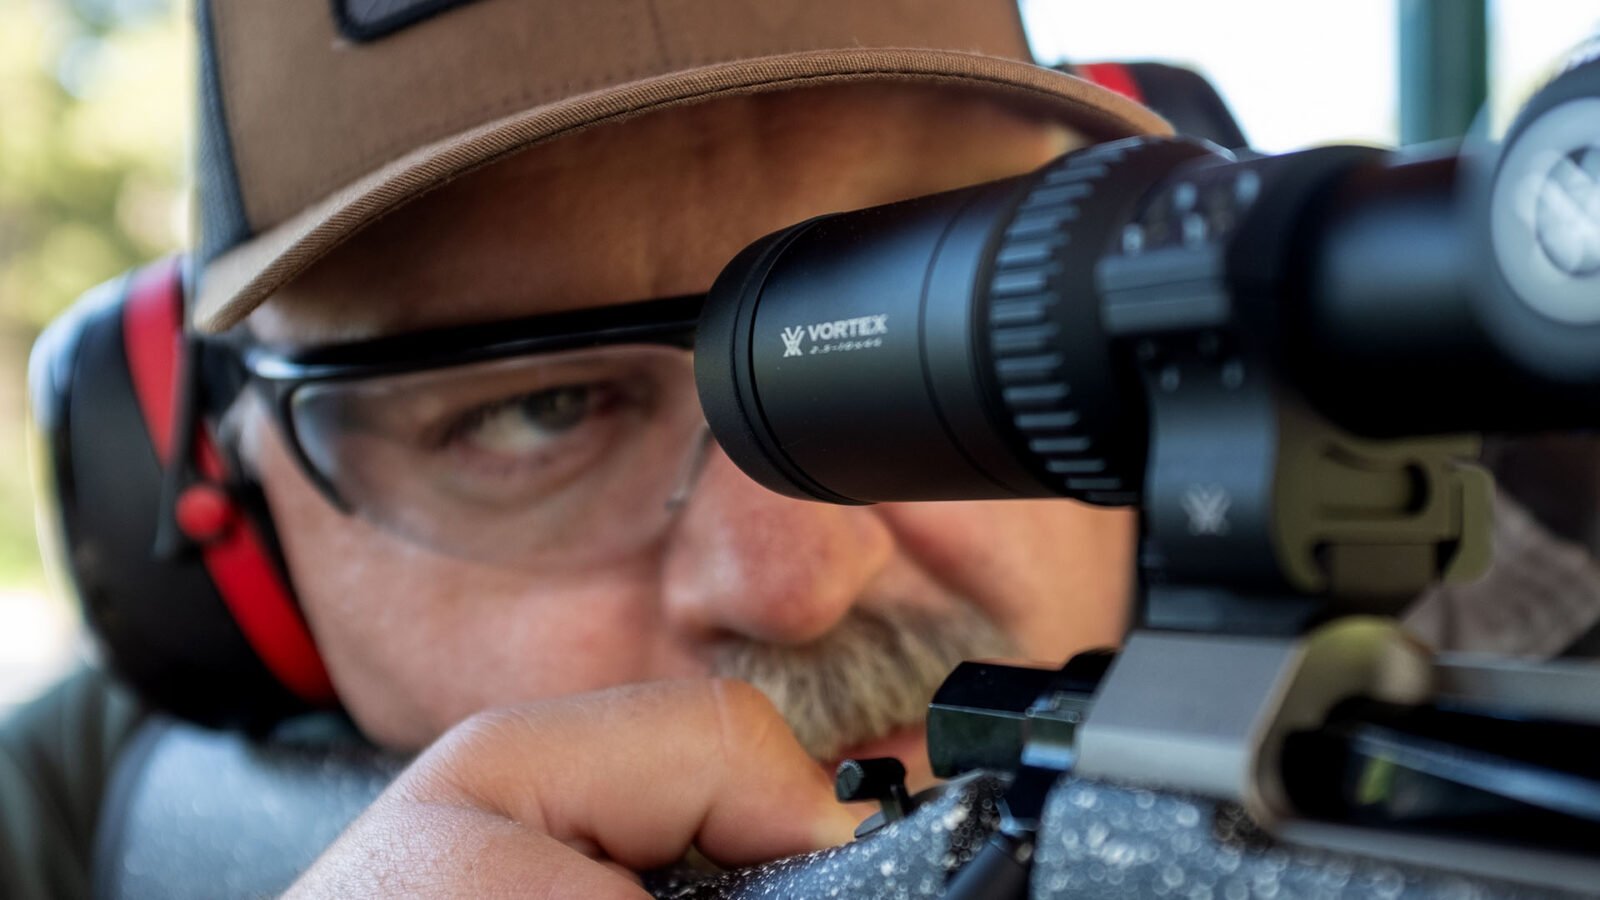
Step-By-Step Guide To Sighting in a Rifle
The first step to sighting in a rifle is to ensure it has been properly mounted and bore-sighted. Often this is done by your local gunsmith or at the place where you purchased the scope. New firearms that come with scopes already mounted “should” have those scopes already bore-sighted at the factory, but if possible it’s worth saving extra rounds of ammunition by getting your scope checked by your local professional.
The overall goal for the sight-in procedure is to make sure you’re shooting “on paper” at 100 yards. Being “on paper” means your shots are hitting your target so you can calculate the adjustments needed to hit the bullseye with subsequent shots. If you’re not on paper at 100 yards and your scope was bore-sighted then you may need to move your target closer, say 50 yards or even 25 yards, so you know in which direction your shots are off.
For the sake of ease, let’s say you’re shooting on paper at 100 yards. Here’s how we recommend sighting in your rifle:
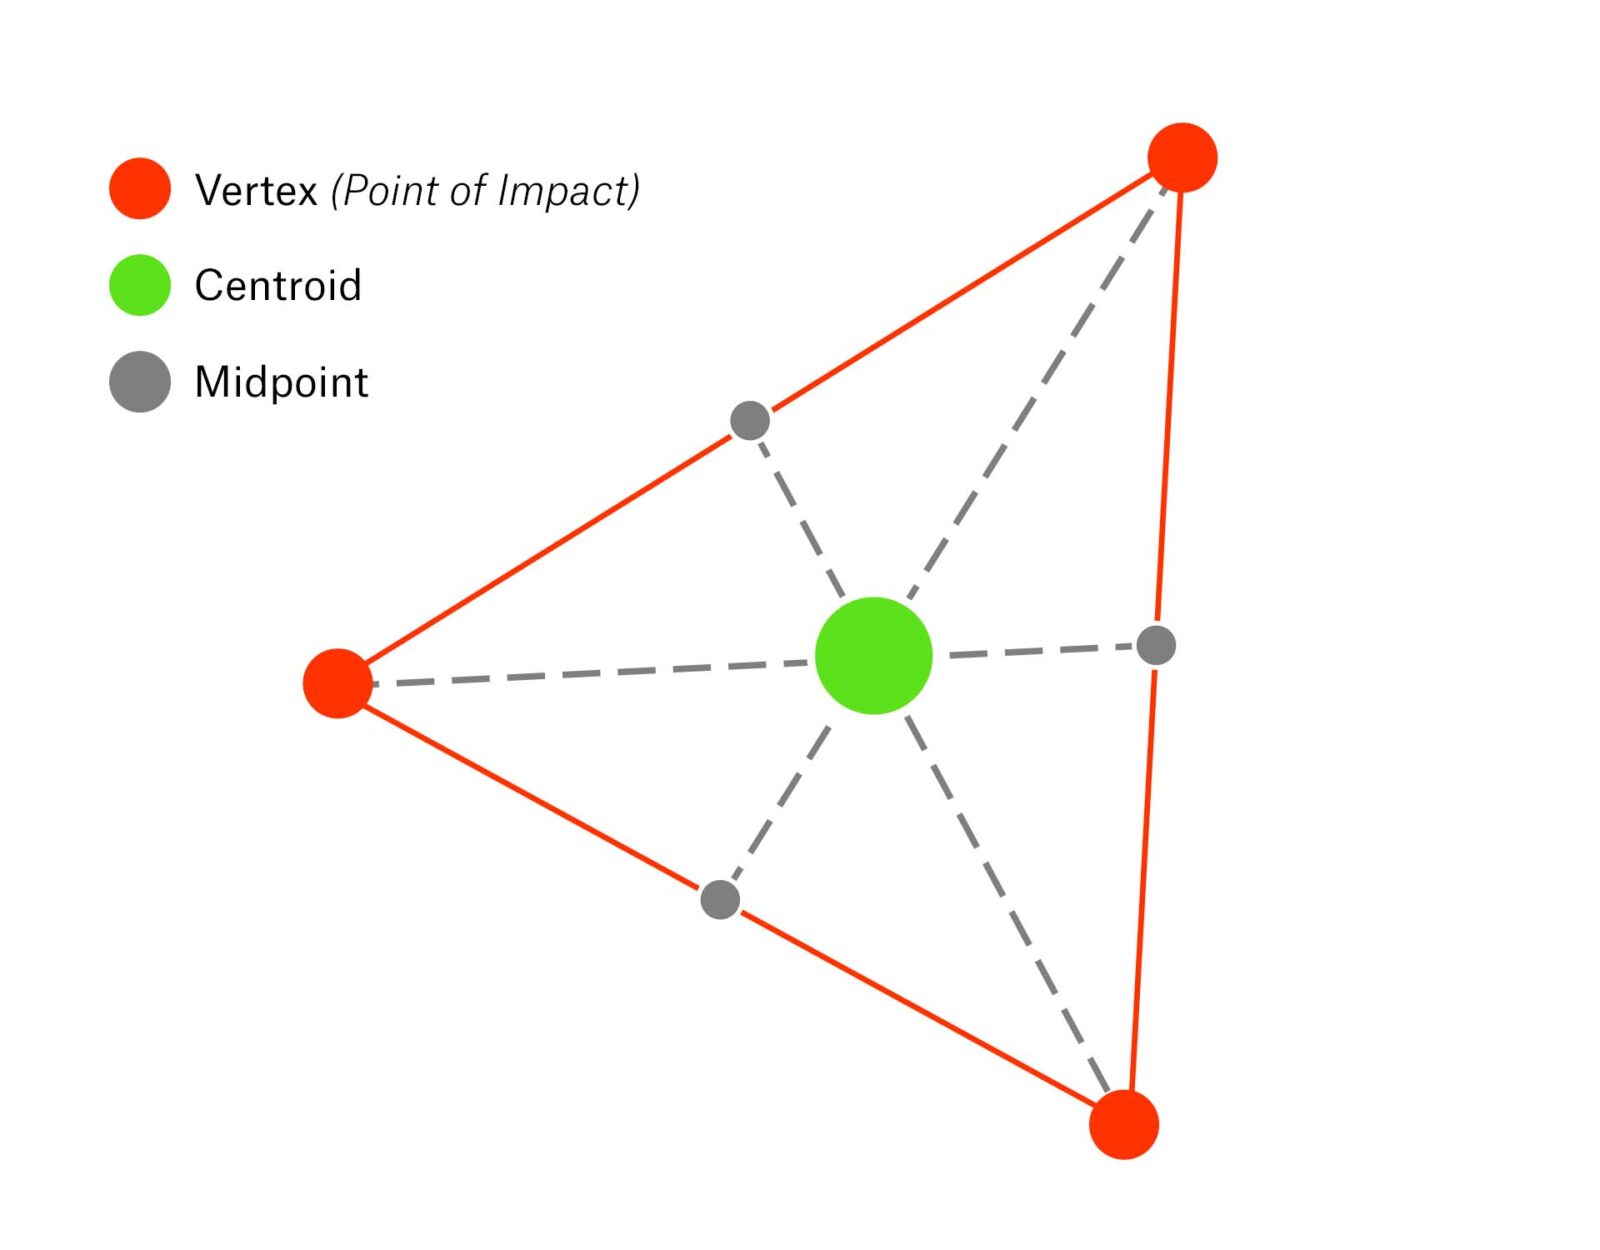
Step 1: After your exploratory paper-check shot, plan on shooting in groups of three. With your rifle steadied, fire off three shots, taking as much time as you need between shots. If you pull a shot and know it, take another shot so your grouping is as tight and accurate as possible.
Step 2: Examine your shot group. Your three shots will create a triangle. You’ll want to find the centroid of the triangle by seeing where its medians intersect. If it’s been too long since your last geometry class, take a look at the image below to see how to find the center. It’s as simple as drawing straight lines from the vertex of each triangle point to the midpoint of the opposite side. Do this for all three vertices and the point at which all three medians intersect is the centroid.
Step 3: Calculate the needed MOA adjustments from the shot group’s centroid to the center of the target. MOA stands for “Minute of Angle,” and it’s an angular measurement that represents 1/60th of a degree. At 100 yards, one MOA equals 1”. If your shot group’s center was three inches to the right of the bullseye and four inches high, you will need to adjust three MOA to the left and four MOA down.
Step 4: Adjust your MOA on the scope. Given that you are shooting at 100 yards and we know that 1 MOA equals 1” at 100 yards it’s easy to calculate the number of MOA adjustments to make based on the example above. MOA adjustments are made by turning the elevation and/or windage turrets on the rifle scope. With the turret caps removed, the dials are turned as clicks in the direction adjustments need to be made. However, it is extremely important to note how many clicks equal 1 MOA on the turrets. The most common ratio on riflescopes is that one click equals ¼ MOA, and since 1 MOA equals 1” at 100 yards, you will need to turn the dial four clicks to move the point of aim 1”.
On each turret dial it will tell you the direction in which to turn to move the point of aim. If your shot group was right of the bullseye you will need to turn the turret to move the MOA left. If your shot group was above the bullseye you will need to turn the turret in the direction that moves the MOA down.
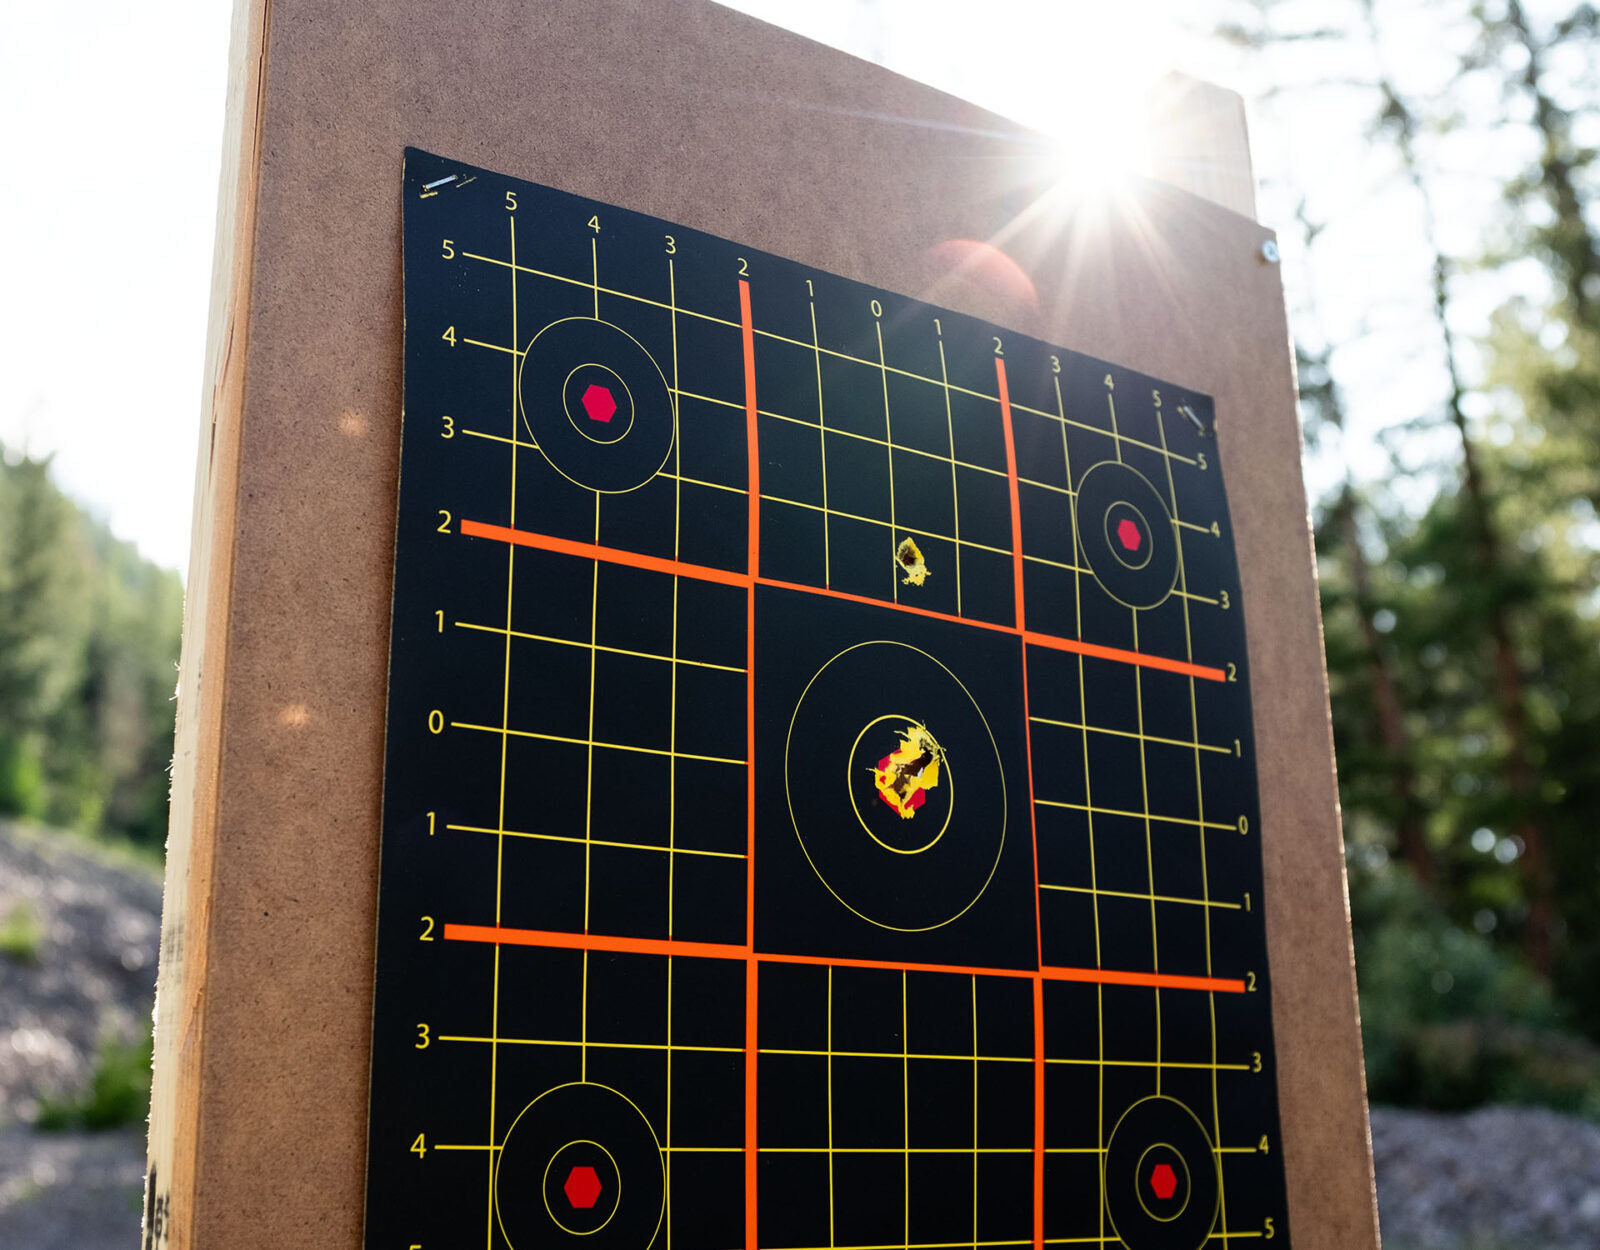
Step 5: Take three more shots. If you’re not dialed here and shooting the preferred 1” grouping at 100 yards (the standard definition of an accurate hunting rifle), repeat steps 3 and 4 until you get your desired results. If your shots keep straying, and you are sure you are shooting your firearm accurately, take it in to see if there was an issue with the mounting or scope itself.
Watch Vortex Sight in a Rifle
If you’d like to watch the steps play out from the professionals at Vortex Optics, check out these videos below. They’re part of the new onX Elite benefit we’re offering with Vortex Optics and Seekins Precision on how to improve your shooting skills. Check it out!
Key Takeaways and Shooting Accurately
Riflescopes are among the class of hunting gear for which you get what you pay for, and for a quality hunting scope, you can expect to pay between a few hundred to a couple thousand dollars for a good to excellent scope. For scopes particularly, the value is in the glass. The better the glass the better and brighter the image, and the better the image the better chance at making an accurate shot.
That said, bad shots happen most often because of the shooter, not the gear. Like with most things, practice makes perfect.
Elite Shooting Course
Hone your technique and capitalize on your shot opportunities in the field with a free rifle course, crafted exclusively for onX Hunt Elite Members.