If you have a Premium Two-State or Elite Membership, you know how much map data is at your fingertips. When managing data across multiple states (Elite Members have access to all 50 states plus Canada), understanding how to add and remove states in the onX Hunt App can help you focus on the task at hand.
Read on to learn how to add, remove, and change states in the onX Hunt App.
How To Add a State
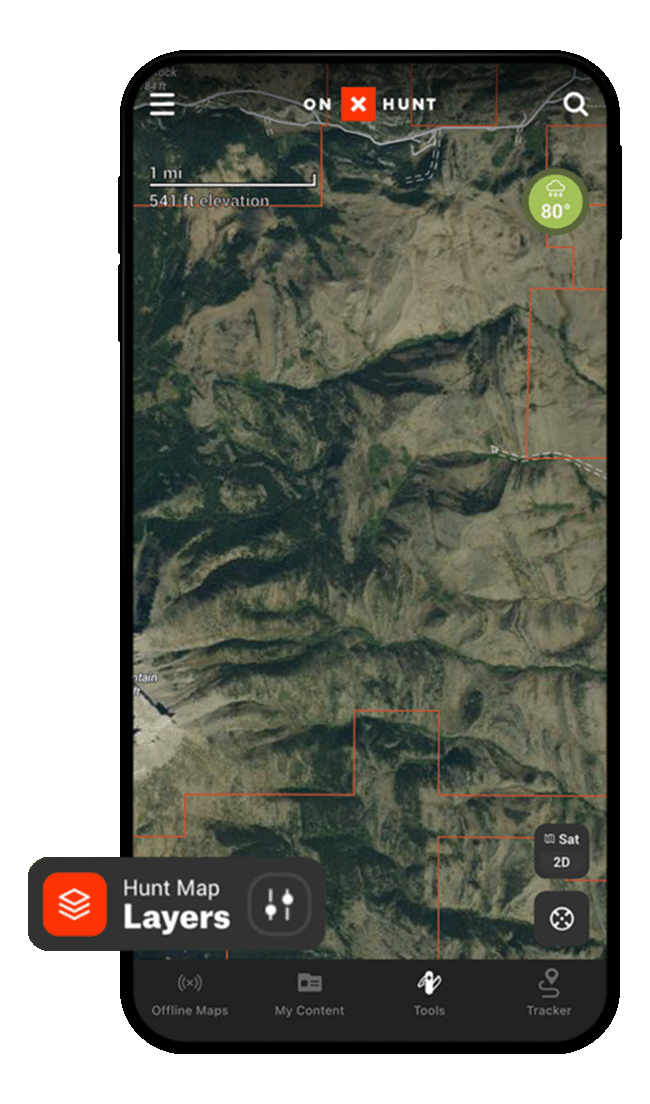
1.) Tap the Hunt Map Layers button in the bottom-left corner of the main screen. This opens the menu that allows you to customize your map.
2.) Scroll down until you see “Turn on State,” and then toggle on the state(s) you need. We recommend keeping the number of states turned on at any given time to a minimum so you don’t bog down the App. Generally, we’ll keep one or two states on at a time.
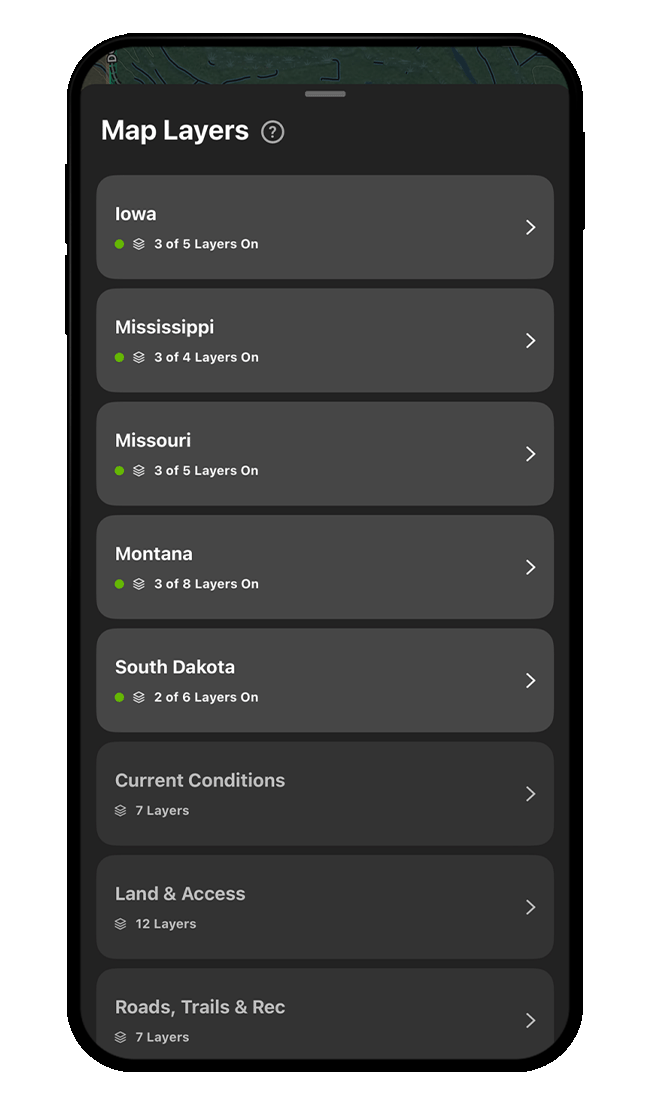
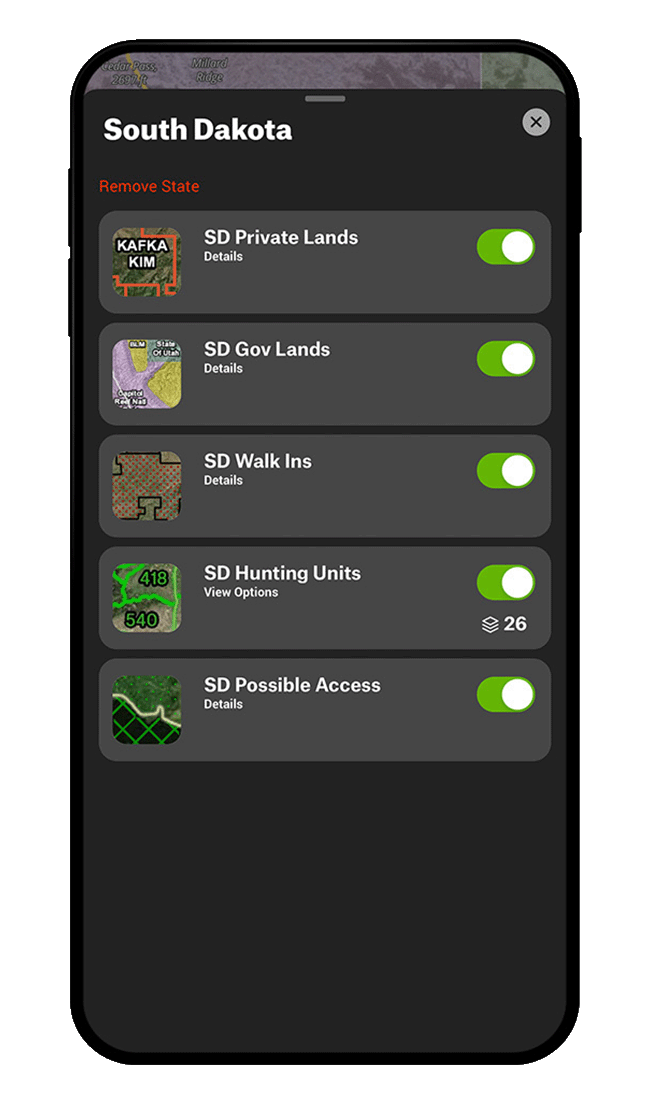
3.) Once you add a state, it will appear at the top of your Map Layers list, and the state’s Private Lands, Government Lands, and Hunting Units Map Layers will be turned on and displayed automatically on your map. Tap into any state in your Map Layers list to manage state-specific Map Layers.
How To Remove a State
It’s generally a good idea to disable state Map Layers you don’t currently need. If you ever notice your Hunt App running slowly, follow the steps below to disable as many states as possible.
1.) Tap the Hunt Map Layers button.
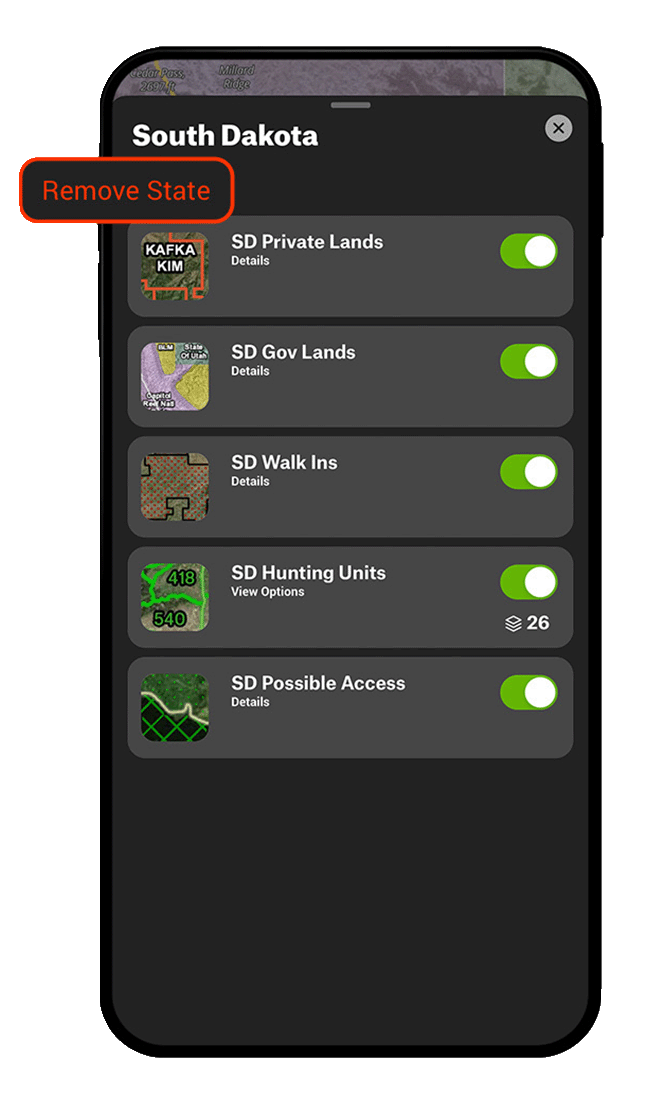
2.) Tap the state you want to remove.
3.) Tap “Remove State.” A pop-up will appear reminding you that you can easily turn the state back on any time. Tap “Remove” to confirm you’d like to disable the state.
Managing Other Map Layers
You can add and remove other Map Layers the same way you add and remove state-specific Map Layers. Tap on “Hunt Map Layers,” tap into the Map Layer category you want to change, and toggle on or off as many Map Layers as you need.
Managing State-Specific Map Layers Across Devices
If you use onX Hunt on multiple devices, your settings on one device will not automatically transfer to the other, so make sure to follow the steps above for all the devices you’re using whenever necessary.
State-Specific Map Layers and Map Markups
Your map markups (e.g. Waypoints, Lines, Area Shapes, Tracks, and Routes) are not connected to any Map Layers, so your map markups will still be visible even if they’re located in a state that you’ve disabled. If you need to hide or unhide map markups, you can do so from the My Content Menu.
Map Layers and E-Scouting
If you’re planning an out-of-state trip, you don’t need to wait until you’re physically in the state to view its Map Layers. By following the steps above, Elite Members can view information for any state whenever needed. By default, the App will display your physical location, but by zooming out, moving the map, and zooming in on the area you’re interested in, you can start scouting as soon as your Elite Membership begins.
If you have access to a desktop or laptop computer, the best way to scout is by using the onX Web Map. The layout is a bit different, but the Web Map’s Hunt Map Layers menu is organized the same way as the Hunt App, so you can do all your planning on a larger screen while you’re waiting for your season to start.