ATES–Using and Understanding The ‘Avalanche Terrain Exposure Scale’
Avalanches claim dozens of lives across North America and Europe every year. The majority of these are recreational snowsports enthusiasts like climbers, skiers, snowboarders, and snowmobilers. In 2003, two high-profile accidents in Canada, each involving multiple fatalities, shocked the public and also provoked serious soul-searching within the professional community.
The second of these accidents involved a group of school kids from Calgary on a class outing in Glacier National Park on Rogers Pass, British Columbia. A natural avalanche released on the opposite side of the valley from where the kids sat eating lunch on a beautiful day. Large and powerful, the avalanche crossed the valley bottom and struck the group, including 17 kids, seven of whom died.
Any avalanche fatality means tragedy, but seven deceased children was an entirely different horror. The accident demanded a reexamination of how avalanche risks were evaluated and communicated to both professionals and recreationalists.
The Aftermath: Avalanche Terrain Exposure Scale (ATES)
A comprehensive investigation of the kids’ deaths ensued, with the coroner’s report suggesting “Parks Canada should complete a snow avalanche risk rating for each ski trail and slope commonly used by the public.”
The accident had taken place within the bounds of a national park, therefore Parks Canada (the Canadian analogue to the U.S. National Park Service) was the responsible land manager. They took the coroner’s suggestion and convened a working group to adapt the suggestion and turn it into part of their avalanche mitigation program.
North America and Europe had already adopted a five-level danger scale by the early 1990s and though there were differences in how each country applied the five levels, there was general similarity in assigning the avalanche danger rating each day.
Most of us are familiar with this system, and it was formally standardized between the U.S., Canada, and New Zealand in 2010-11 as the North American Danger Rating Scale. The danger scale has color coding (green-yellow-orange-red-black), as well as specified levels—low (1), moderate (2), considerable (3), high (4), and extreme (5).
Just as today, forecasters in both the U.S. and Canada indeed gave a hazard rating each day during the winter, but Parks Canada wanted to go further and give users, both professional and recreational, another tool to assess risk. That is, analyzing the terrain itself—how inherently prone to avalanche hazard is the trip you’re taking? Put another way, how exposed to avalanches will you be during your outing or trip?
So, in addition to a danger rating, ATES gives a user a sense of how exposed to potential avalanches they’ll be. It helps answer the most fundamental question—am I in, or out, of avalanche terrain? And if I’m traveling in or around avalanche terrain, how easy is it for me to limit my exposure?
Taken together—knowing the danger on the day and how exposed one’s proposed trip is—gives anyone, professional or recreationalist, a very good planning tool to reduce their overall risk.
How ATES Works
Parks Canada developed ATES during 2003 and its first version debuted in August 2004. It had actually become two parallel models: one professional or “technical,” the other geared towards recreationalists.
“Both models say the same thing, delivered in different languages,” writes Grant Statham, Ian Tomm, and Bruce McMahon, the principal architects of ATES, in their white paper, “The Avalanche Terrain Exposure Scale,” delivered at the 2006 International Snow Science Workshop (ISSW).
ATES seeks to classify terrain based on identifiable characteristics as “simple,” “challenging,” or “complex.” One criterion, for example, is the opportunity for avoiding avalanche paths—having fewer options to avoid exposure bumps the rating from “simple” to “challenging,” or even “complex.”
Notice, too, the language. Statham et al. intentionally wanted to give users an idea not just of a particular ski run, but of a global sense of what it might entail to recreate in that zone or drainage. Is the approach threatened by avalanche paths? The exit? So they discussed “trips,” rather than “runs.”
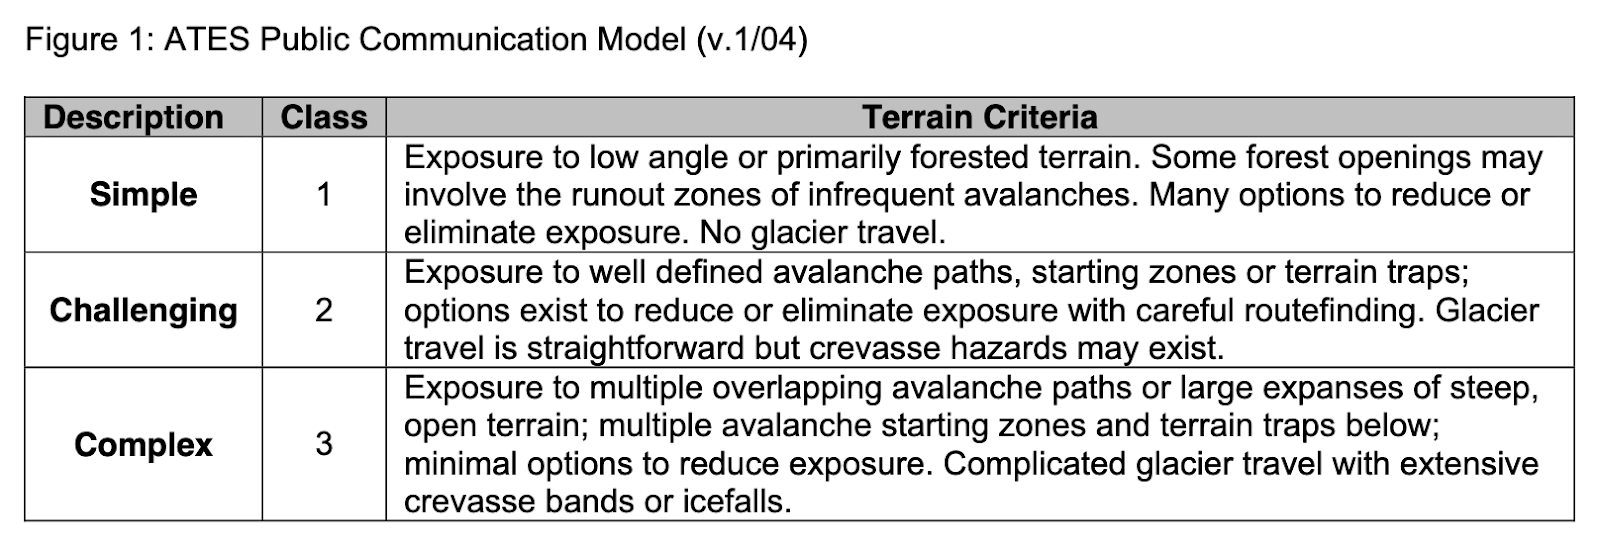
The first iteration of ATES used green-blue-black categories to classify terrain, but that was eventually abandoned for the descriptors above: simple, challenging, and complex. If you read the terrain criteria, you get a good sense of the different classes of terrain.
Already you probably have some of your home ski zone popping into your head. Denver folks might be thinking of Emerald Lake and the drainage with the Dragontail and Dead Elk Couloirs in it. If you’re based in Seattle, how about Chair Peak and the Pineapple Pass drainages? Out of Salt Lake, what does Superior sound like to you, reading the terrain criteria above?
When ATES first arrived in the U.S., many avalanche courses spent a good chunk of their time debating what trip option qualified as which class—I was teaching a lot of courses then, from 2010 on. Many of us argued passionately about specific ski zones we knew and in the end getting the actual classification correct wasn’t nearly as productive as just identifying the terrain criteria, looking at images or observing in the field, and then analyzing the avalanche hazard through those lenses.
Avalanche Exposure vs. Likelihood
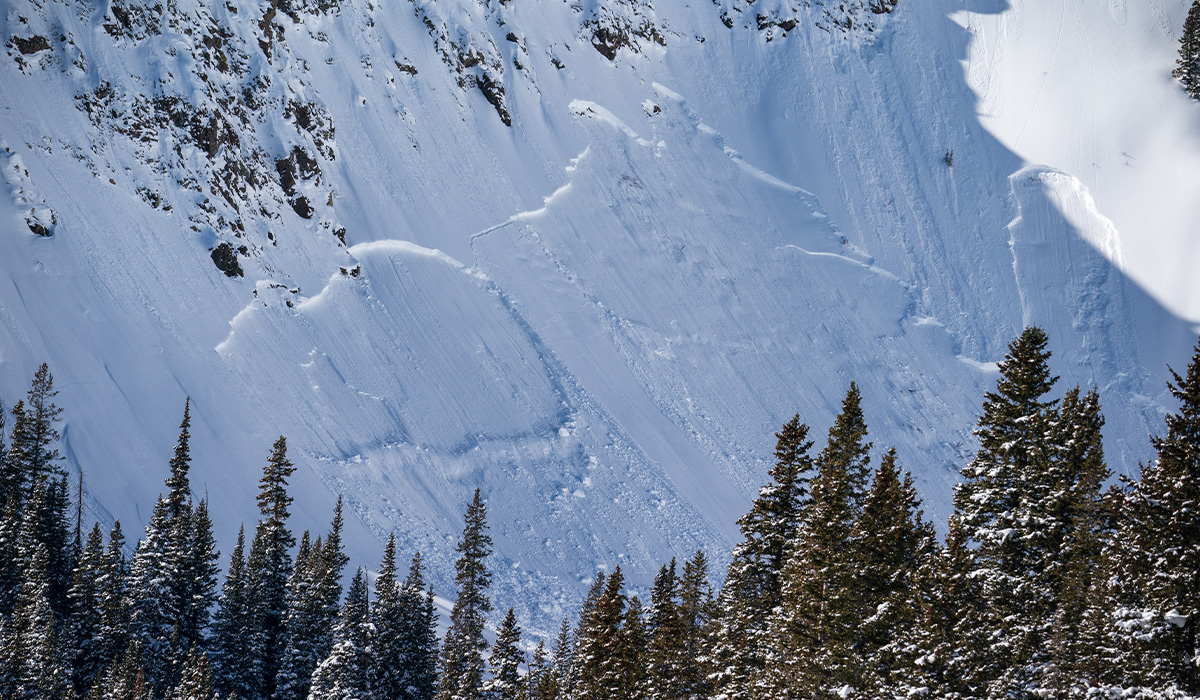
Too often, backcountry practitioners—pros, recreationalists, skiers, snowmobilers, and others—focus too much on likelihood; that is, what is the likelihood a slope will slide?
ATES, on the other hand, doesn’t take likelihood into account. The ATES rating for a zone or drainage doesn’t change based upon the danger rating or avalanche problem of the day. ATES focuses entirely on exposure: if an avalanche were to occur, am I exposed to it or not?
Now maybe you see how powerful ATES, when combined with your local avalanche forecast, can be for trip planning. The ATES rating of a drainage doesn’t change based on snowpack, problem, or danger rating—it’s merely asking you to identify how exposed to avalanches you will be in that area.
By having an idea of simple, challenging, or complex in the back of your mind, you can make an informed decision about avoiding certain terrain on a day with, say, considerable danger. Your thought process might be, “The danger is rated considerable, which means natural avalanches are possible, and human-triggered avalanches are likely. Let’s stay in simple terrain today, so we are on lower-angled slopes with many options to reduce or eliminate our exposure.”
Skiing low-angle terrain reduces our exposure because lower-angle slopes are less prone to avalanches (provided you’re not connected to steeper slopes!). Options to reduce exposure mean we can easily skirt around avalanche runouts or avoid paths altogether. We haven’t made a prediction about the likelihood of encountering an avalanche. Rather, we’ve focused on reducing our risk by reducing our exposure to an avalanche.
Because curiosity killed the cat, I know you’re wondering about the professional scale. In a nutshell, it’s really just a more detailed version of the recreational one above, with more terrain criteria and a bit more direction in how to classify terrain. There’s no magic bullet or high-end snow science in there.
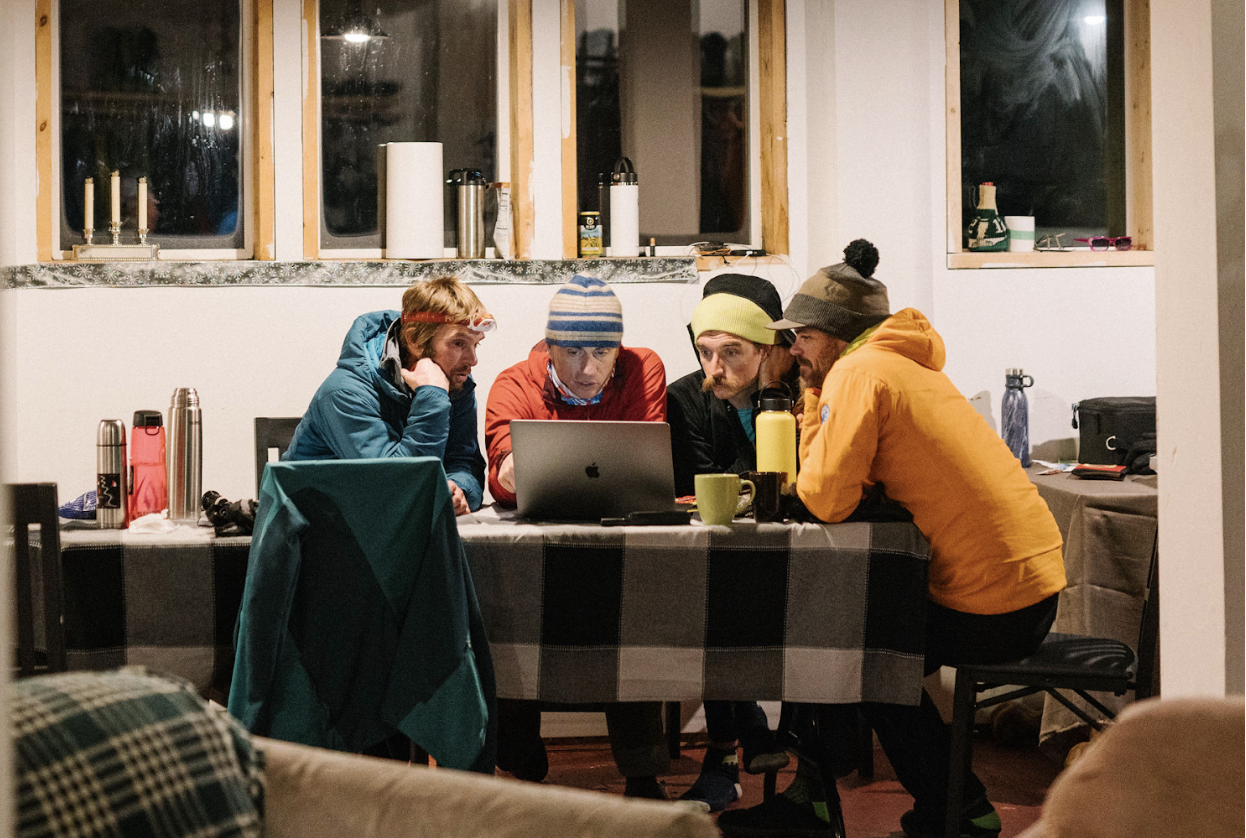
We’ll discuss how guidebooks and professionals classify terrain in a sec, but for a zone without a formal ATES rating, have a productive discussion with your teammates about giving an ATES score, but remember—it’s more about identifying the criteria and having the discussion than it is nailing the correct answer. If you can’t decide between simple and challenging, just call it challenging and identify why it is. Then ask yourself, do conditions warrant being in challenging terrain? If we have a lot of uncertainty in our team, the weather, the conditions, then sticking to simple terrain is probably a better call.
ATES Today
ATES gradually filtered into the rest of the North American scene and today you might see an ATES rating in guidebooks. Professionals in Canada use the term as easily as the danger rating on the day and it’s a standard part of their submissions to their professional avalanche product, the InfoEx.
In the U.S., guides, forecasters, and more advanced recreationalists are certainly hip to the term. Beacon Guidebooks, for example, gives most of its tours an ATES rating, which gives the user another effective tool with which to mitigate our hazard in the backcountry.
As I’m working on this blog, the folks at the Canadian Avalanche Association (CAA) are working on the latest version of ATES. Refinements have been steady, but I wouldn’t say they’ve dramatically changed ATES or how we use it since its inception. The biggest news is that the CAA will add a “0” or “no exposure” category to ATES in the future—it’s still a work in progress, I’m told.
We probably won’t see that 0 rating any time soon, though, but you can understand the motivation behind it. In places like Snoqualmie Pass near Seattle or Loveland Pass near Denver, you have enormous numbers of snow recreationalists, some of whom want no exposure to avalanche terrain whatsoever. Think mellow backcountry skiers, snowshoers, or families just looking to build a snowman with the kids and get out a bit. Users like this want trips or zones where they can hang without any training or worries about their loved ones. (Pro tip: all of our mothers want us to stay in 0 terrain.)
As we update guidebooks and new ones come out, expect to see an ATES rating with proposed tours—it’s certainly the professional standard in North America.
Using ATES in Practice
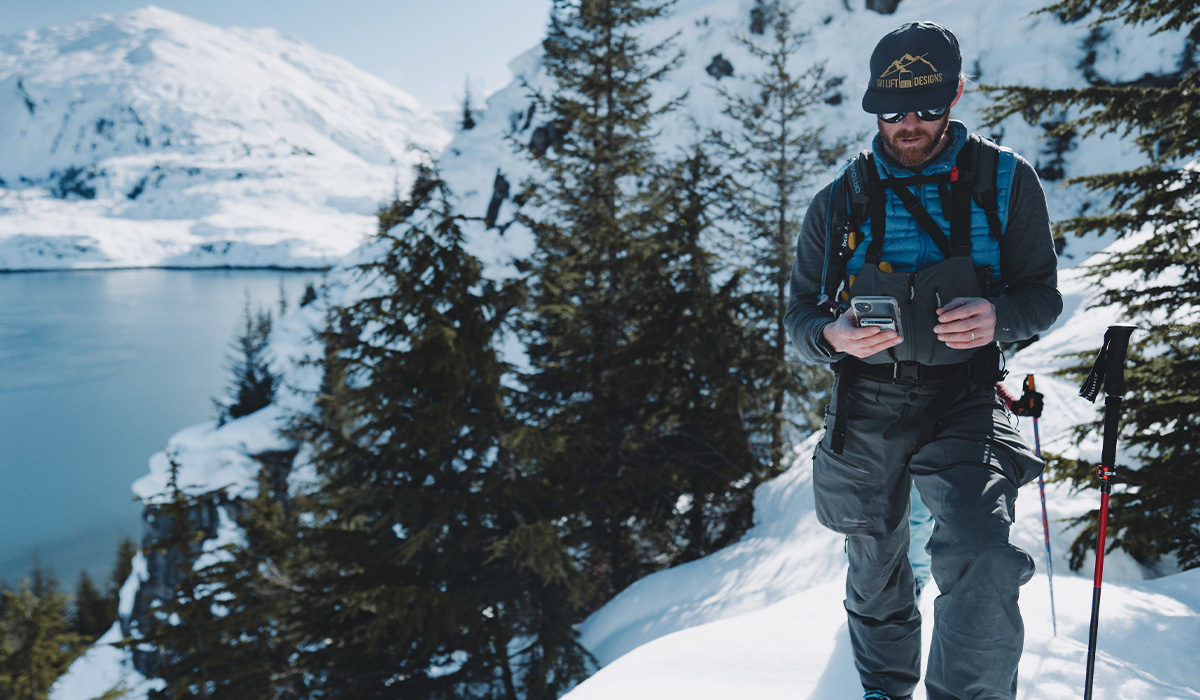
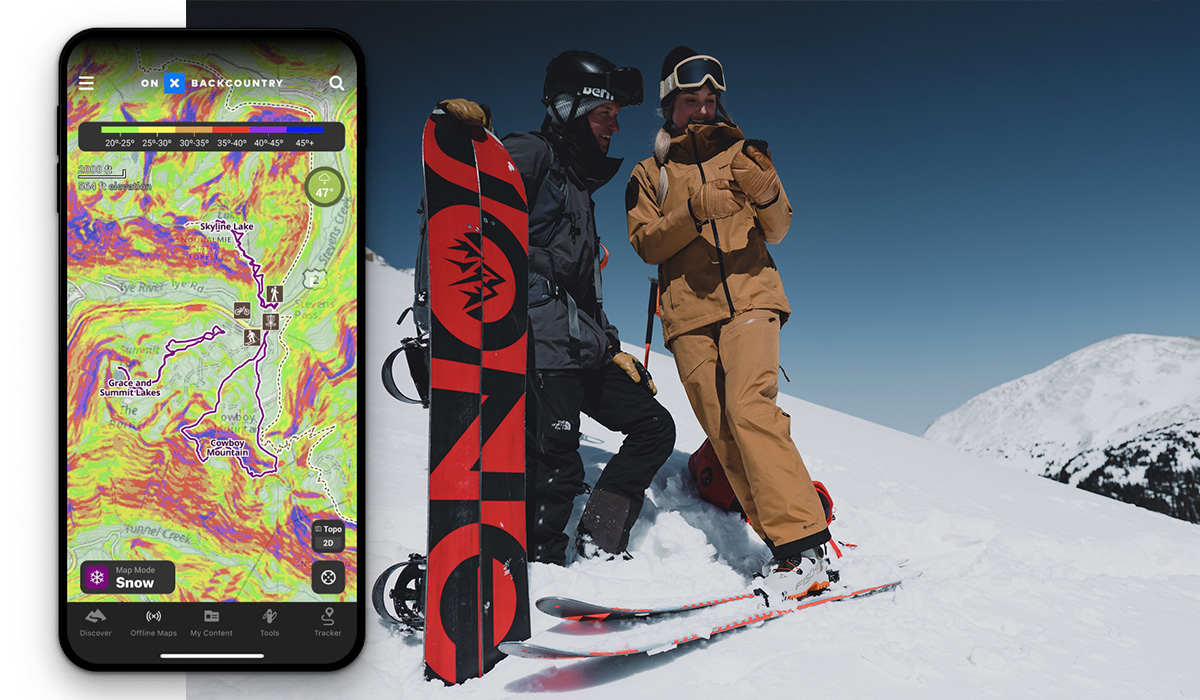
Maybe you’re already using ATES and you’re comfortable with it. Perhaps this is the first you’ve heard of it. Either way, let’s remember to keep our own skills tuned and dialed. Simply because a guidebook or website gives an ATES rating to a particular trip, it doesn’t mean that they’re necessarily right and we can turn off our brains or quit making our own observations. Becoming an expert at identifying avalanche terrain—in your mapping app, from a map and compass, and with your eyeballs—is absolutely essential to recreating on snow.
Your observations, in concert with ATES and the daily forecast from your local avalanche center, should give you a very good idea of where to tour and more importantly, where not to tour. Remember, ATES is best used as a tour planning device to identify where you don’t want to be on the day.
“Terrain coding” is a professional term from the Canadian heli industry and it simply means identifying what terrain is “open” for the day and what terrain is “closed.” Snow safety specialists at an operation or mountain guides will terrain code after reviewing the danger forecast, the weather, previous and current observations, and a run list of where they’re operating. It’s a great habit to get into—discussing with your teammates what terrain makes sense on the day, given the danger and conditions.
Incorporating terrain coding and ATES will make you a smarter, safer backcountry skier or snowboarder. Sure, it requires having a pretty good idea of your local terrain, but you could also put it into general terms like, “Today we’re going to avoid north-facing slopes steeper than 35 degrees or anywhere the wind has drifted the snow, and we’ll stick to simple terrain.” If you can’t recall what simple terrain is, according to the ATES, then take a photo of it, or print it and paste it in your notebook. Glance at it if you’re making a decision on terrain during your pre-trip meeting or in the field—it will help guide you and stick to terrain you’ve identified as lower hazard.
Conclusion
Keep your eyes peeled for ATES in your guidebooks. If you live in an area with less information, then remember to take terrain photos—label them, discuss with your teammates, and pore over your maps. Start building an idea of simpler, more challenging, and complex terrain. Remember, professionals spend a bunch of time ground-truthing ATES terrain when determining its classification, but you and your team can have productive discussions about terrain using the terrain criteria in the ATES chart above. Make it part of your pre-trip meeting and you’ll be a smarter, safer backcountry traveler.