Waypoints
Waypoints are customizable pins you can drop anywhere on your map to log notes and memories from your scouts and hunts. With nearly 100 icons and an array of colors, Waypoints keep you organized.
Waypoints Tutorial
Expand each block to learn how to use Waypoints.
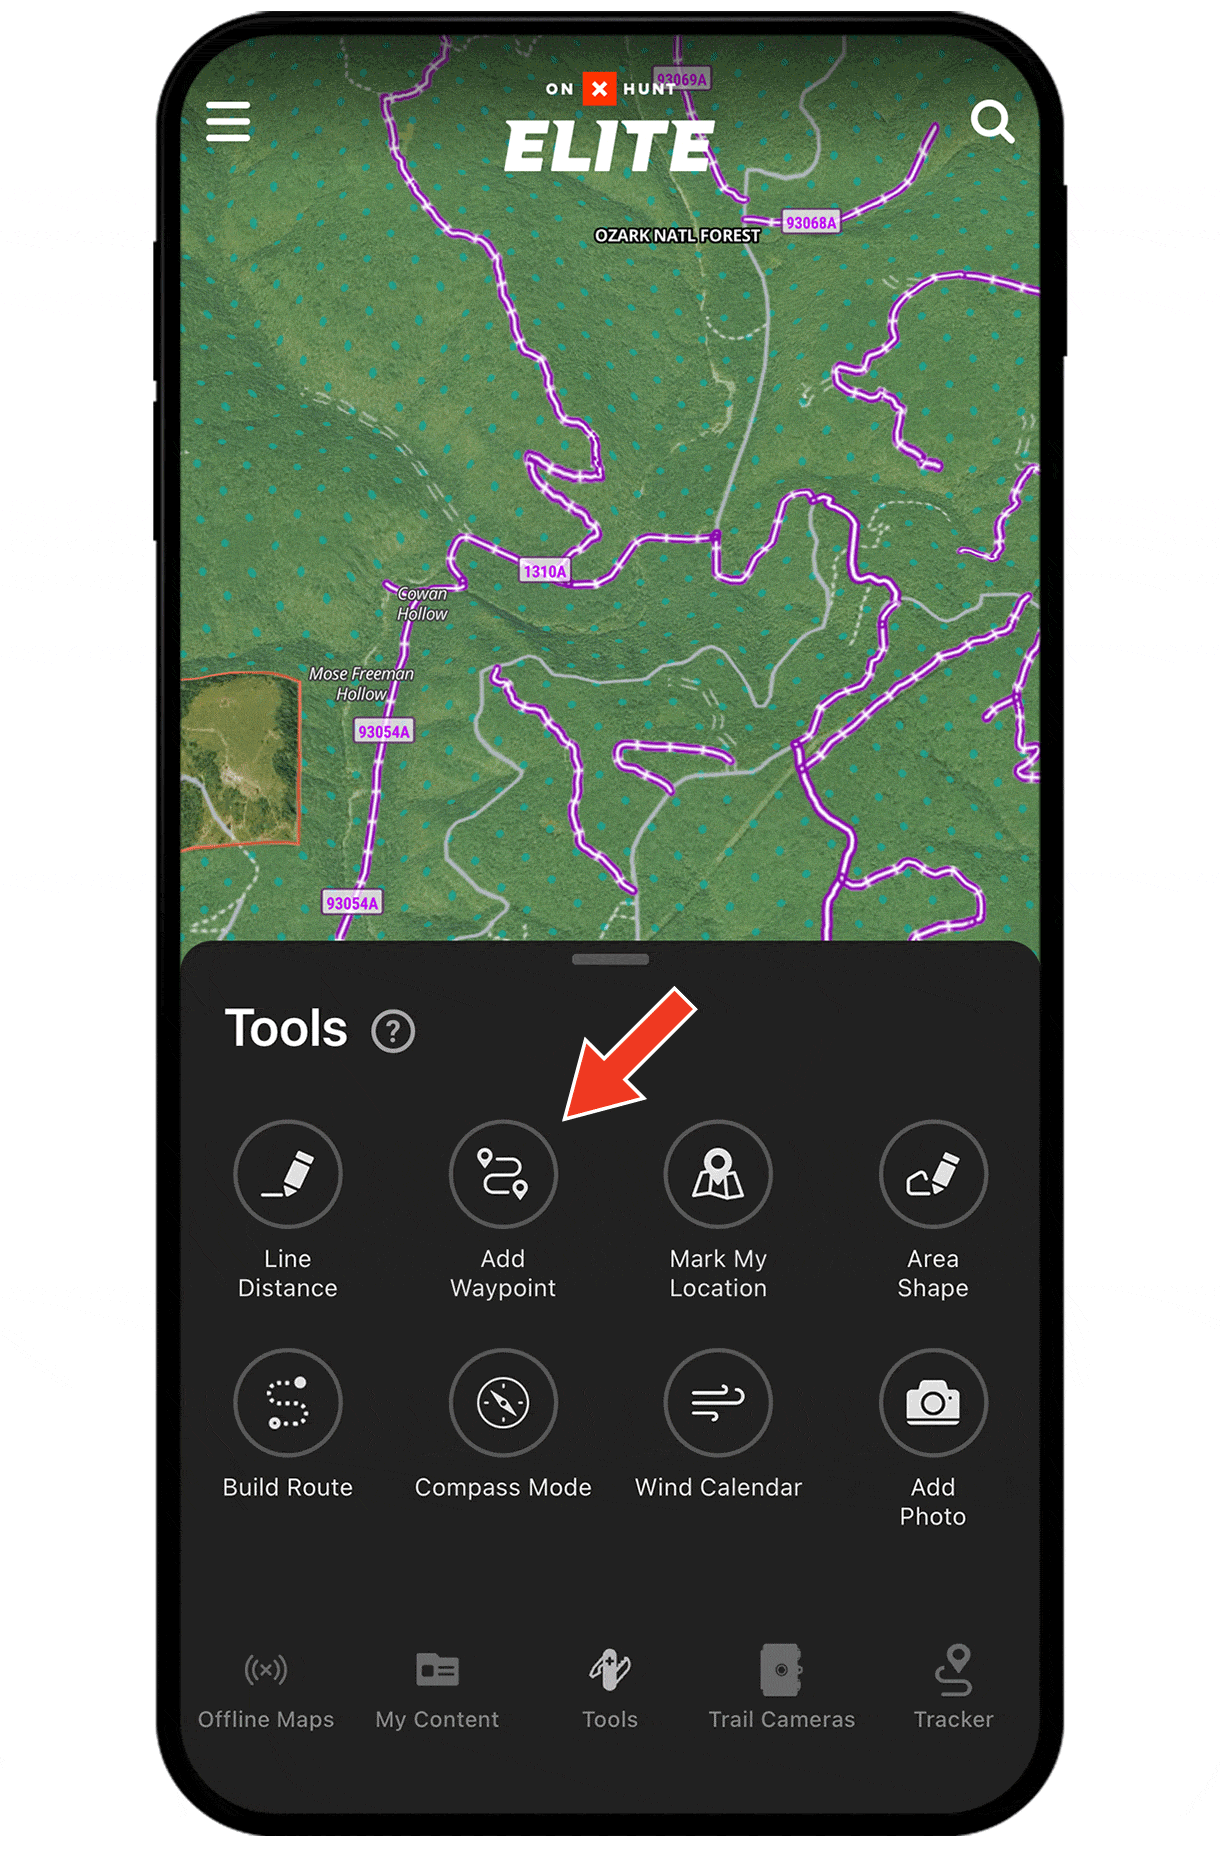
Create a Waypoint
Step 1: Long-press (tap and hold) the map location where you’d like to drop a Waypoint.
Step 2: Tap “Save.”

Customize a Waypoint
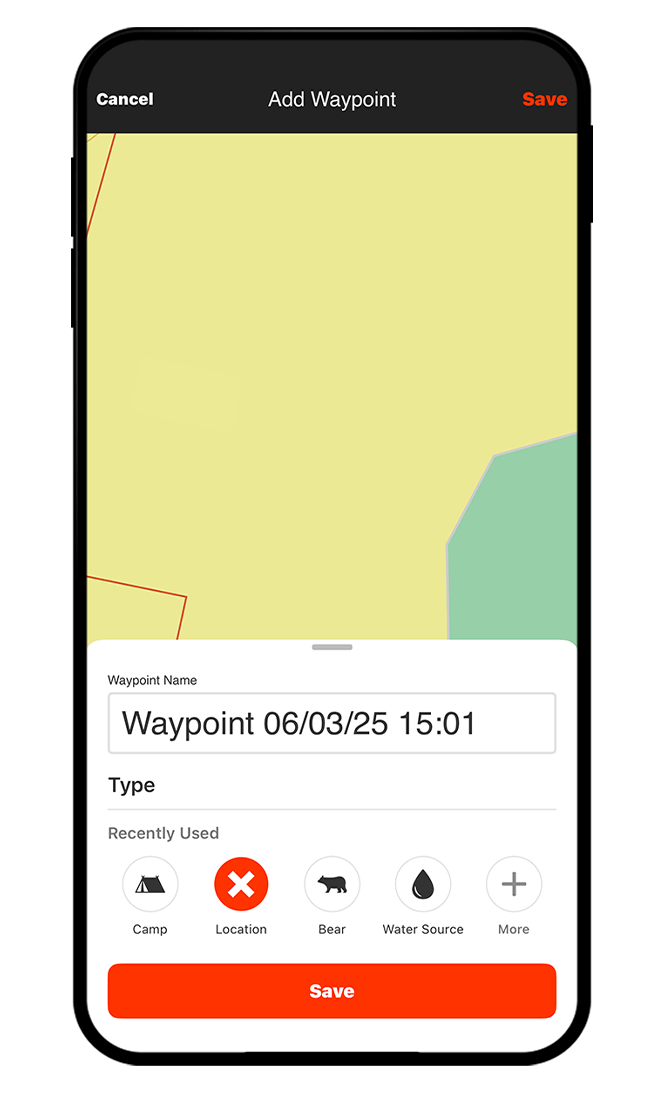
You can customize Waypoints while creating them or anytime afterward by tapping an existing Waypoint and selecting “Edit.” Below, we’ll cover how to make the most of your Waypoints with key customizations.

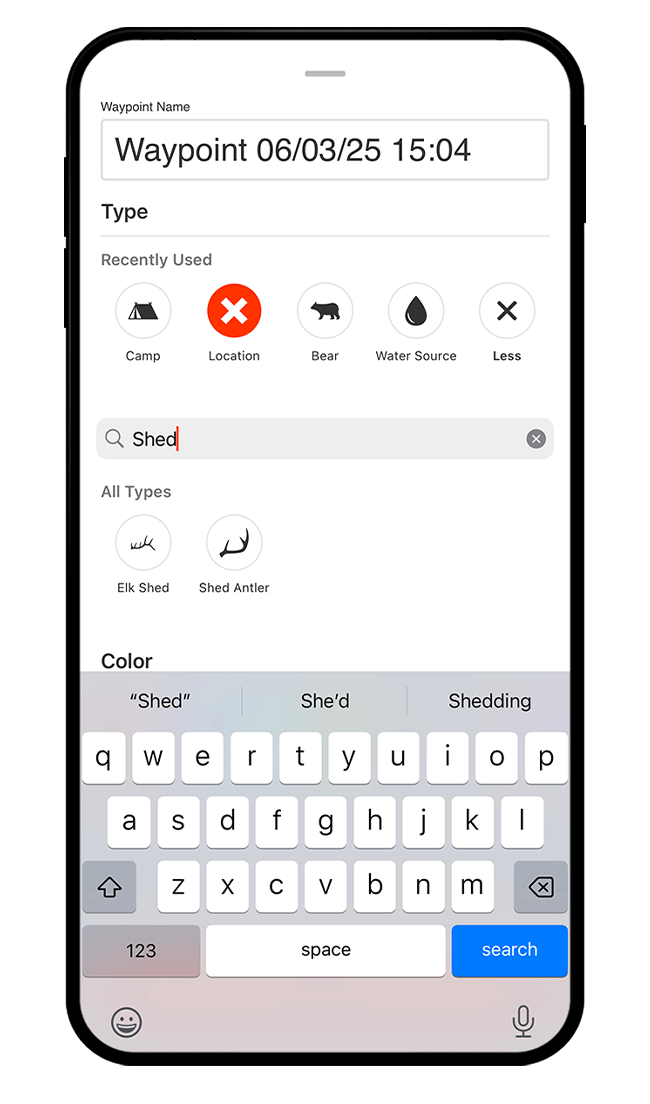
Custom Icons
Under “Type,” tap “More.” Browse or use the search bar to find the icon that best represents your Waypoint. Using custom icons helps you recall details and spot patterns across your map at a glance.
Custom Colors
You can also customize Waypoint colors. Develop a system that works well for you. For example, use different colors for each year to track trends over time, or assign different colors for different species. Or, use colors to differentiate e-scouting efforts from boots on the ground experience, allowing you to compare areas you identified as promising with verified areas where you actually found the game you were after.

Photos
Under “Photos,” tap “Add” to upload any photos you want to attach to your Waypoint.

Add Waypoints to Folders
Step 1: Tap a Waypoint and choose “Add to Folder.”

Step 2: A dialogue will appear allowing you to choose any additional Waypoints you’d like to add to a folder. Tap individual Waypoints on the map or use “Select All in Frame” to bulk select everything visible. When you’re done, tap “Add to Folder.”

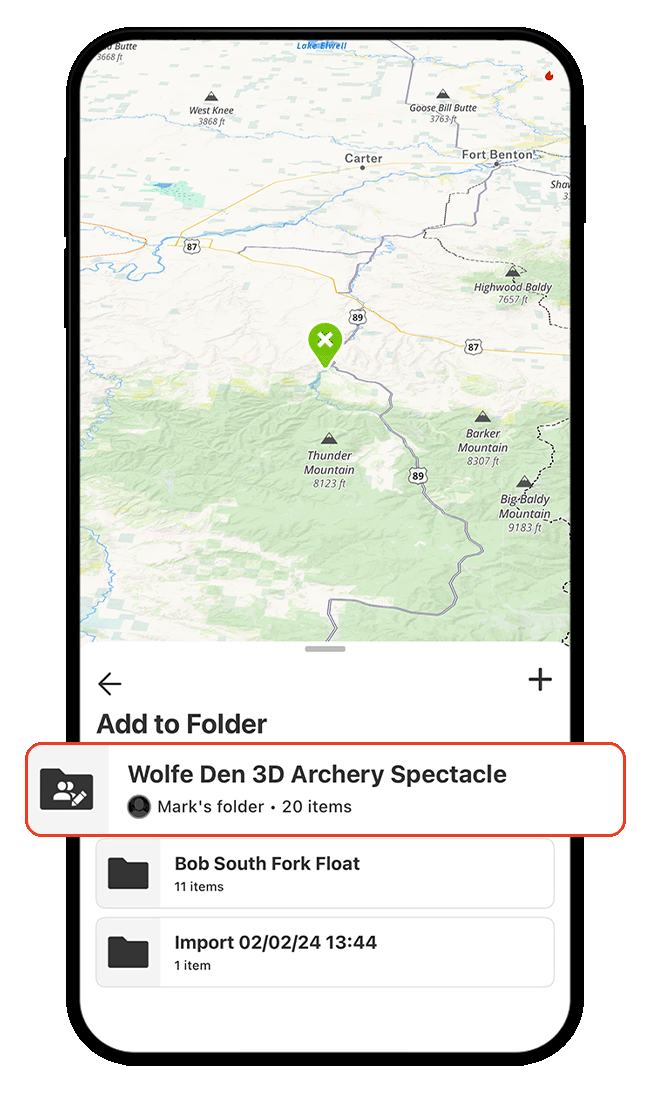
Step 3: Choose an existing folder you’d like to add your Waypoint(s) to—or, tap the plus icon to create a new folder.
If adding a Waypoint to an existing folder, all you need to do is tap the name of the folder, as shown below, and the Waypoint is automatically added. If you need to create a new folder first, you’ll give your new folder a name, and then the Waypoint will be automatically added to the new folder.
View Wind Speed and Direction for Exact Locations
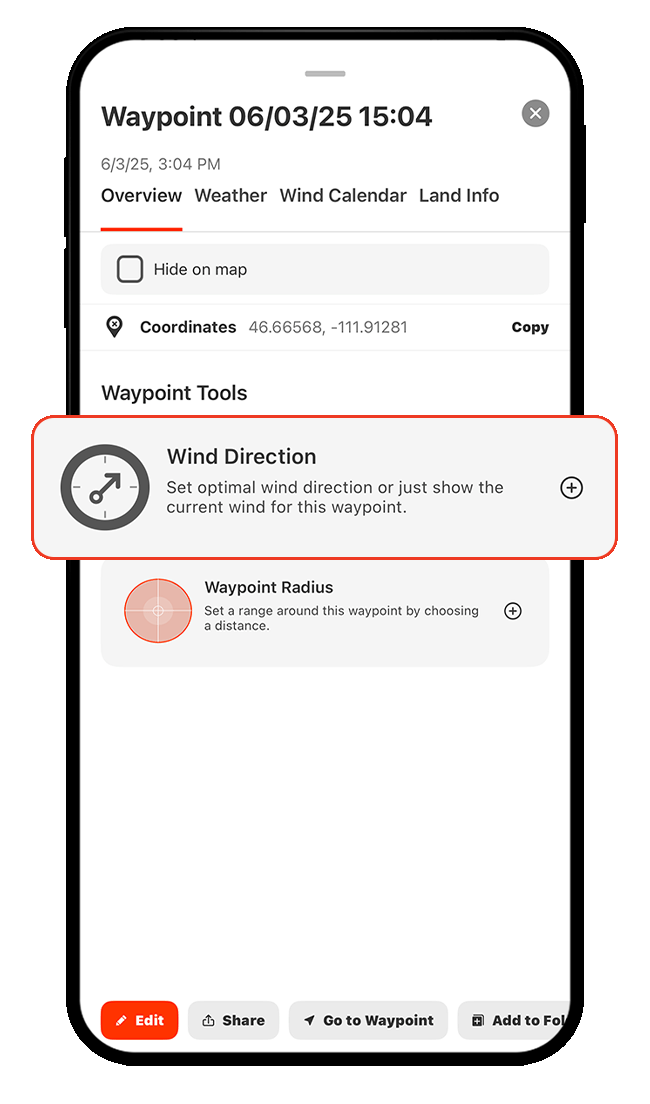
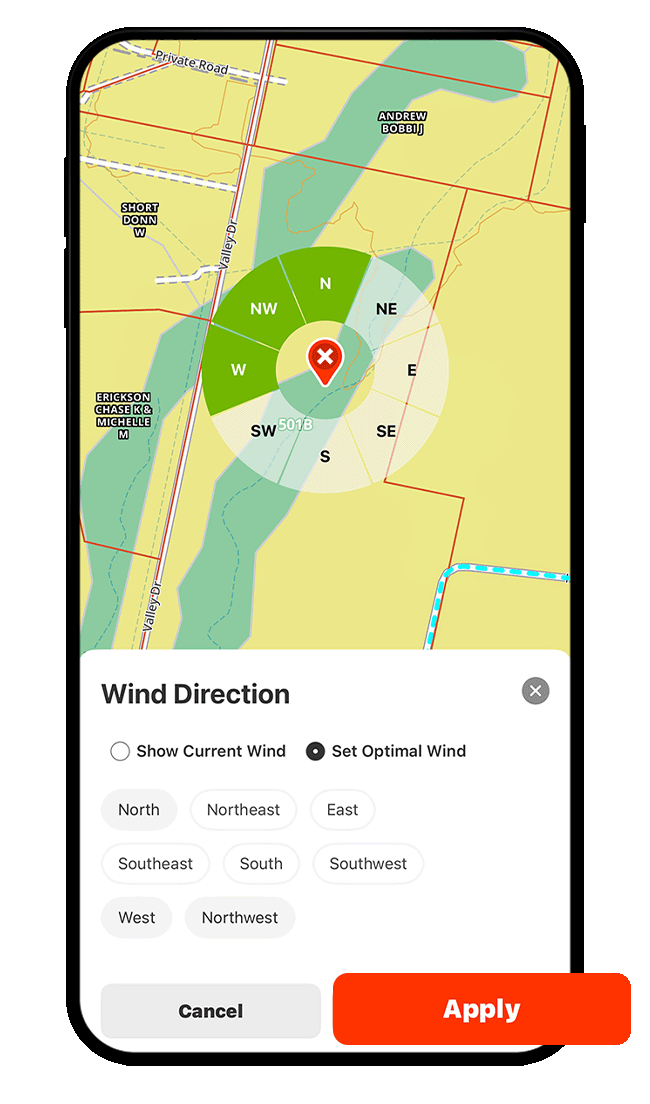
Step 1: Tap a Waypoint, drag the information card toward the top of your screen to expand the details, and select “Wind Direction.”
Step 2: Choose whether you want to view the current wind speed and direction (Show Current Wind) or your preferred wind speed and direction (Set Optimal Wind).
If you choose “Show Current Wind,” tap “Apply” to see real-time wind data on the map.
If you choose “Set Optimal Wind,” continue to Steps 3-4 to customize your ideal wind conditions.
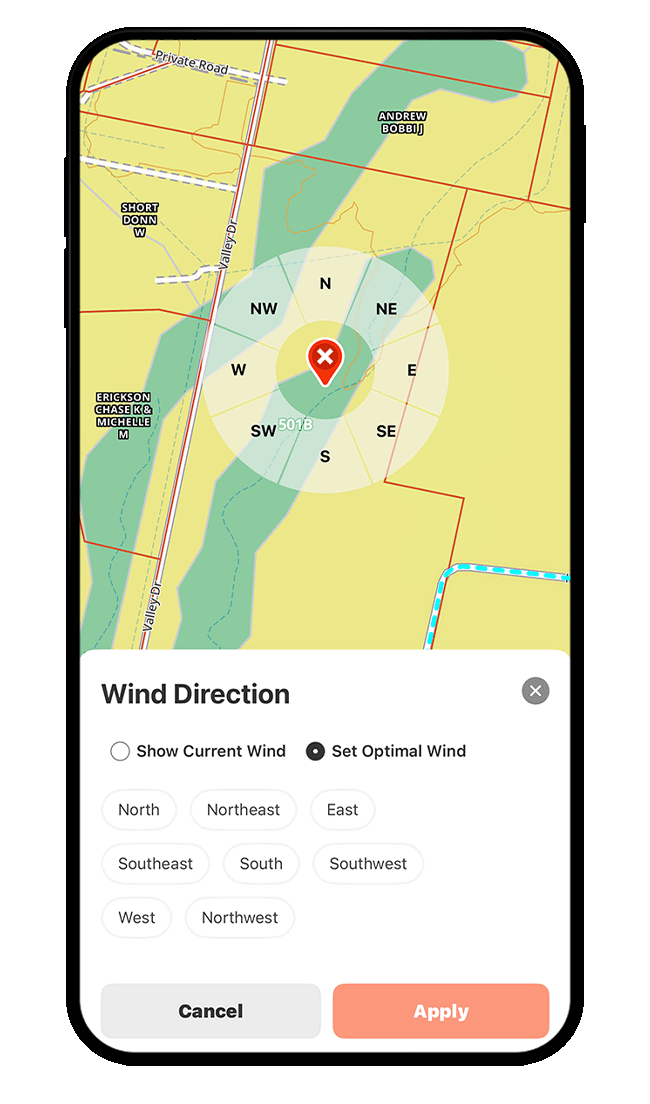
Step 3: Tap the wind direction(s) best suited for that location. Remember, wind direction refers to the direction the wind is coming from.

Step 4: Tap “Apply” to view real-time wind direction and speed for the location, along with a color-coded indicator—green for good, yellow for okay, and red for bad—based on the wind preferences you set in the previous step.
Compare Wind Details Across Locations
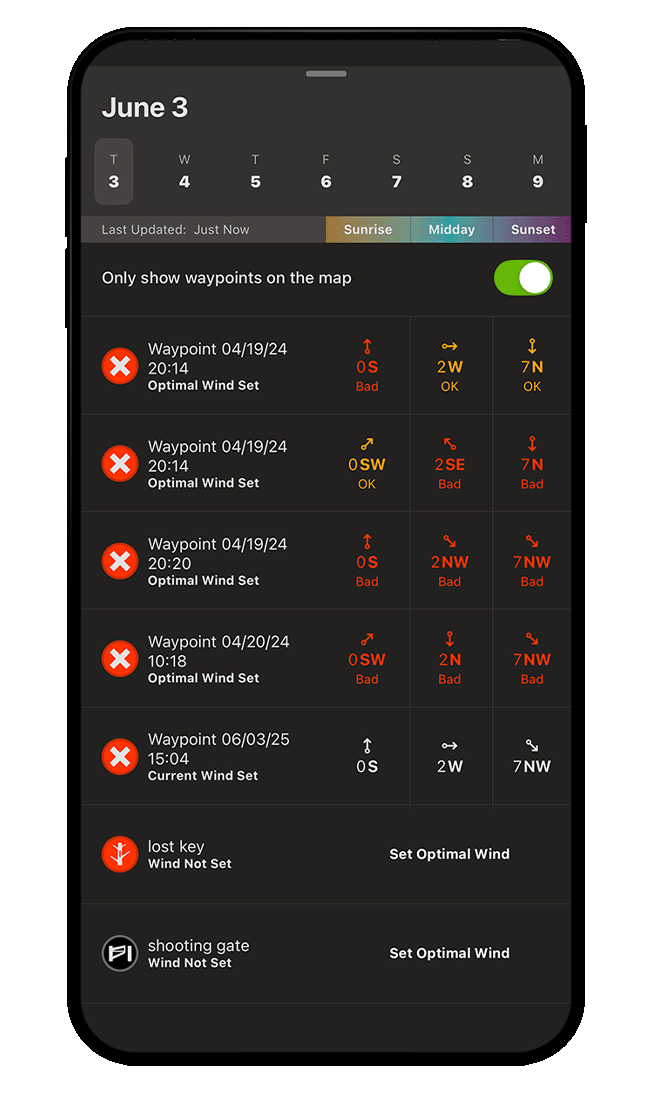
Once you’ve established wind settings for more than one Waypoint, you can compare wind speeds and directions across locations.
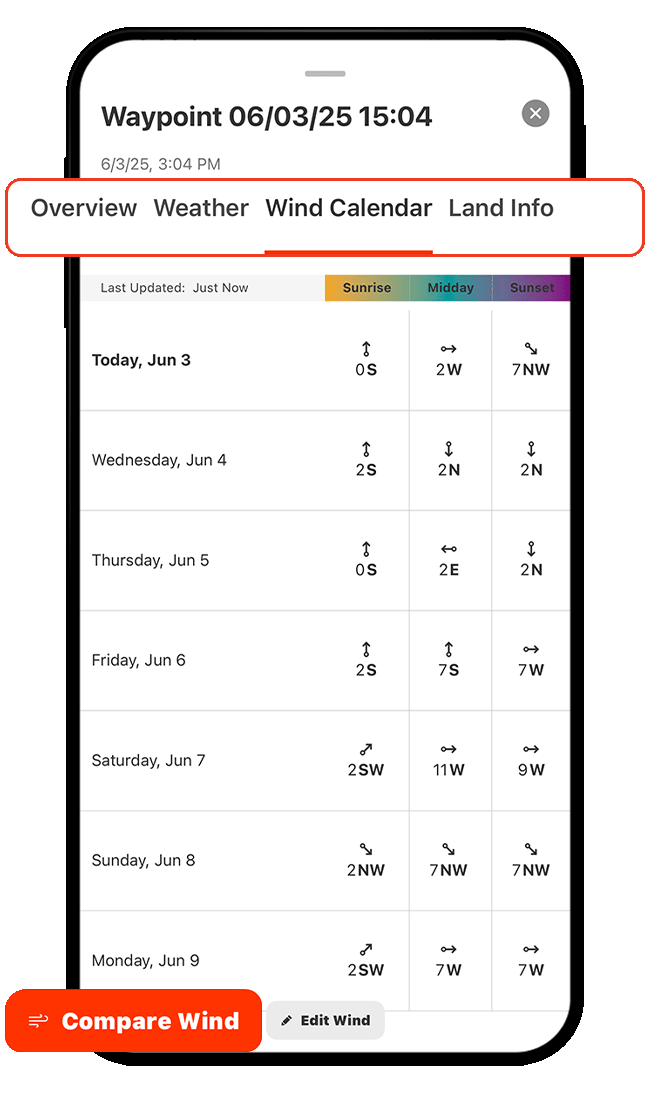
Step 1: Tap a Waypoint, choose the “Wind Calendar” tab, and select “Compare Wind.”
Step 2: Scroll through the Waypoint list to find locations with the best wind conditions over the next seven days, broken down by time of day.
To limit results to Waypoints currently visible on the map, make sure the toggle is green (as shown below).
If a Waypoint doesn’t have wind settings, tap “Set Optimal Wind” to define ideal conditions so it’s included in future comparisons.
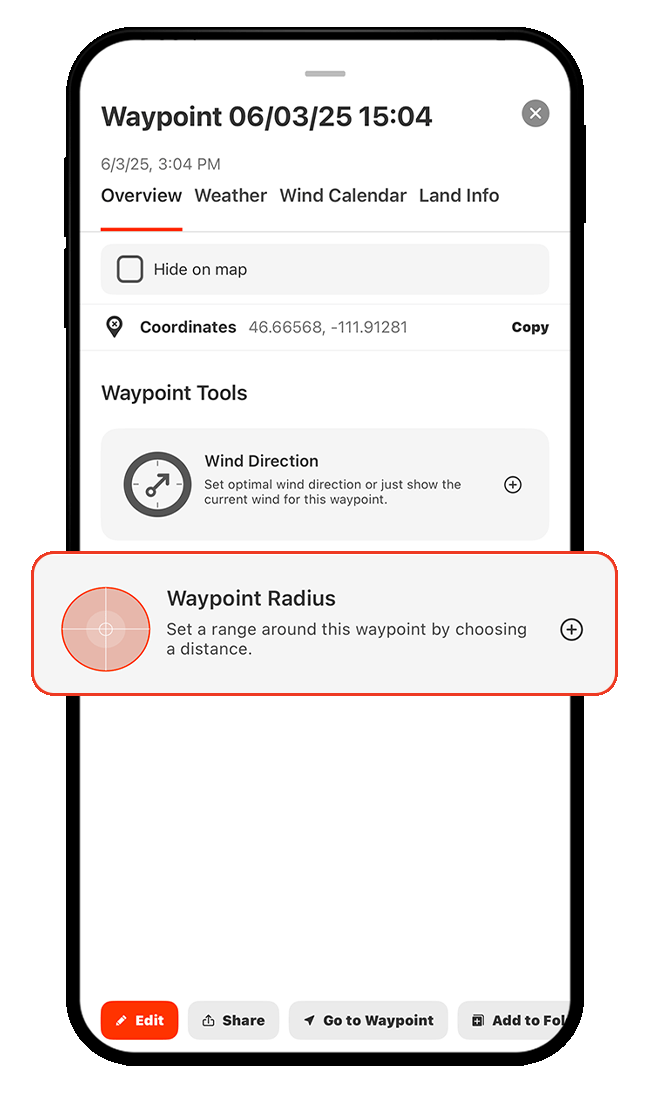
Set a Radius Around a Waypoint
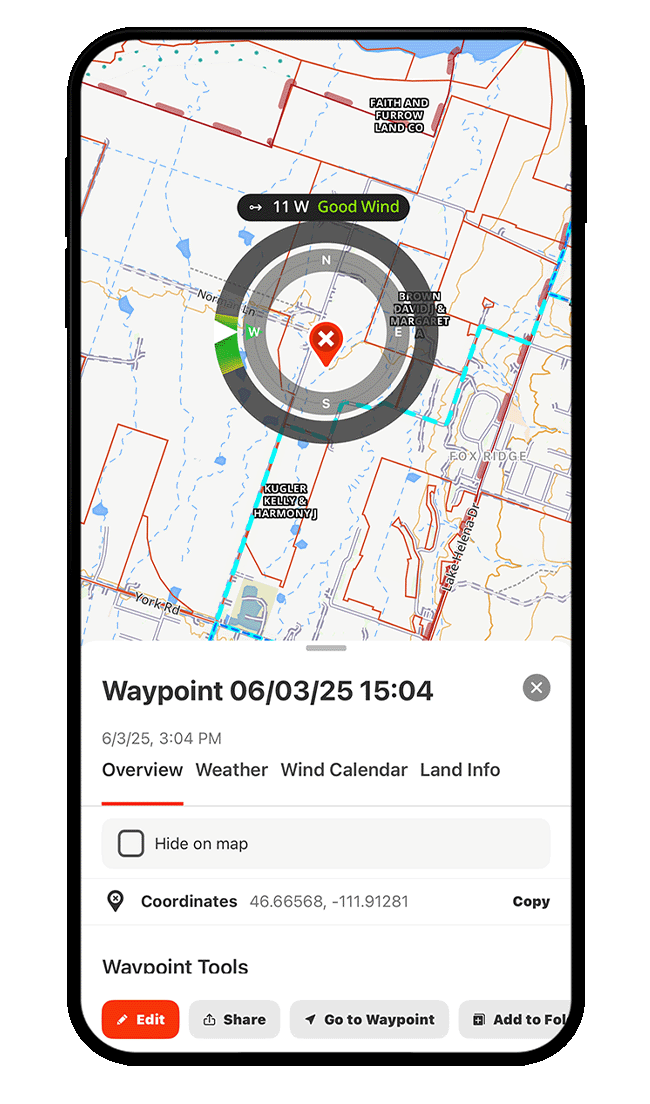
Step 1: Tap a Waypoint, drag the information card toward the top of your screen to expand the details, and select “Waypoint Radius.”
Step 2: Choose whether you’d like your radius in yards or miles, then drag the slider left or right to establish your desired distance. The circle will expand or contract based on your selection, showing you the area covered for that distance from the Waypoint’s location.
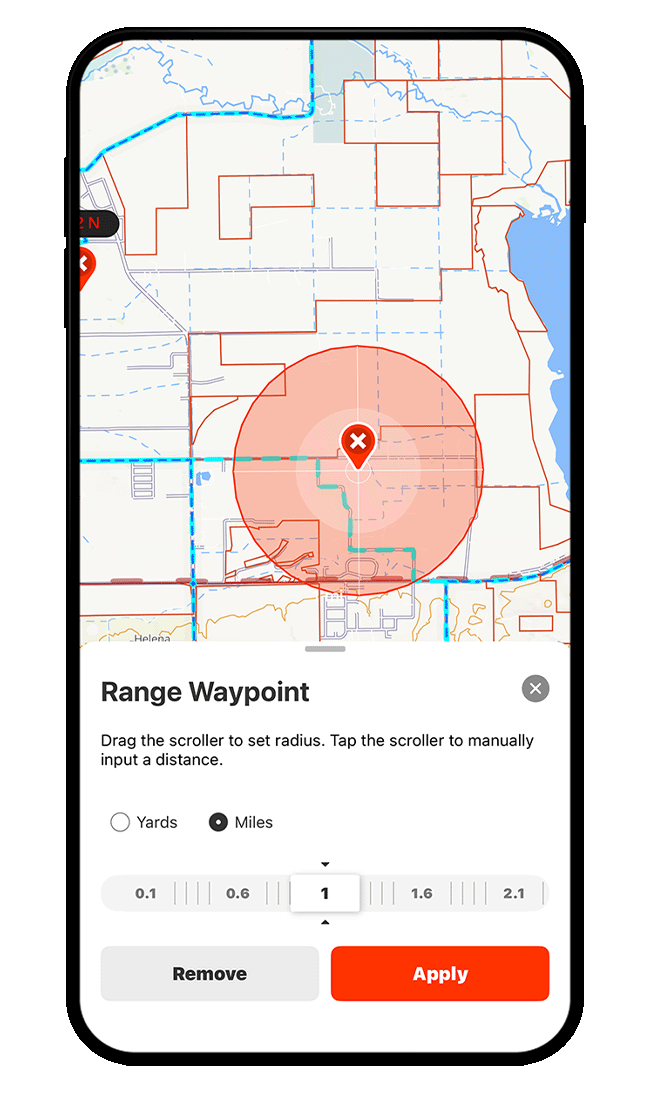
Step 3: Tap “Apply” to save your Waypoint Radius settings.

Measure the Distance Between Two Locations
Using two fingers, tap and hold on the two locations you want to measure. The straight-line distance will appear in yards (if under 1,000 yards) or miles (if over 1,000 yards).
This measurement is for quick reference only and won’t be saved to “My Content.”
Get Turn-by-Turn Directions to a Waypoint
*Elite-only capability
Step 1: Tap the Waypoint you’d like to navigate to and choose “Driving Directions.”

Step 2: Choose “onX Navigation.”

Step 3: Select “Go” for turn-by-turn directions.
Remember, if you have a vehicle compatible with Apple CarPlay or Android Auto, you can plug your phone into your infotainment system to view the map in your vehicle.

Step 1: Tap the Waypoint you’d like to navigate to and choose “Driving Directions.”
Step 2: Choose “onX Navigation.”
Step 3: Select “Go” for turn-by-turn directions.
Remember, if you have a vehicle compatible with Apple CarPlay or Android Auto, you can plug your phone into your infotainment system to view the map in your vehicle.
View Waypoint Details
Step 1: Tap any Waypoint on the map (or select a Waypoint from the “My Content” menu) to show details for that exact location. The Overview card shows you when the Waypoint was created, coordinates, and elevation. You can also access advanced Waypoint settings, including Wind Direction and Waypoint Radius.

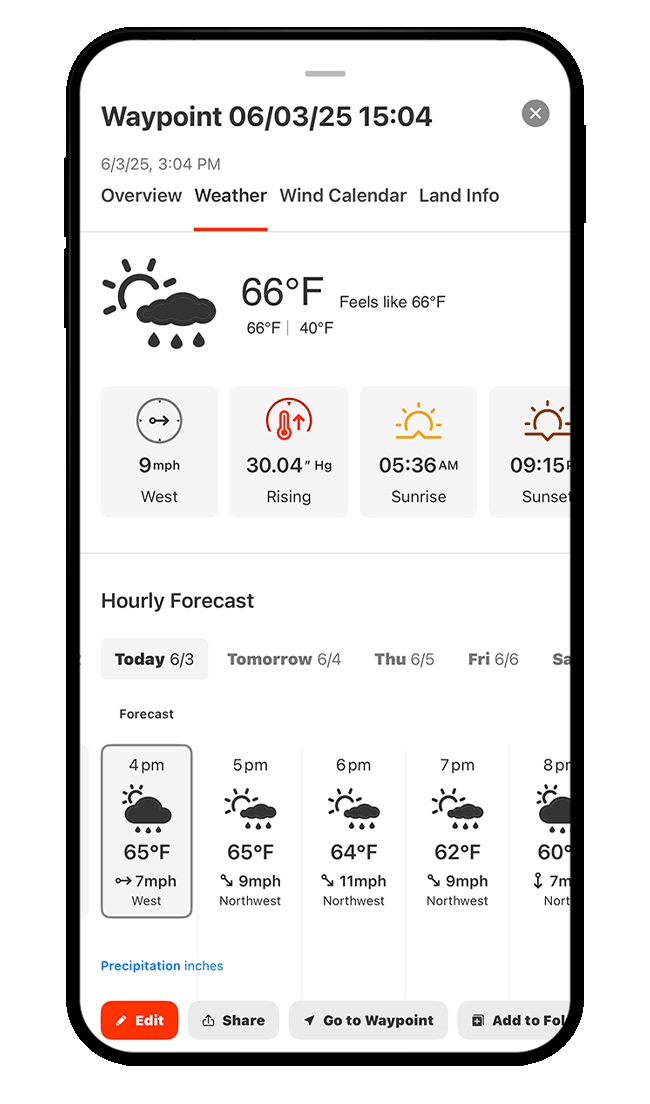
Step 2: Tap the Weather tab to view current conditions and forecasts for that location.
Step 2: Tap the Wind Calendar tab to view the wind forecast for that location. Note, you need to set Wind Direction preferences for a Waypoint before you can see details under the Wind Calendar. If you haven’t done this, you’ll see a note that says “No Wind Set” and can then choose “Set Wind” to get started.

Step 3: Tap the Land Info tab to view location-specific details based on the Map Layers you have enabled.
For example, with Soil Capability and Government Lands Layers turned on, you’ll see information related to both, as shown below. The content in the Land Info tab updates automatically based on your active layers.

Filter and Sort Waypoints
Step 1: Tap “My Content.”

Step 2: Tap “Waypoints.”

Step 3: To filter Waypoints, tap the slider icon.

Step 3: Filter your Waypoints by owner, photo attachments, icon, and/or color to quickly narrow your results.

Step 4: To sort Waypoints, tap the arrows icon.
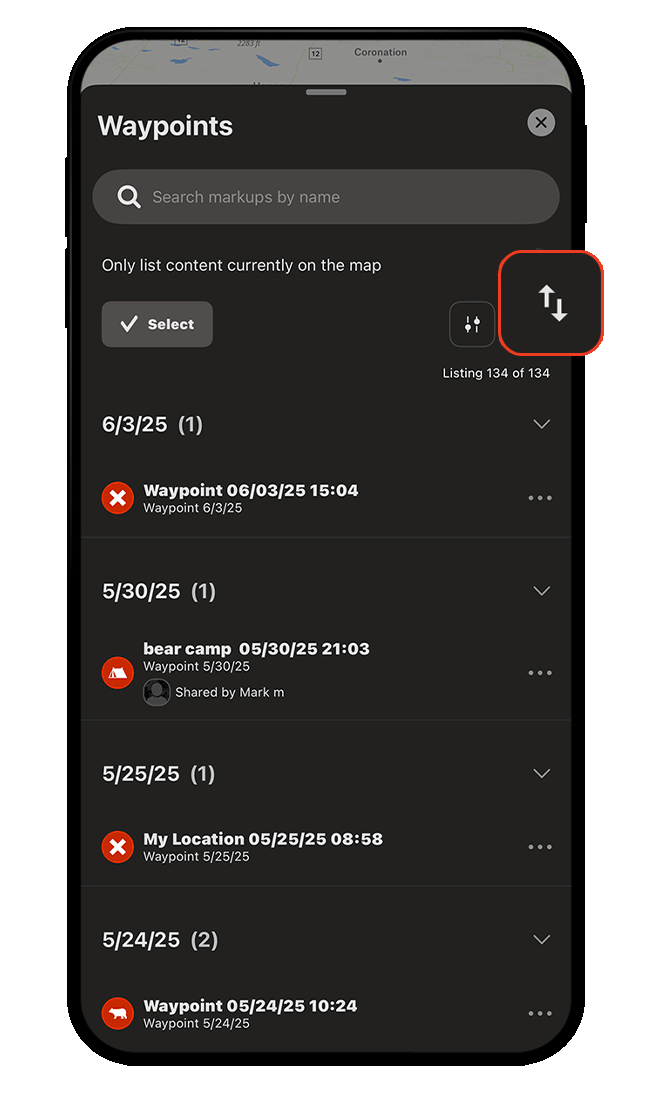
Step 5: Sort Waypoints alphabetically or by recency.

Start Dropping Waypoints Today
Waypoints are available to paid members. Purchase a Premium or Elite Membership for full access.
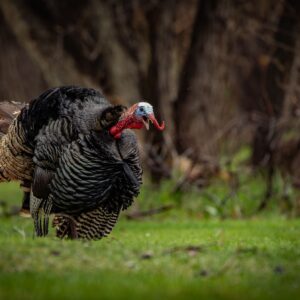
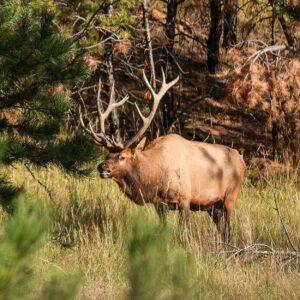
Waypoint Use Cases
Explore ways to use Waypoints to improve your hunt.