Map Layers
With hundreds of overlays, Map Layers create a customized mapping experience with information covering everything from trees, crops, and terrain to land access and wildlife distribution.
Map Layers Tutorial
Expand each block to learn how to turn Map Layers on and off, get Map Layer details, and change states.
Turn Map Layers On and Off
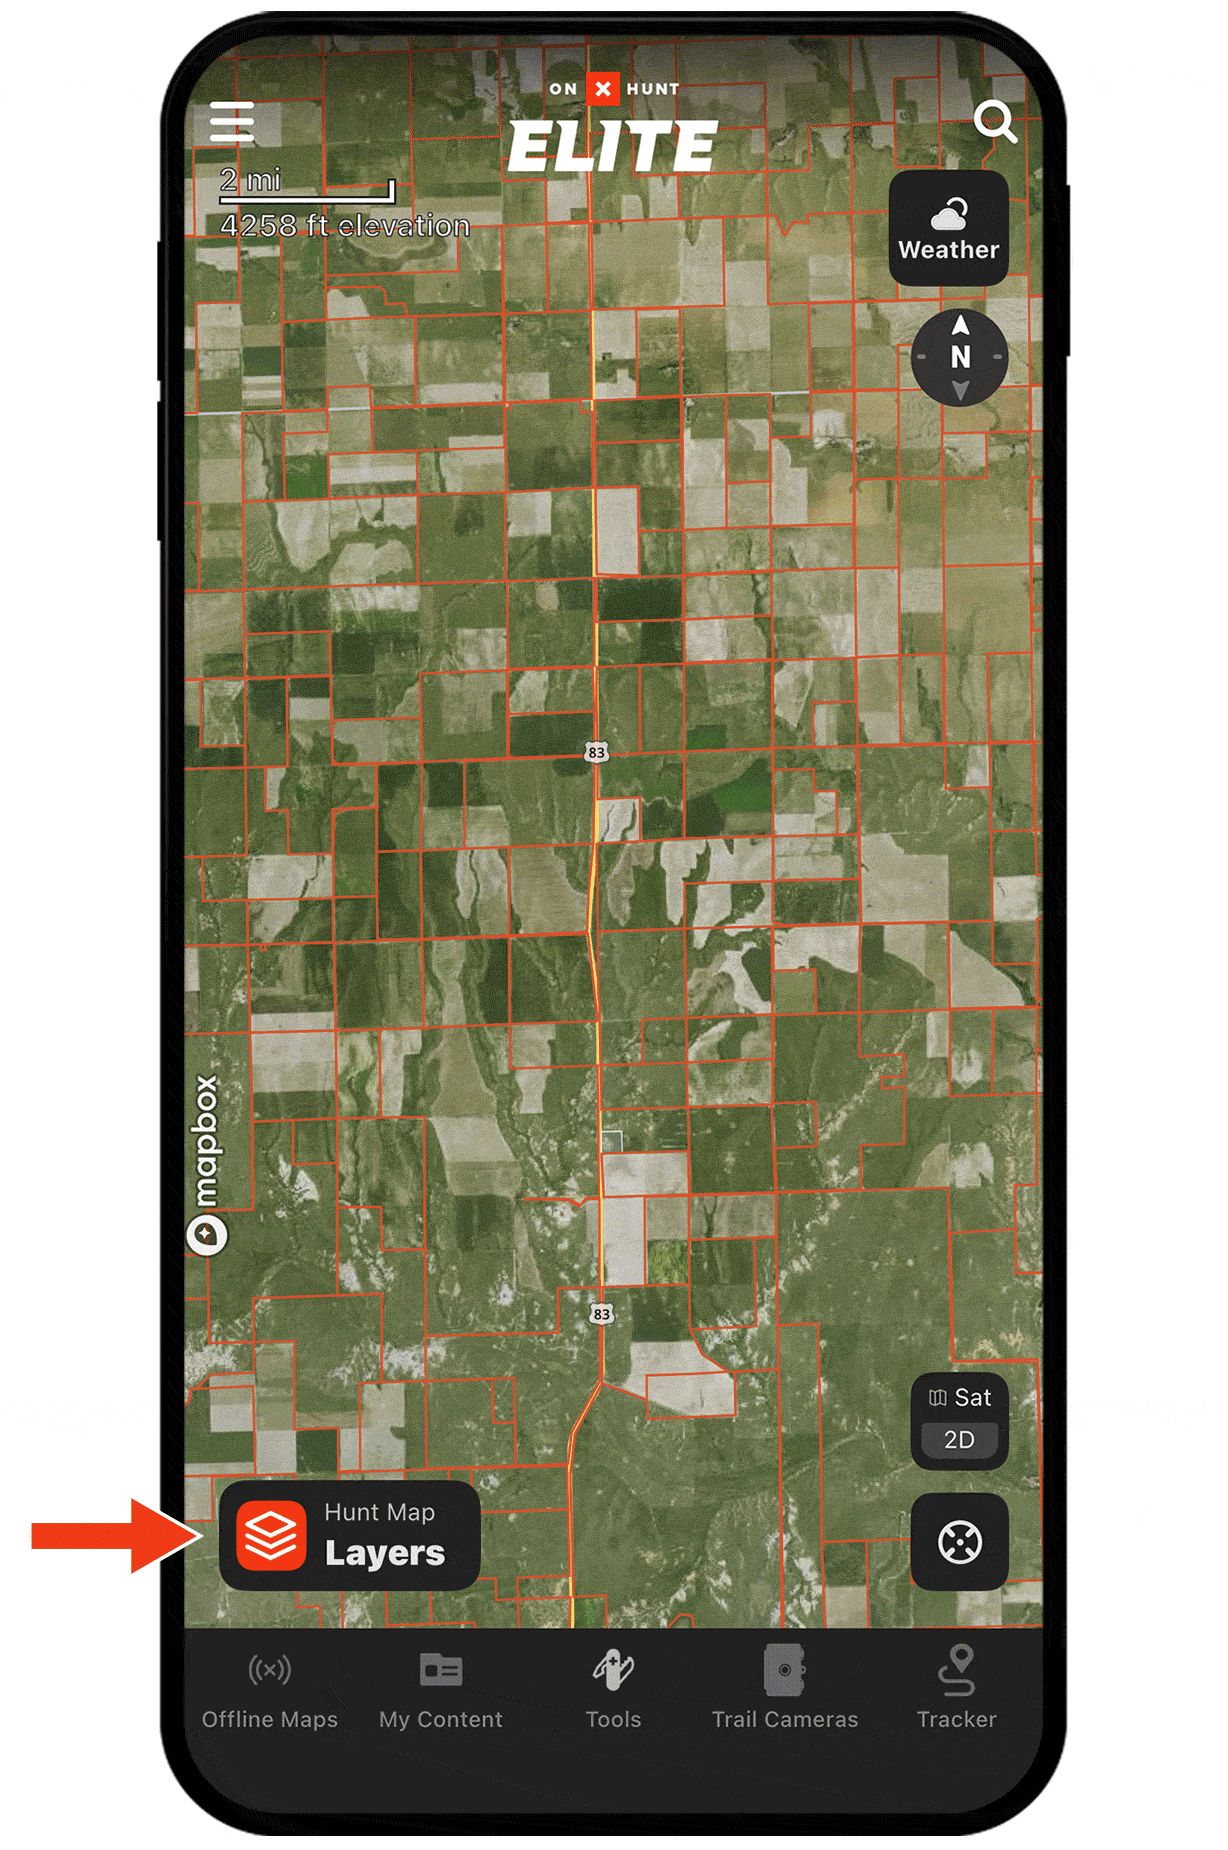
Step 1: Tap “Hunt Map Layers” at the bottom of your screen.
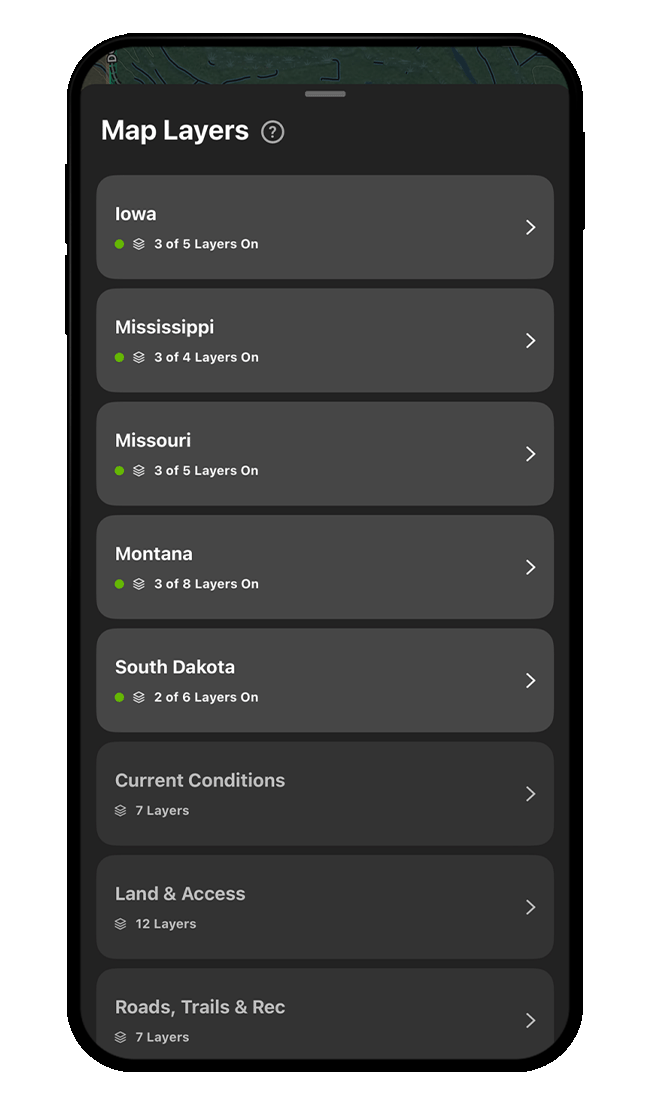
Step 2: Tap into any Map Layer collection to view available data overlays, or scroll down to “Turn On State” (available to Premium Two-State and Elite Members) to access state-specific Map Layers.
Step 3: Tap the toggle next to any Map Layer to activate it on your map. Note, different Map Layer data appears at different zoom levels. If you activate a Map Layer and don’t immediately notice your map change, zoom in and out.
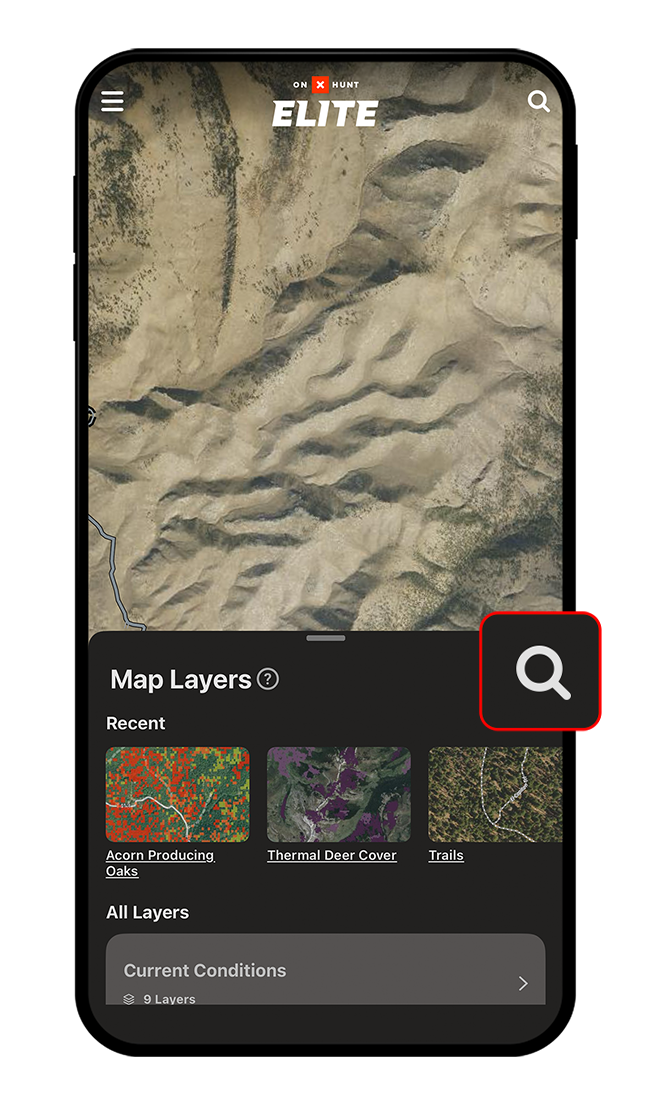
Search Map Layers
Step 1: Tap “Hunt Map Layers” at the bottom of your screen.
Step 2: Tap the magnifying glass.
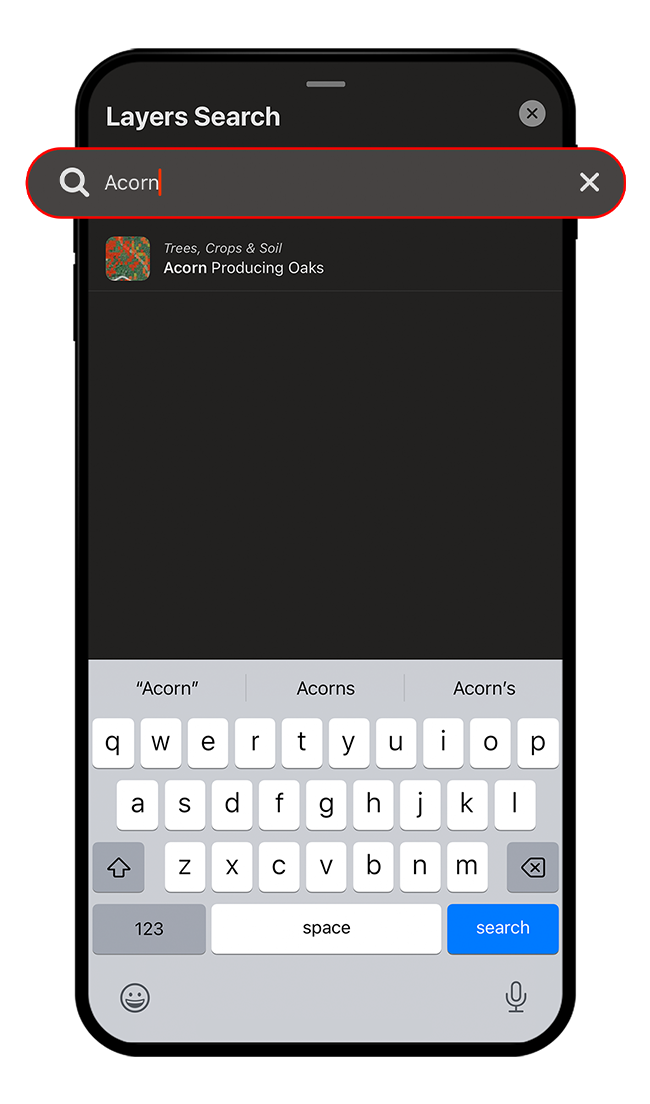
Step 3: Enter your search term.
View Map Layer Details
All Map Layers will show either “Details” or “View Options” under the Map Layer name.
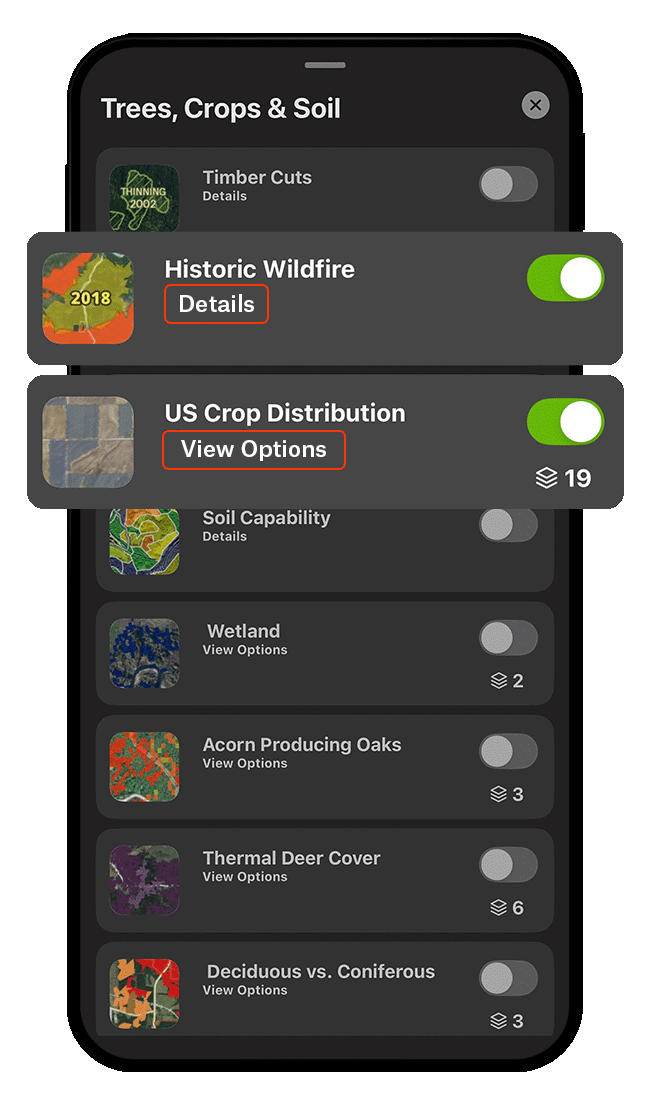
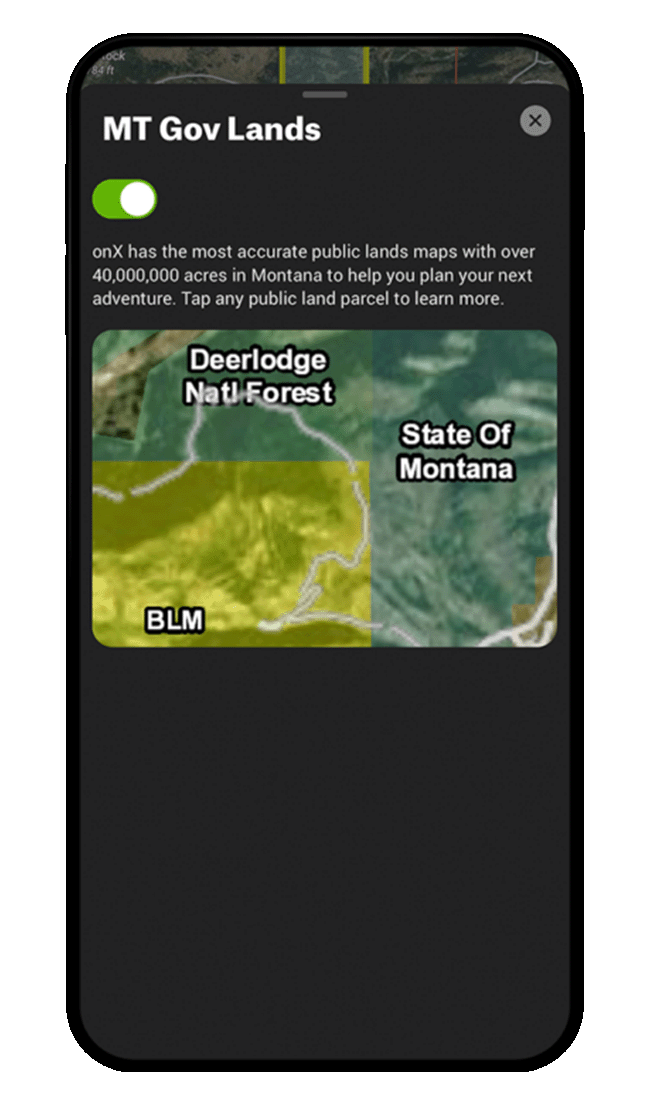
Details
Tap “Details” for more information about what various Map Layers convey. The following example shows what you see when you tap “Details.”
View Options
Where available, tap “View Options” to access sub-layers. For example, when you tap “View Options” under the US Crop Distribution Map Layer, you can then toggle 19 sub-layers on and off.

Location-Specific Details
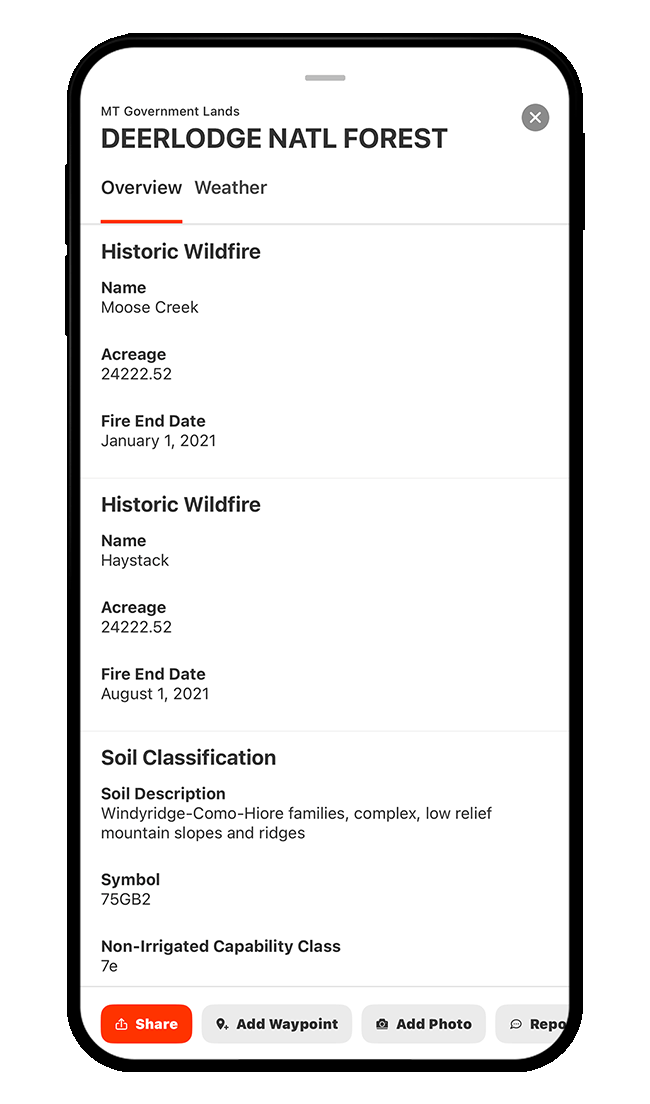
You can also view location-specific Map Layer details directly on the map. When you have a Map Layer turned on, you can tap anywhere on the map to view detailed information about that exact spot—if data is available there for that layer.
For example, with the Historic Wildfire and Soil Classification Map Layers enabled, tapping an area covered by both will show details such as soil description, soil symbol, non-irrigated capability class, etc., as well as the historic fire’s name, acreage, and containment date, as shown below.
Add and Remove States
*This capability only applies to Premium Two-State and Elite Members; Premium Members have access to just one state.
Add a State
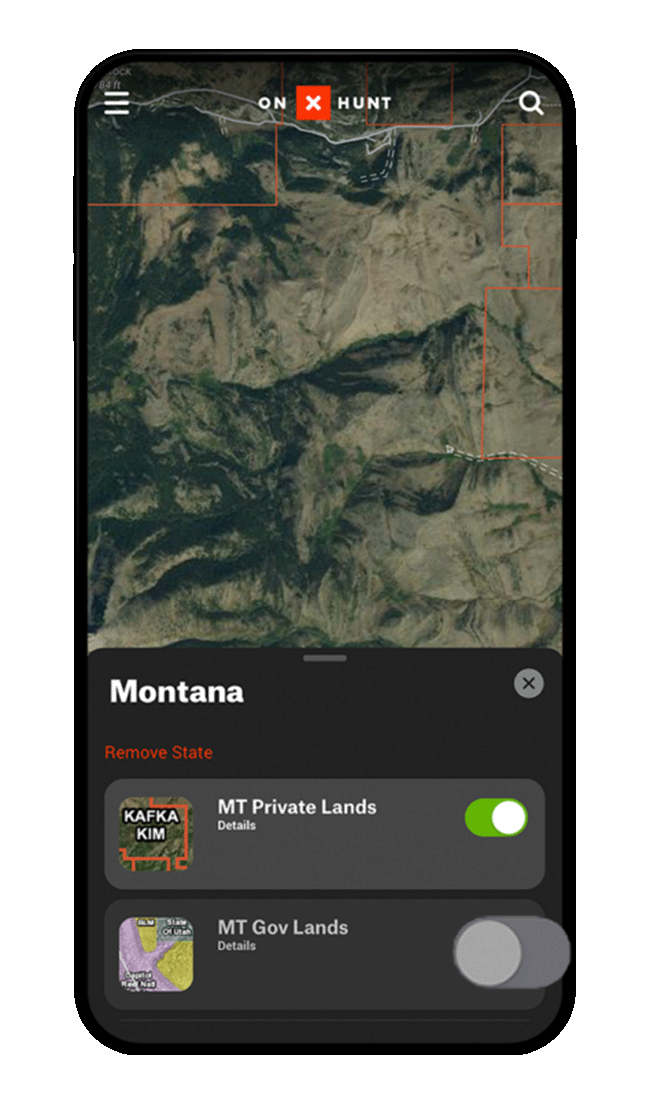
Step 1: Tap “Hunt Map Layers” at the bottom of your screen.
Step 2: Scroll down until you see “Turn on State,” and then toggle on the state(s) you need. Once you add a state, it will appear at the top of your Map Layers list. We recommend keeping the number of states turned on at any given time to a minimum to maintain optimal performance.
Step 3: Once you add a state, the state’s Private Lands, Government Lands, and Hunting Units Map Layers will be turned on and displayed automatically on your map. Tap into any state in your Map Layers list to manage state-specific Map Layers.
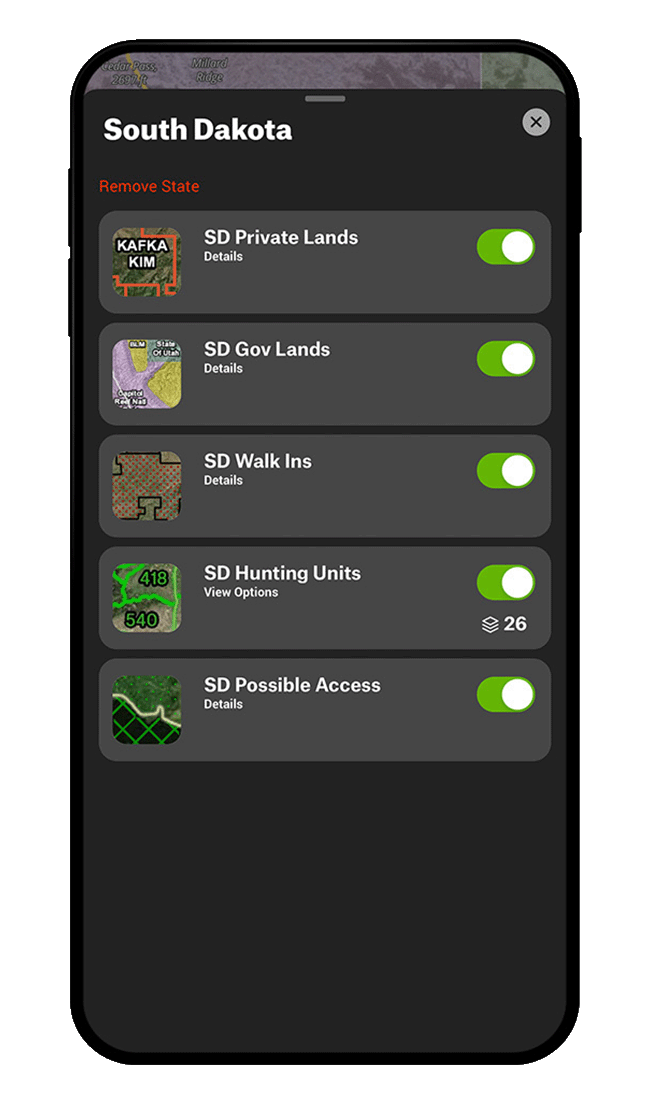
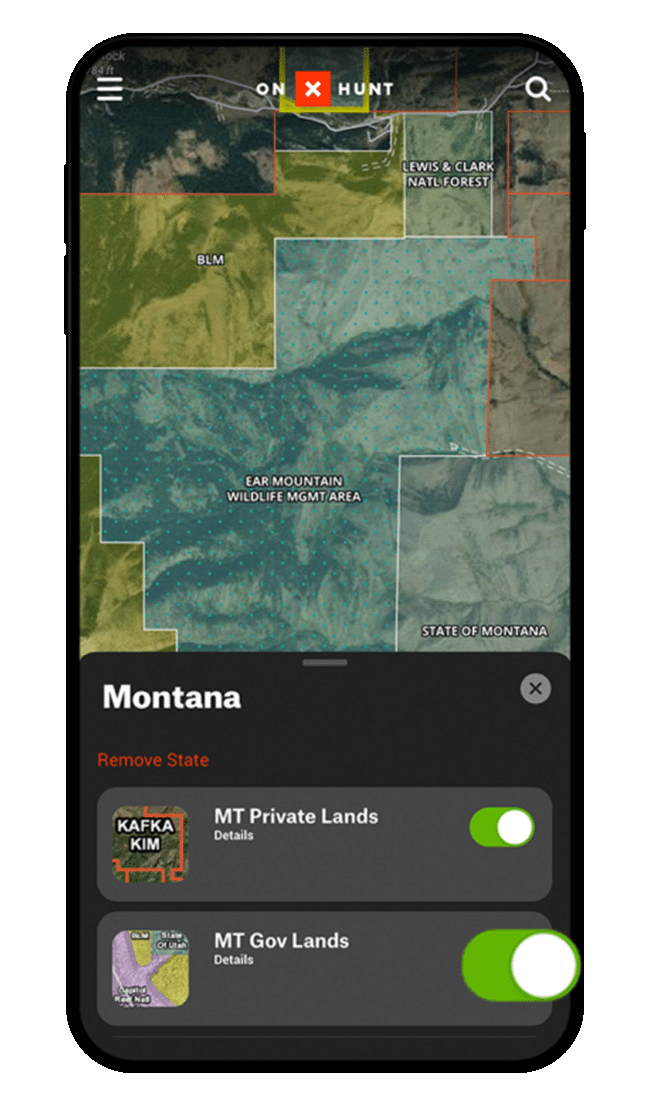
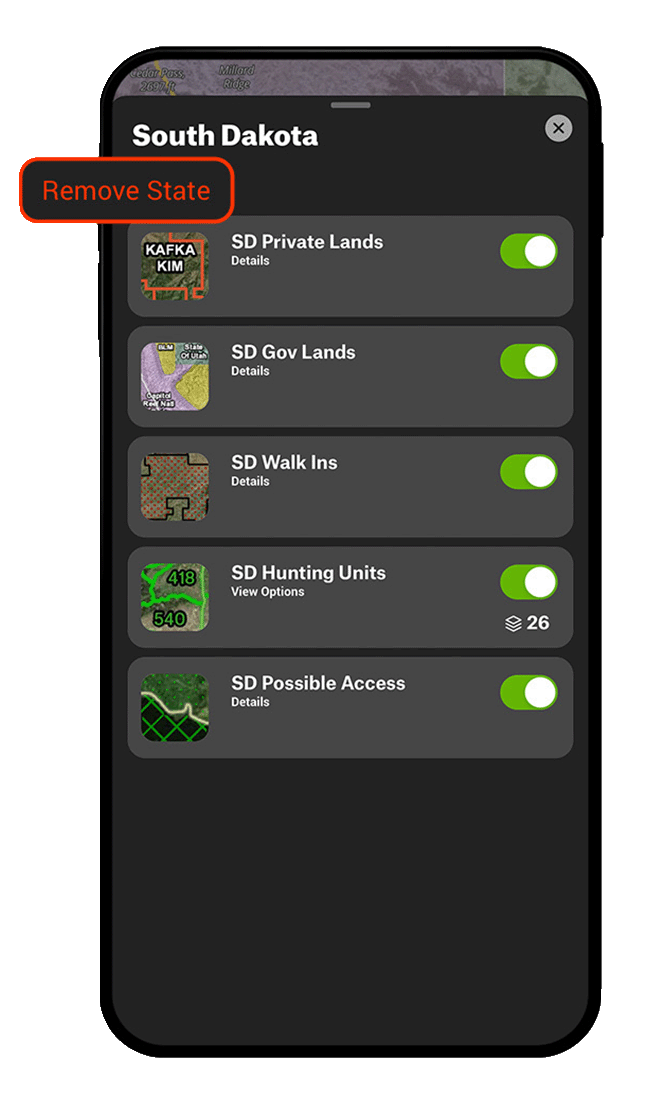
Remove a State
Step 1: Tap “Hunt Map Layers” at the bottom of your screen.
Step 2: Tap the name of the state you want to remove.
Step 3: Tap “Remove State.” A pop-up will appear reminding you that you can turn the state back on at any time. Tap “Remove” to confirm you’d like to disable the state.
Add a State
Step 1: Tap “Hunt Map Layers” at the bottom of your screen.
Step 2: Scroll down until you see “Turn on State,” and then toggle on the state(s) you need. Once you add a state, it will appear at the top of your Map Layers list. We recommend keeping the number of states turned on at any given time to a minimum to maintain optimal performance.
Step 3: Once you add a state, the state’s Private Lands, Government Lands, and Hunting Units Map Layers will be turned on and displayed automatically on your map. Tap into any state in your Map Layers list to manage state-specific Map Layers.
Remove a State
Step 1: Tap “Hunt Map Layers” at the bottom of your screen.
Step 2: Tap the name of the state you want to remove.
Step 3: Tap “Remove State.” A pop-up will appear reminding you that you can turn the state back on at any time. Tap “Remove” to confirm you’d like to disable the state.
Unlock Map Layers Today
Map Layers are available to paid members. Purchase a Premium or Elite Membership for full access.
Map Layer Use Cases
Explore ways to use Map Layers to improve your hunt.