
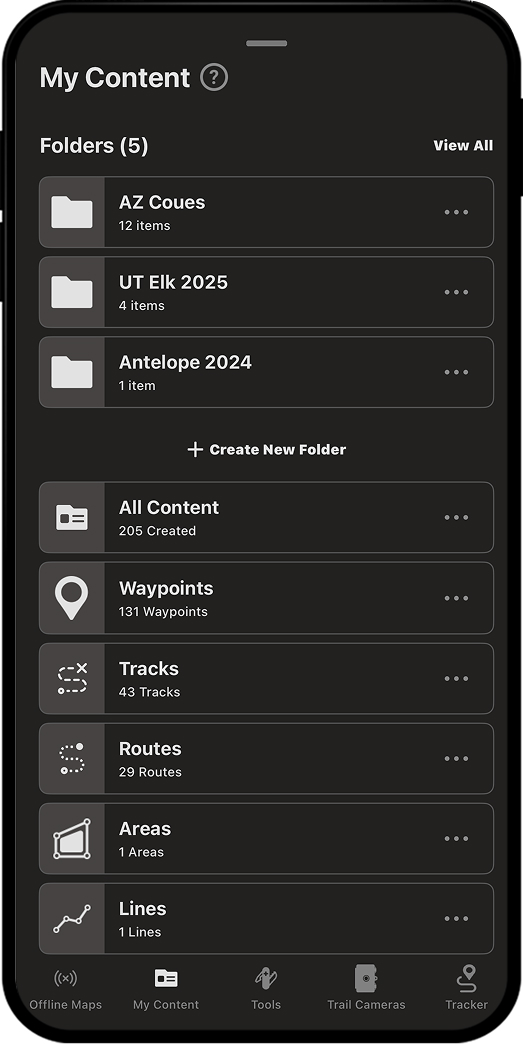
Collaborative Folders
Build, share, and sync your hunt plan with your crew. Drop in Waypoints, Tracks, Lines, Routes, and Areas, then choose who can contribute vs. who can view only.
Collaborative Folders Tutorial
Expand each block to learn how to use Collaborative Folders.
Create a Folder
Step 1: Tap “My Content.”

Step 2: Tap “+ Create New Folder.”
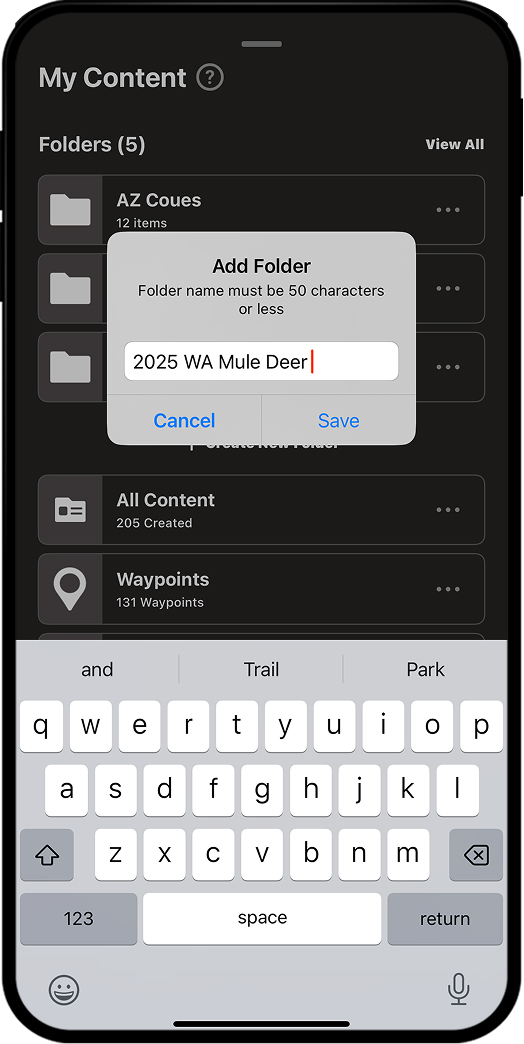
Step 3: Name the folder and tap “Save.”
Add Content to a Folder
You can add Waypoints, Tracks, Lines, Areas, and Routes to Collaborative Folders by starting on the map or from within My Content. We review both ways below.
Starting from the Map
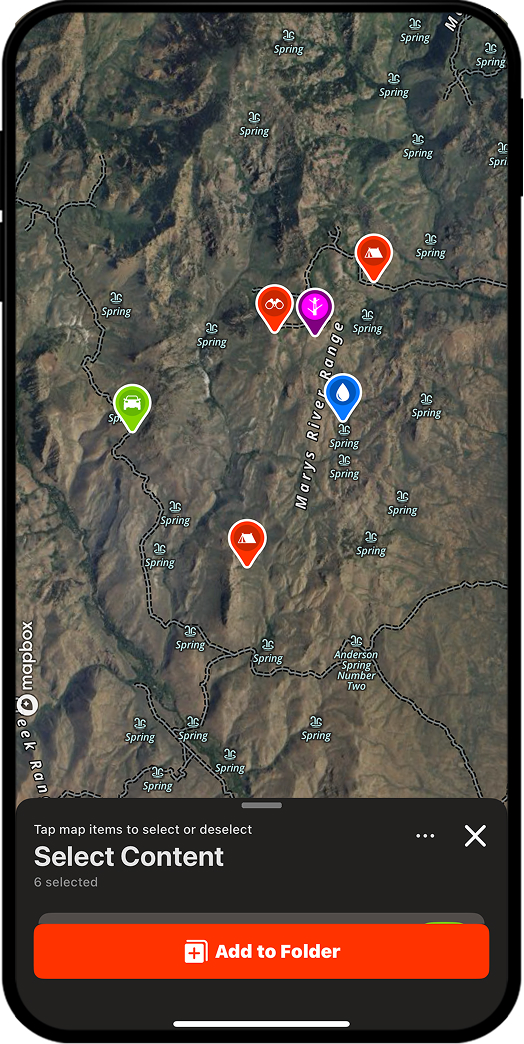
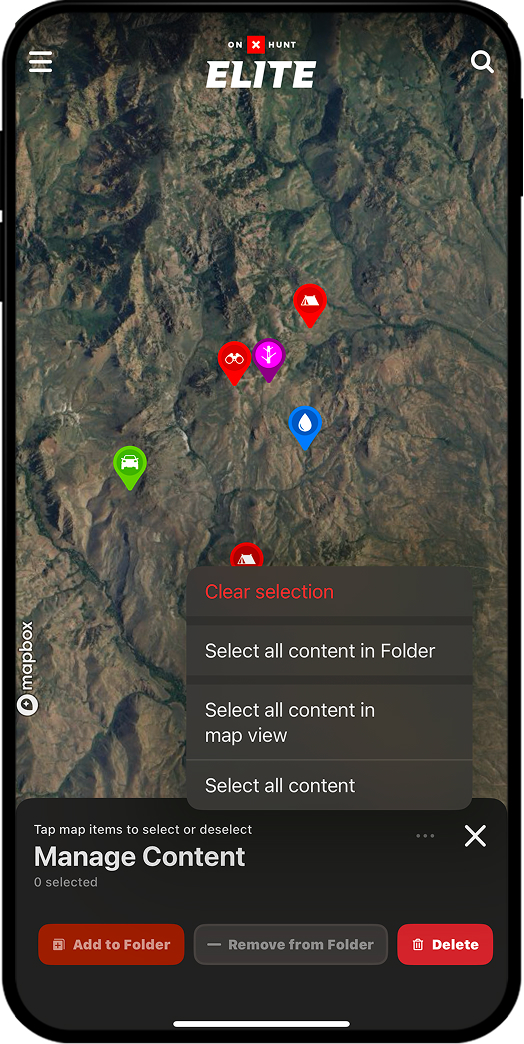
Step 1: Tap on any map markup and choose “Add to Folder.”

Step 2: A dialogue will appear allowing you to choose any additional markups you’d like to add to a folder. Tap individual items on the map or tap the three dots and select “Select all content in map view” to bulk select everything visible.
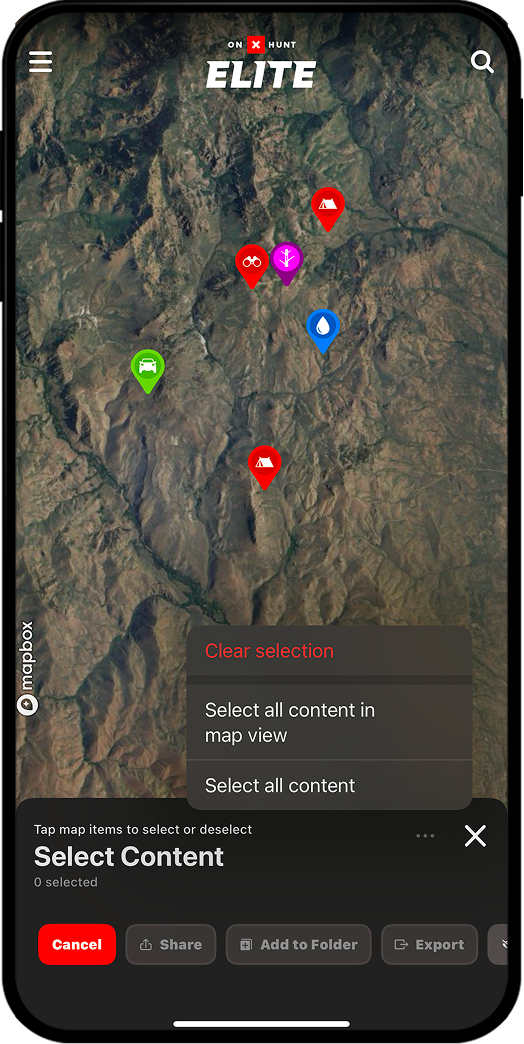
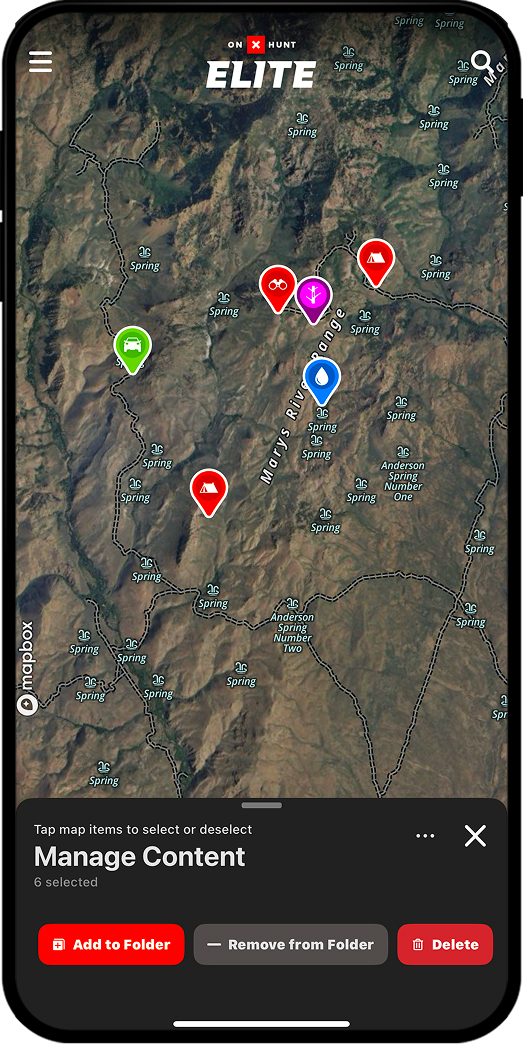
Step 3: As you select items, they will be outlined in white. When you’ve selected all the items you want to add to a folder, tap “Add to Folder.”
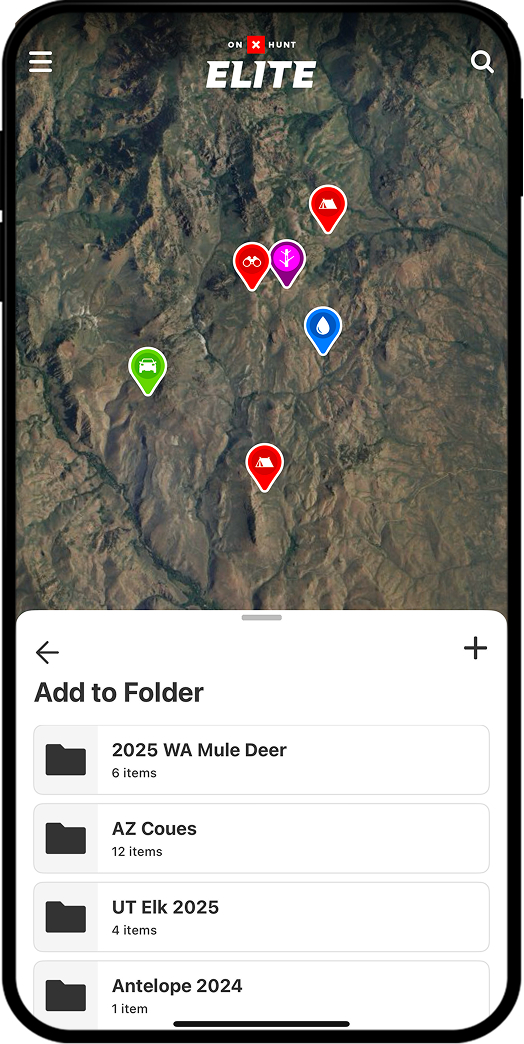
Step 4: Tap the folder to which you want the markup(s) added. The markups will automatically be added to that folder.
Starting from My Content
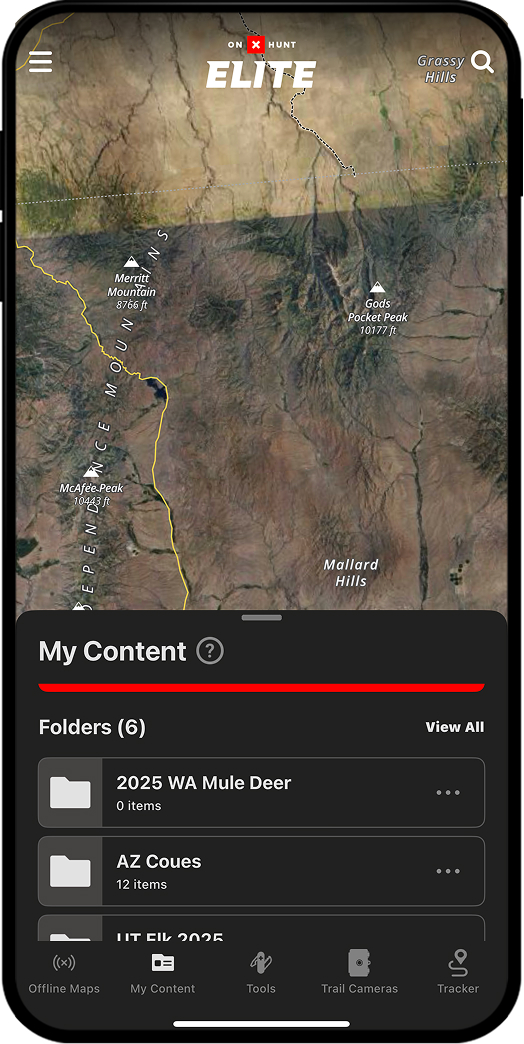
Step 1: Tap “My Content.”
Step 2: Tap into the folder to which you want to add content.
Step 3: Tap “Manage Content.”
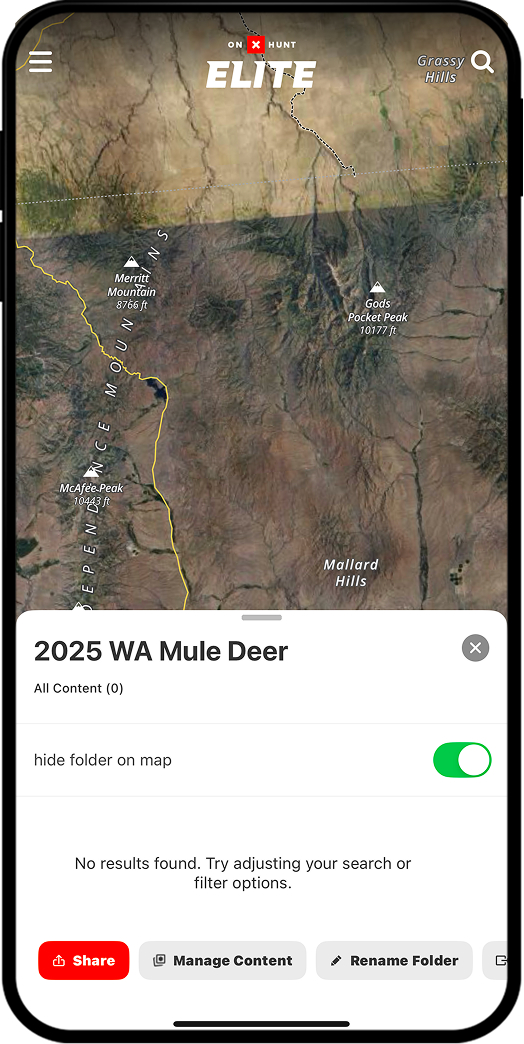
Step 4: A dialogue will appear allowing you to choose the markups you’d like to add to the folder. Tap individual items on the map or tap the three dots and select “Select all content in map view” to bulk select everything visible.
Step 5: As you select items, they will be outlined in white. When you’ve selected all the items you want to add to a folder, tap “Add to Folder.” The markups will automatically be added to the folder.
Share a Folder
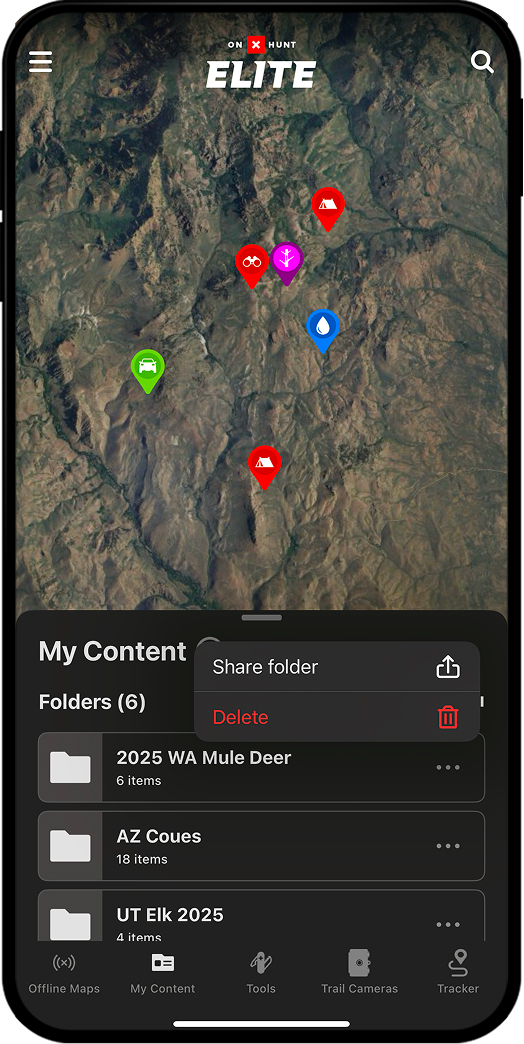
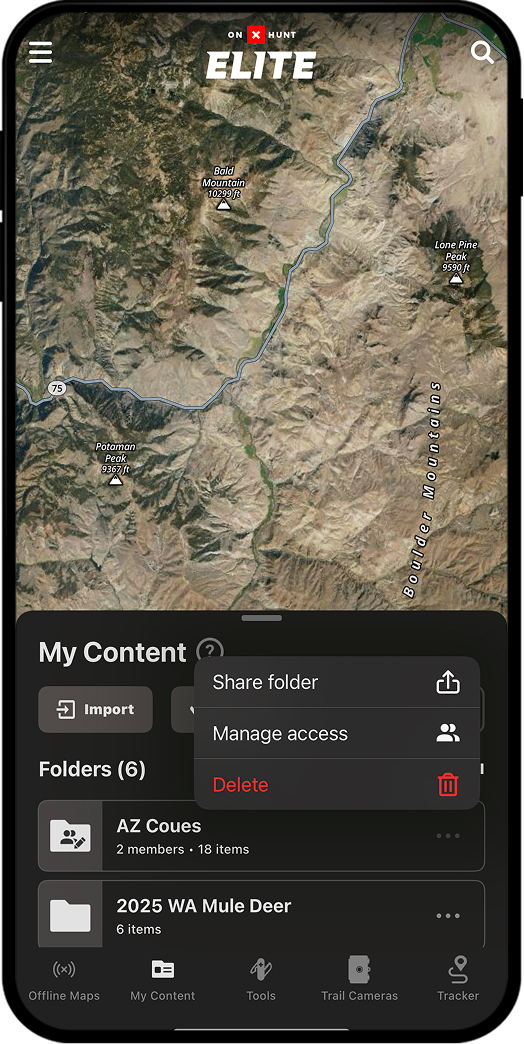
Step 1: Tap “My Content.”
Step 2: Select the three dots next to the Folder you want to share and tap “Share folder.”
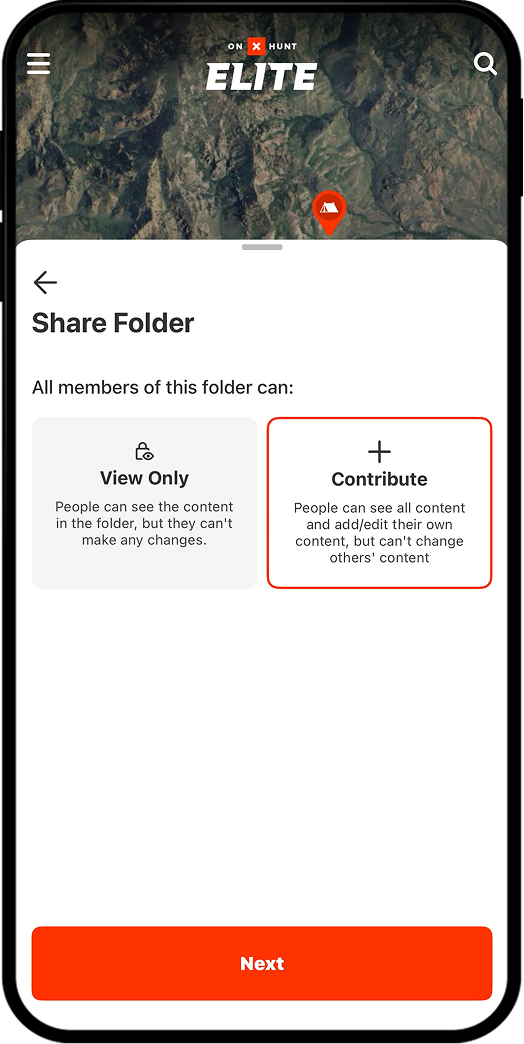
Step 3: Choose whether you want the recipient’s permission level to be “View-Only” (the recipient cannot make any additions to the map) or “Contribute” (the recipient can add content to the map). You can edit permission levels at any time.
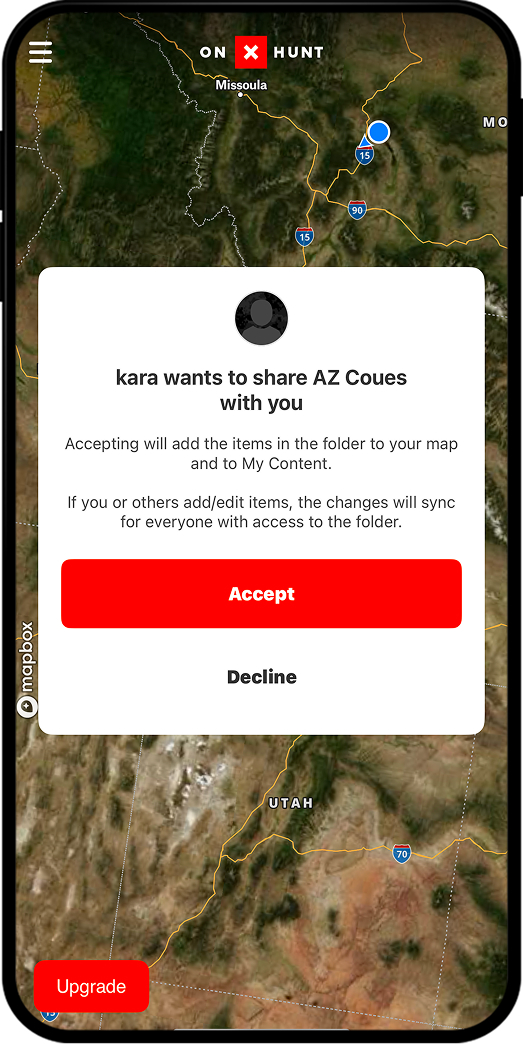
Once you tap “Next,” you’ll have the choice to share via text or email.
Note: When your recipient(s) open the link you share with them, they see this:
Manage Folder Permissions
Step 1: Tap “My Content.”
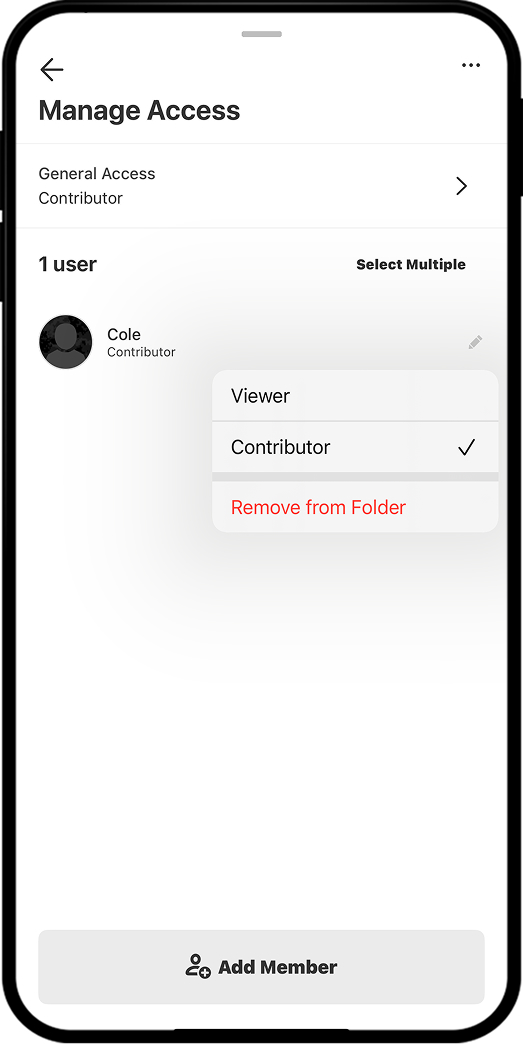
Step 2: Tap the three dots next to the name of your Collaborative Folder and choose “Manage access.”
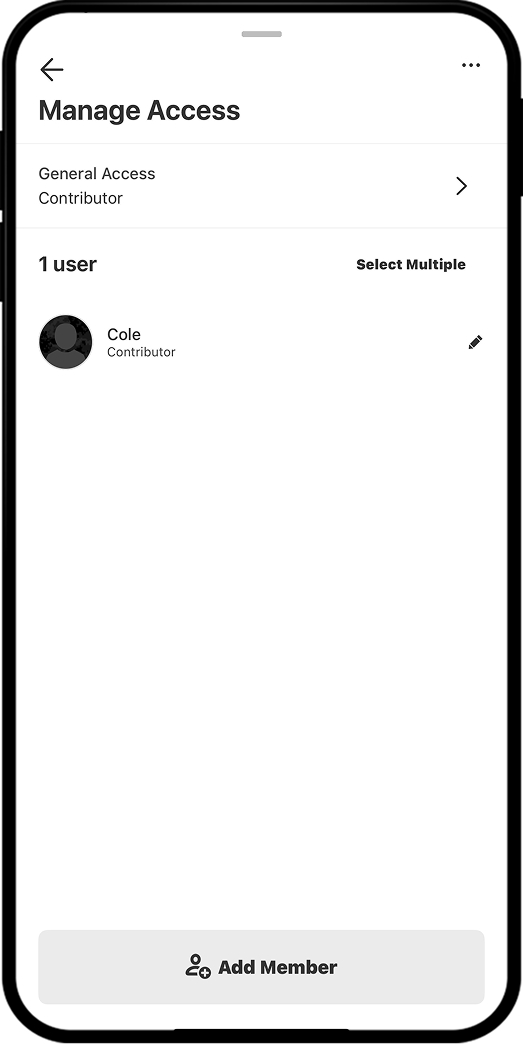
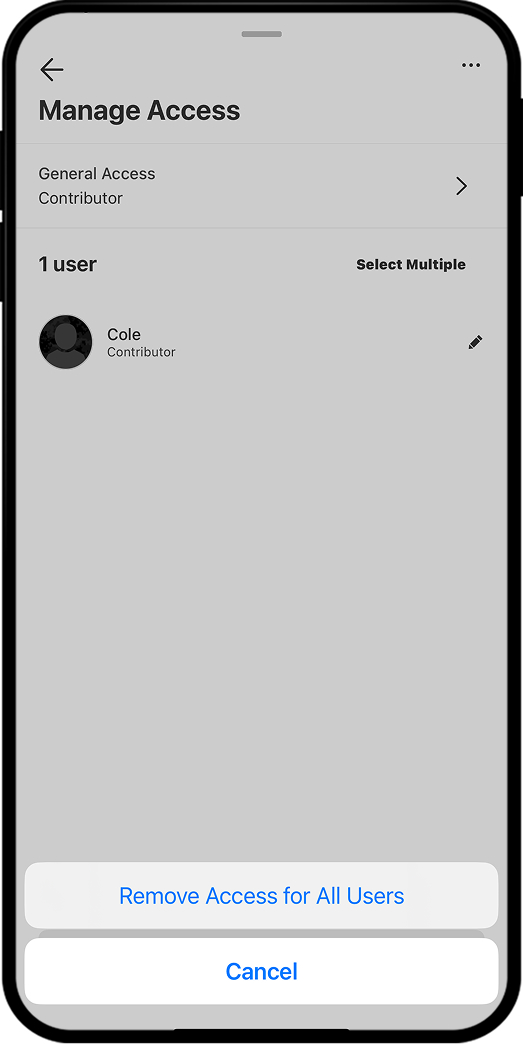
Step 3: On the Manage Access screen, you’ll see a list of everyone who has access to your Collaborative Folder. From this screen, you have several ways to review and edit user permissions, as outlined below.
Remove Everyone’s Access: Tapping the three dots in the upper right corner allows you to remove permissions for everyone with whom you’ve shared the folder in a single tap.
Change Individual Permissions: Tapping the pencil icon next to a specific user allows you to edit their permission level (view-only vs. contributor) or remove their access to the folder entirely.
Need help deciding on permission levels?
– Viewers cannot make any changes to Collaborative Folder content.
– Contributors can add content to Collaborative Folders; they cannot delete any content you or others create, nor can they remove any content from the Collaborative Folder that they didn’t personally create.
Neither Viewers nor Contributors can share your Collaborative Folder or any of the individual markups contained within.
You can also share the folder with additional people via the Manage Access screen by tapping “Add Member.”
Unlock Collaborative Folders Today
Collaborative Folders are available to paid members. Purchase a Premium or Elite Membership for access.

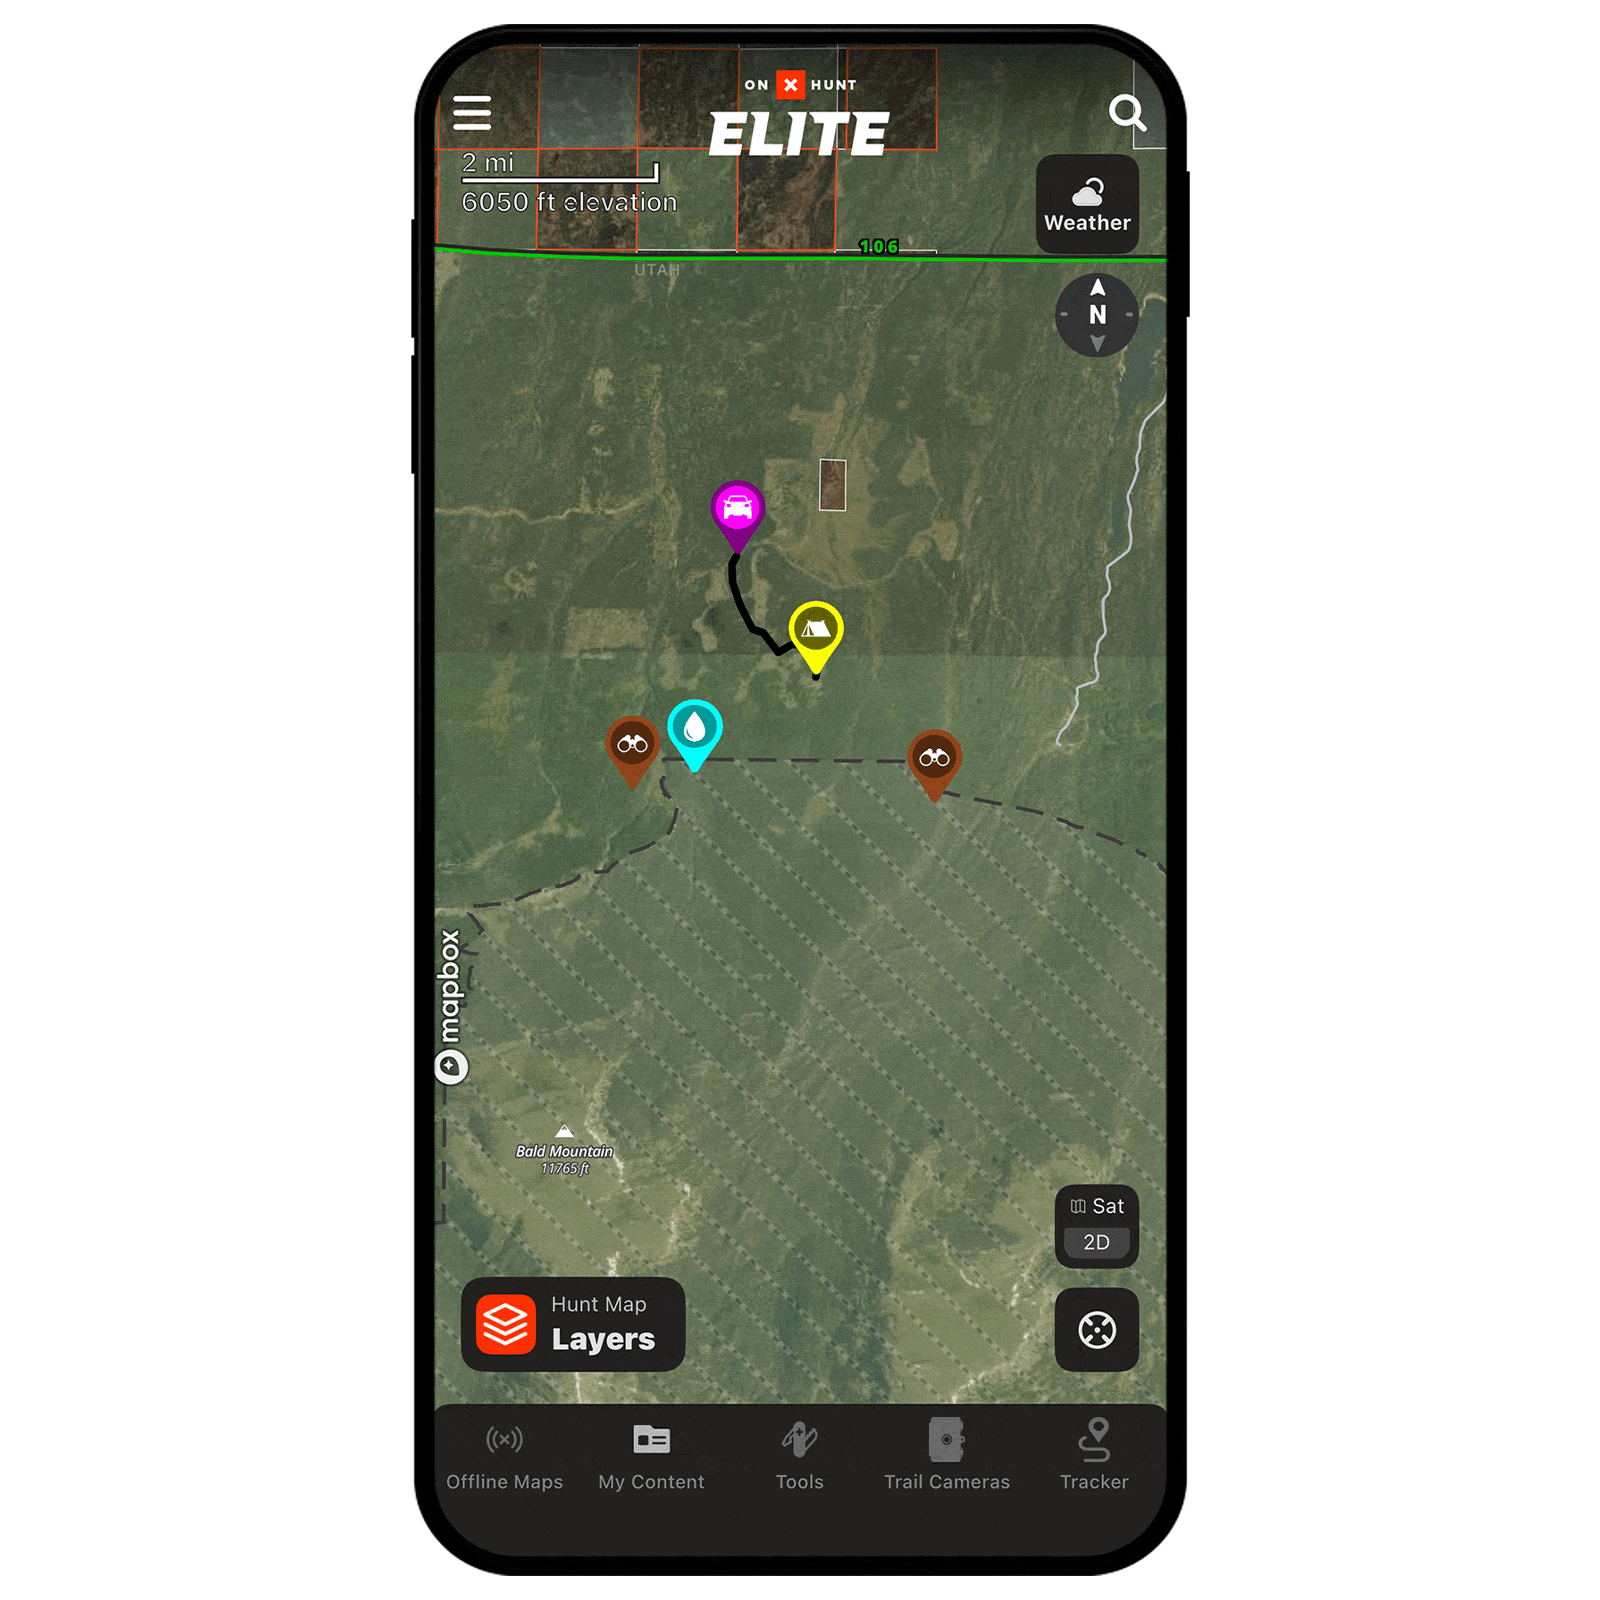
Show only what you need, when you need it.
From within My Content, you can quickly toggle folder visibility on or off, so you’re only seeing the map markups that matter for the plan you’re running.
Keep your map clean, your mind clear, and your team aligned.